How to Build a Dog Door
-
font size
decrease font size
 increase font size
Allowing your pups to come and go as they please can make your life easier. Installing a dog door is easier than you think.
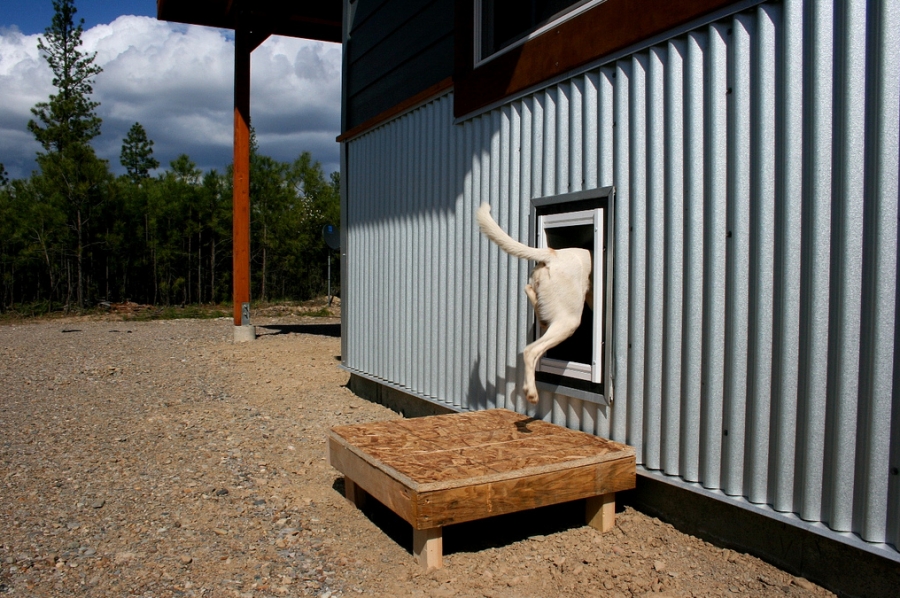 Image (CC BY-NC-ND 2.0) Moosicorn
Dog doors are great for pet owners with busy schedules. Follow these tips to build your own DIY dog door.
-
Measure the Area
-
Cut the Hole
-
Trim the Opening
-
Build the Flap
-
Attach the Flap
-
Secure Your New Dog Door
_Kevin_Harbor.png "I wish I had a Doggie Door | Image (CC_BY-NC-ND_2.0) Kevin Harbor")
A new pet door won't do much good if your dog is unable to get through it. To ensure that you get the right fit, begin by measuring your dog. Then measure from the floor to the underside of your dog's chest and mark the distance (allowing an inch for clearance), measuring from the bottom of your door. Then measure from chest to head and one shoulder to the other, making sure you leave an inch or two on each side for comfort. Mark your door using a ruler or framing square.
For this task, it's easiest if you take your door off its hinges and put it across a pair of sawhorses. Get your cutting started by drilling holes with a power drill (making sure you don't go past your marks). Make a hole in each corner and a few along each edge. Then insert a jigsaw into one of the holes and follow your marks around.
_Moosicorn.png "Finished Doggie Door | Image (CC_BY-NC-ND_2.0) Moosicorn")
You don't want your DIY door to hurt your pooch, so make sure you trim the opening to prevent scratches and splinters. Sand it down, then use some sturdy cloth or store-bought trim along the edges. A silicone-based adhesive should do the trick, but you can ask around at your hardware or home improvement store to see what they suggest for your specific type of trim.
Once you've cut and trimmed the hole, it's time to install the flap. You can buy a pre-made one, but making your own is usually much cheaper and very easy. All you need is an aluminum strip and a rubber mat; an auto floor mat will work just fine. Cut the aluminum strip to the same width as the dog door, then cut your mat to fit the hole (leaving about an inch to attach above the opening). Holding the aluminum on top of the mat, drill holes through both every few inches.

Those holes you drilled in Step 4 are where the flap will attach to the door. Use silicone adhesive along the top of the opening to hold the flap in place while you screw it to the door. Once it's secure, make sure it swings easily both ways so your dog can let herself in and out with no trouble.
Attaching the door doesn't mean you're done. That flap is an opening into your home, and you need to make sure it's not making you unsafe. If you haven't already installed a home security system, then that's your next step. Talk to the experts from your home security system provider about ways to ensure that your DIY dog door doesn't make your home vulnerable.
Now that you've finished your project, it's time to kick back and put up your feet. After all, the dog can let herself out now.
Here are some more pictures of really cute dogs:
_Moosicorn.png)
_Kevin_Harbor.png)


Kerry Jones
Kerry Jones is a food blogger and freelance writer/editor based in Tampa, FL. When she's not experimenting in her kitchen, she's trying to make her cat the next viral sensation. Check out her food blog, Snark and Pepper.
Website: www.snarkandpepper.com/