How to Build an Outdoor Fire Pit
-
font size
decrease font size
 increase font size
Building a fire pit in your backyard is a great weekend project that adds value and enjoyment to your home.

Reclaiming an Outdoor Firepit

Find out, step-by-step, how to make a firepit for your backyard patio by using a reclaimed metal stove. Read More...
Once you gain an understanding of the materials required as well as layout and installation techniques, building a fire pit is a project many do-it-yourselfers can accomplish.
Laws and Regulations
Before building a fire pit on your property, you should contact your local fire department as well as refer to your local zoning requirements and home association guidelines. This will help you to gain an understanding of what laws and regulations apply to open burning. Generally speaking, urban areas allow open burning for recreational purposes only. The laws and regulations define size and location restrictions, require use of clean seasoned firewood or a clean-burning fuel, and typically prohibit the burning of waste materials. The laws and regulations in rural areas are often less stringent. In either case, it is best to contact your local municipality prior to starting the project. You should also contact your local utility companies to mark the location of any underground utilities in the area where you want to build a fire pit.
Planning
When considering a location for your fire pit, it is important to locate it a safe distance from anything combustible. You should never build or place a fire pit on or near a wood deck. My local municipal code defines this safe distance as 25' from any structure or combustible material. Next, you want to take into account the views you desire as well as consider the direction of prevailing winds and the visibility of the fire pit from inside. Orient the fire pit to take advantage of these elements. Finally, a fire pit should enhance the aesthetics of your backyard (and not be an eyesore). Consider materials that complement the architecture of your home and the surrounding landscape.
Types of Fire Pits
A variety of designs, methods, and materials are used to create fire pits. You could have a simple campfire surrounded by large stones, a portable fire pit, a traditional wood-burning fire pit, or a more complex gas-burning fire pit. This article will take you through the steps of how to build a traditional, round, wood-burning fire pit, using dry laid landscape block and firebrick. Please note that rock or stone found in or excavated from rivers or other bodies of water should not be used inside a fire pit or adjacent to a fire. Water may be trapped inside, and when such rocks are placed near intense heat, the water inside will steam, eventually causing the stone to explode under the pressure.
Advantages of a Dry Laid Landscape Block Fire Pit
Trends and Tips: Outdoor Living Spaces
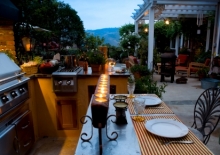
It comes as no surprise that during these warmer months we move more of our attention toward the outdoors. Thoughts of sipping cool beverages atop cozy lounges and backyard barbeques instantly come to mind at the mere mention of summer. The last few years, however, have brought a dramatic increase in the dollars and time spent on improving our outdoor living spaces, and designers have responded to this trend and are seeking to provide us with our ideal backyard paradise. Read more
Outdoor Lighting: Technology, Techniques, and Fixtures
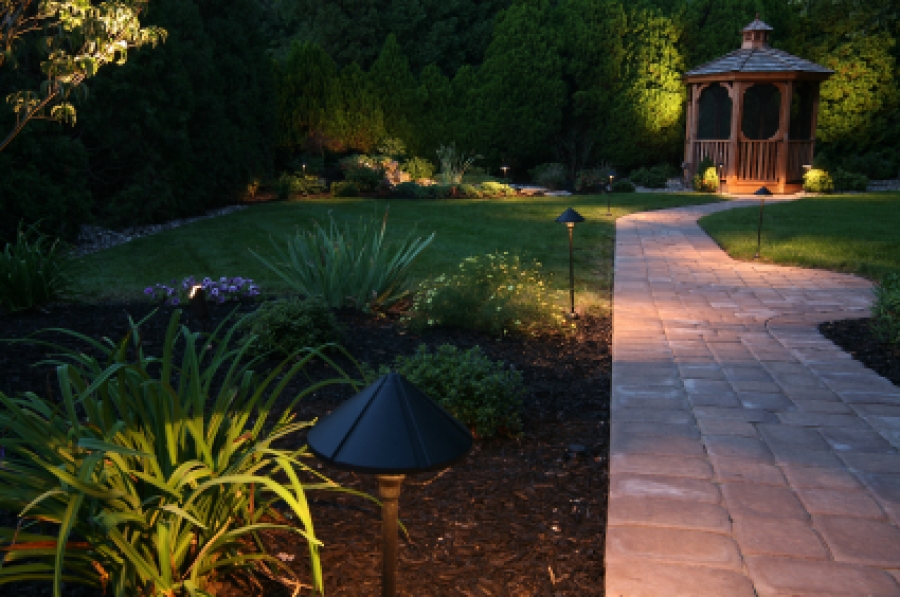
Outdoor lighting illuminates social gatherings, comforts us with additional safety and security, enables us to work or play, and enhances our home garden aesthetics from dusk to dawn. With the variety of outdoor lighting fixtures available, selecting the right one can be somewhat daunting. Understanding the available outdoor lighting technologies, techniques, and fixtures will allow you to make better use of your property after the sun goes down. Read more
How to Build a Wood Privacy Fence

You may choose to build a privacy fence on your property for any number of reasons: to increase safety, privacy or security; enclose pets or children; eliminate sight lines beyond your property; or simply to enhance your home's curb appeal. Read more
- Rainwater won't pond inside the fire pit, because rainwater can seep through the joints.
- While the fire is burning it will receive more air from the openings at the joints. This in turn feeds the burning fire with oxygen, creating a better fire.
- The firebrick will protect the landscape blocks from heat, increasing the longevity of the landscape blocks. Without the firebrick the landscape blocks would dry out and crumble over time.
- When materials need to be replaced, a dry laid landscape block is easier to replace than a mortared or adhered block.
How to Build an Outdoor Fire Pit
-
Define the center location of the fire pit on level ground with a stake.
-
Tie a piece of string to the stake and mark the desired diameter of the burn area (to the inside edge of the firebrick) by using spray paint.
-
Lay a row of firebrick, stacked tall lengthwise, edge to edge, with the inside edge placed on top of the markings.
-
Lay a row of landscape block, edge to edge, on the outside edge of the firebrick. Landscape blocks will generally not need to be chiseled or cut to shape as they are preformed for radius walls.
-
Adjust the location of the blocks, inward or outward, to form a tight and complete radius. Narrow joint gaps, every few blocks, are acceptable and will allow for greater air flow inside the fire pit.
-
Using an edging shovel, edge around the outside of the landscape block to define the extent of the fire pit's base.
-
Set aside all materials and excavate the area to a depth that will allow for a 6" base of gravel plus the height of the first layer of landscape block. The top of the first layer of landscape block needs to be flush with grade. Rake and tamp the earth level.
-
Place the gravel inside the excavated area and tamp to compact the material and create a level building surface.
-
Place the first row of landscape blocks along the outer edge of the hole. Use a rubber mallet to ensure that the blocks are seated and level.
-
Place the second row of landscape blocks atop the first row, staggering the joints and leveling the blocks as you go. Verify that the outside edge of landscape blocks are perpendicular to grade around the entire circle by using a plumb bob. When stacking the blocks do not use adhesive; simply place one block on top of the other. Adhesives will give off unhealthy fumes when the temperature of the fire is hot enough to melt them.
-
Place the first row of firebrick, stacked tall lengthwise, along the inside edge of the landscape block.
-
Fill the bottom of the fire pit with gravel to a height equal to the top of the first landscape block layer.
-
Continue to build the fire pit walls to the desired height (or at minimum two dry laid, stacked courses of landscape block and a dry laid, stacked course of firebrick). Generally speaking, you want to build the fire pit walls to a height that willĀ comfortably accommodate seated (not standing) people (above-grade height of 12" ¢ 24"), taking views of the fire from a seated perspective into account.
-
After the outside and inside fire pit walls are complete, you may want to set a capstone. You might also consider painting the surface of the interior firebrick black, with a heat-tolerant masonry paint, as it will become discolored over time.
It is important to follow basic fire safety rules and common sense when having a fire. Also, you should regularly clean ashes from the bottom of the fire pit. After you have constructed the fire pit (keeping fire safety in mind), you are ready to start a fire. Invite some family and friends and break out the s'mores, hot dogs, and drinks, and let the good times roll!


Jeff Calcamuggio
Jeff is an Editor-at-Large for Buildipedia.com who writes and edits Featured At Home and Knowledgebase content. Prior to joining Buildipedia, Jeff's work experience included carpentry, construction documentation, specification writing, construction administration, project management, and real estate property inspection. Jeff is a member of the Construction Specifications Institute (CSI) and an educator at Columbus State Community College and enjoys challenging DIY home improvement projects.
Ā