Bathroom Caulking 101
-
font size
decrease font size
 increase font size
Preventing water damage inside our bathrooms is just as important as directing water away from our homes. Caulking, as part of routine homeowner maintenance, prevents avoidable damage around the multiple fixtures and different building materials located inside a bathroom. To get started all you need to know are the areas inside a bathroom that need to be regularly maintained, how to remove existing caulking, and how to apply a new bead of caulk.
What Areas Need to Be Maintained?
Gaps occur along joints, the transitions between materials or surfaces. These seemingly minor spaces create opportunities for water to penetrate and cause large problems. The typical areas in a bathroom where caulking needs to be maintained exist in and around tubs, showers, and vanities. Specific locations will vary depending on the fixtures and materials installed in your home. Examples include:
-
Along the seams of a tub/shower surround;
-
Along the wall, where a tub/shower surround terminates;
-
Along the top of a tub, where the tile meets the tub;
-
Along the ceiling, where the tile meets the ceiling;
-
Along the floor, where a tub/shower meets flooring;
-
Along the top of a vanity, where a backsplash meets the vanity top;
-
Along the top of a backsplash or counter, where it meets the wall; and
-
Around faucets, shower heads, hot/cold knobs, and spouts.
How to Tile a Custom Bathroom

Ceramic tile is an ideal choice for walls and floors in any bathroom. ItÆs durable, impervious to water, and comes in an almost limitless selection of colors and styles. Tiling a custom bathroom with your own hands is a rewarding project for an experienced do-it-yourselfer. Join the At Home channelÆs host, Jeff Wilson, as he offers guidance on installing wall and floor tile in the second installment of Buildipedia's custom bathroom series. Read More...
How to Install a Bathroom Lavatory

Lavatory, or vanity, sinks are often the focal point of a bathroom. The bathroom sink is the most frequently used fixture in the room and comes in a nearly unlimited number of design options. Despite the wide variety of styles and components available, bathroom sinks all install in much the same way, and the installation of a bathroom sink is a project that just about any do-it-yourselfer can accomplish. Join the At Home channelÆs host, Jeff Wilson, as he installs a lavatory cabinet, undermount sink, countertop, faucet, and drain to complete our custom bathroom series. Read More...
Maintaining these areas is easier and less expensive than making the costly repairs that are necessitated by water damage. On an annual basis you should inspect the areas listed above. If the existing caulk is discolored or has mildew on the surface, it can be cleaned by using commercially available cleaners or general household materials such as bleach, baking soda, distilled vinegar, or peroxide. If the existing caulking is dry, loose, damaged, missing, or stained, it should be removed and replaced.
How to Remove Existing Caulking
Caulking can generally be removed by using caulk softener/remover, along with a utility and putty knife.
-
Apply the softener/remover and allow it to soak into the existing caulking for a few hours.
-
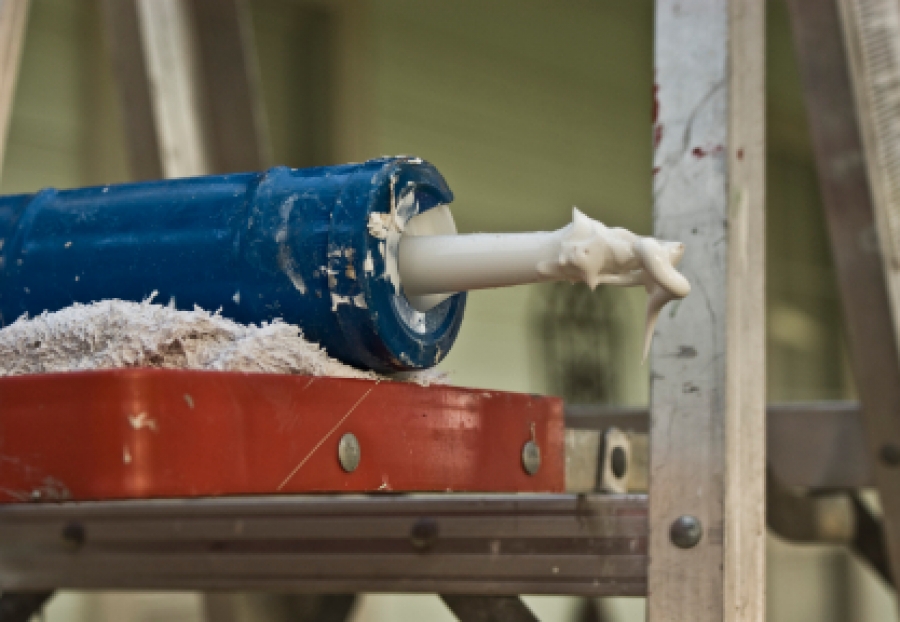
After the softener/remover has had time to soak into the caulk, score the existing caulking along the joint with a utility knife and carefully scrape it away with a putty knife. Ensure that the adjacent surfaces arenÆt scratched while using the utility and/or putty knife. Depending on what type of caulk is present, a heat gun may be required. A variable temperature heat gun with a low temperature setting under 300 degrees will work just fine. Keep the heat gun moving, working your way along the joint to soften the existing caulking. Then remove it by using a putty knife. Be cautious while operating the heat gun to prevent personal injury and to protect adjacent materials from damage caused by excessive heat.
-
Once the existing caulking is removed from the joint, clean up the debris and vacuum the joint. Using a rag with rubbing alcohol or another appropriate solvent, scrub clean the surfaces adjacent to the joint. If mildew was present, you should apply a mildew remover to the joint to kill any lingering mildew spores. Rinse with warm water and then allow enough time for the surface to completely dry.
How to Apply New Caulking
Once the joint and adjacent surfaces are completely dry, new caulk can be applied. Caulk, in general, is a non-porous, flexible material that adheres to the surface of building materials along a joint. While there are many different types of caulk, you should use a specially formulated silicone caulk for fixtures and materials in a bathroom. Kitchen/bath silicone caulk is permanent, waterproof, flexible, shrink-proof, crack-proof, and resistant to mildew. It is available in a variety of colors or in a paintable formulation. It is sold at home improvement stores in tubes that are intended to be used with a caulk gun as well as hand-squeezable tubes or pressurized cans.
Prior to applying caulk, ensure that the adjacent materials along the joint are fairly tight to one another, with less than 1/8ö gap. If the gap is larger than 1/8", a foam backer rod should be pressed into the gap to fill the void. While itÆs not entirely necessary, masking tape provides beginners with a professional appearance, ensuring a clean and straight bead. Apply masking tape to both surfaces adjacent to the joint, about 1/8ö away from the joint. After the joints are taped, you should prepare the tube of caulk.
Using a utility knife, cut at a 45-degree angle to remove the tip of the caulk tube at the 1/8ö bead score mark. Any less and you wonÆt have a bead to work with; any more and youÆll have too much. I prefer to use just the right amount, if not less, and then come back to hit an area again if necessary. Once the tube is open, place it in the caulk gun. Have plenty of paper towels and/or rags available, along with a small pail of water.
When you have finished applying the caulk you can use a wet finger or caulk applicator to smooth the bead. Immediately remove the masking tape, pulling it away from the bead of caulk on a 45-degree angle. Allow the new joint time to set up: some kitchen/bath silicone caulks set up in 1¢3 hours. While this may be the case, I prefer to wait 24 hours before taking a shower or bath.


Jeff Calcamuggio
Jeff is an Editor-at-Large for Buildipedia.com who writes and edits Featured At Home and Knowledgebase content. Prior to joining Buildipedia, Jeff's work experience included carpentry, construction documentation, specification writing, construction administration, project management, and real estate property inspection. Jeff is a member of the Construction Specifications Institute (CSI) and an educator at Columbus State Community College and enjoys challenging DIY home improvement projects.
Ā