The Importance of Sealing the Building Envelope
-
font size
decrease font size
 increase font size
You already know the basics of sealing: you do it every time you zip up your jacket or lift your collar against the wind. Sealing a home works on the same principle, reducing air infiltration through the walls, ceilings, and floors to save energy and stay comfy. Just as you do a jacket, it’s best to button up – or seal – the shell of your home, or the “envelope,” as the exterior of your home is called in trade parlance. Older homes may have had no sealing done at all, and not all builders of new homes do a great job of sealing a house, even when sealing is required by today’s energy codes. We researched the best products and spoke to several experts to learn how to tighten the envelope of your home, save energy, and keep out the cold.
Air Leaks
Air seeps into and out of your home through holes and cracks in exterior walls, floors, and ceilings. The building experts we spoke with attribute 5%–40% of a home’s heating and cooling costs to energy lost through air leaks. To get the picture, imagine an open window on a cold winter’s night. Most homes suffer the air-leak equivalent of one open window.
 Air leaks come in two flavors, direct and indirect.
- Direct leaks are the most obvious, such as a crack around a door that allows outside air to come directly under the sill or around the frame.
- Indirect leaks are more difficult to find but represent most of the air leakage in a typical home. Indirect leaks occur where air penetrates the exterior at one location and the interior at another, such as where warm, indoor air is sucked through plugs and switch plates and into the cold attic.
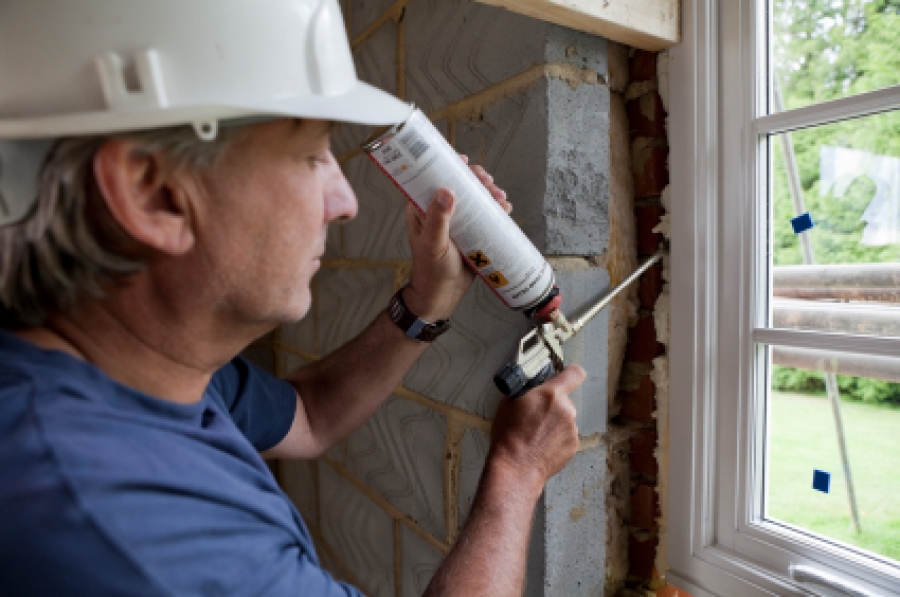
Sealing is all about plugging those holes and cracks. The easiest place to do this is on the exterior of the house during construction, but you can still improve an existing home by inspecting the exterior walls and sealing penetrations, especially where pipes come into the house, such as at meter locations. Apply a carefully aimed caulking gun around the penetration, but be careful when using expanding foam insulation. It’s a very effective sealer but it can also expand so much that it makes an ugly, foamy mess on your beautiful siding.
 In the interior of your home, it helps to picture air infiltration as water seeping into your house through small leaks and then dripping onto the dining room table. You’d lose no time in fixing this leak, but air infiltration is much less likely to get our attention.
Attics are the leakiest part of the house. They typically have large openings for ventilation and yet aren’t sealed off from the living space below. Even insulation in the attic doesn’t guarantee a sufficient air barrier. Attic insulation works to lower thermal transfer, but it has relatively little effect on airflow. Cold air can blow right through most insulation, and leaks to the interior through recessed ceiling lights, bathroom fans, and heat registers are likely. Also, warm household air rises and creates a "chimney effect": the rising warm air exits through leaks in the attic while cold air enters through lower leaks, such as around the front door.
To plug the holes between the attic and the rooms below, begin by shutting off the power with the appropriate circuit breakers. Remove ceiling light fixtures, heat registers, and bathroom fan covers so that you can caulk the spaces between them and the ceiling drywall. If the attic is unfinished, make sure that the power is off and pull up the insulation surrounding the places where plumbing and wiring penetrate the top plate of the walls below. Apply caulk or expanding foam sealant into the holes. If there’s enough space to accommodate the tip of the caulk cartridge or the nozzle of the foam sealant, also plug the holes (called knockouts) where wires enter junction boxes.
Next, with the power off, remove all electrical interior wall plates for switches and outlets and install thin foam gaskets to stop infiltration. If you feel up to doing the work, you can remove the casing around windows and exterior doors and spray low-pressure foam into the gap between the jambs and wood framing. Don’t use standard foam; it is apt to expand to the point that it bends the jambs and causes window and doors to bind.
For the most ambitious, two-part foam kits that blow the thick, expansive material that professional foaming contractors use to insulate whole houses is an option. One such product, DOW Building Solutions FROTH-PAK™ Foam Insulation, is a two-component, low-pressure polyurethane spray foam that expands to fill cavities, penetrations, and cracks greater than 2”. Because this type of foam can be sprayed directly onto the surfaces that contribute to heat loss, they work well when insulating difficult, high-heat-loss areas of the house, such as the eaves and band joist.

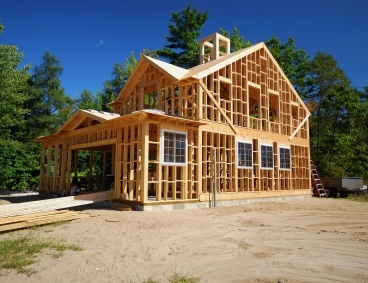
Reside Tight
Since the best and easiest place to seal a house is on the exterior wall surfaces, the ideal time to improve the energy profile of a home is when residing. The New Jersey Institute of Technology (NJIT) is conducting a study to determine the best methods for sealing a home under new siding. “We are residing 15 homes using three different sealing techniques: five homes with a weather barrier like Tyvek; five with ENERSHIELD-HP a new, spray-on weather barrier by BASF; and five with foam insulation,” explains Christine Liaukus, a Senior Research Architect for the NJIT's Center for Building Knowledge. Although the results from the study are not yet available, we can look at each option. Whatever method you choose, the improvement to your home’s performance will become evident almost immediately in your utility bill.
Housewrap Boot Camp
Effective air sealing comes from workmanship. No matter what brand of housewrap you choose, you will be wasting your money unless you install it carefully. Getting the installation right is not hard, but it requires a basic understanding of how housewrap works. Detailed installation instructions can be found on manufacturers’ websites and often at the lumberyard or home center where you purchased the housewrap. Read More
A “Weather-Resistive Barrier,” or housewrap, is the white plastic that wraps a home right after framing and before siding. Installed before and beneath the siding, housewrap provides a second layer of defense for your home. When installed properly, it performs three basic functions.
- First and foremost, housewrap acts as a backup barrier that keeps water off the structural sheathing and framing. Properly installed siding is the first line of defense, but sometimes wind-driven rain and snow still find a way through.
- Housewrap also functions as a seal that stops the passage of hot and cold air through the wall cavity. When joints are sealed properly with “sealing tape,” housewrap is designed to cut utility costs and increase comfort by reducing air infiltration and potential drafts.
- The real magic of housewrap lies in its third function: it allows the free passage of water vapor so that wall cavities and framing lumber can dry to the outside of the building, reducing the threat of mold and rot. Without this function, installing housewrap would be like putting a thick raincoat over your house – great at keeping out the rain but terrible at releasing water vapor. Instead, housewraps are designed to allow water vapor to pass through the building envelope, preventing moisture problems from arising.
?The key to the success of housewrap lies in the words "properly installed." “If the wrap is not tight, lapped right, and sealed, then the benefits are greatly reduced,” says Steve Easley, a building scientist with Building Media Inc., a construction research and training firm.
Enter ENERSHIELD-HP, a one-component, fluid-applied vapor-permeable air- and water-resistive barrier. Installation is performed with a roller, brush, trowel, or spray-application directly to manufacturer-approved wall substrates (sheathing), including plywood and oriented strand board (OSB). You will not need seam tape to seal laps and, when combined with a proprietary mesh that BASF calls Sheathing Fabric, ENERSHIELD-HP acts as window flashing to keep out air and water.
Sheathing foams have been used for about three decades but are popular now as effective exterior sheathing that combines sealing with insulation. A good, 1/2" foam can add an R-value of 3 or better to your walls. Taping the seams between sheets will provide an air barrier. Complications come with the extra depth of foam, which often necessitates extending window and door trims to accommodate the added thickness. One option when residing is to use insulated siding, which comes with foam with an average R-value of 3 that is already laminated to panels.


Fernando Pages Ruiz
Homebuilder, developer and author Fernando Pagés Ruiz builds in the Midwest and Mountain States and consults internationally on how to build high-quality, affordable and energy-efficient homes. As a builder, his projects have numerous awards including the 2008 “Green Building Single Family House of the Year” and the 2007 “Workforce Housing Award” from the National Association of Home Builders. In 2006, the Department of Housing and Urban Development's PATH project chose him to build America's first PATH Concept Home, a home that is affordable to purchase and to maintain while meeting the criteria of LEED for Homes, ENERGY STAR, MASCO Environments for Living, and the NAHB's Green Building standards. A frequent contributor to Fine Homebuilding and EcoHome magazines, Pagés is also the author of two books published by the Taunton Press: Building an Affordable House: A high-value, low-cost approach to building (2005) and Affordable Remodel: How to get custom results on any budget (2007).
Contact Fernando on facebook or by way of his website buildingaffordable.com.