How to Fix a Squeaky Floor
Video
Bothered by squeaky floors? You shouldn't have to live with that. Find out how to fix a squeaky floor here.
Bouncy, squeaky floors are a common nuisance in older homes. Floor problems in a newer house can be due to overly flexible floor systems such as engineered long-span joists, improperly secured subfloors, and insufficient mid-span blocking. All of these problems, old and new, have inexpensive fixes.
Silencing Squeaky Floors
To fix a squeaky floor, you have to know why it squeaks. Underlayments and subfloors tend to become unfastened over time. The floor frame may be structurally slack. A wall may be improperly connected to a floor that spans a considerable distance and is flexing.
To fix loose subflooring, or wood flooring, drill several small pilot-sized holes (3/32” or so) either down through the flooring or up through the subfloor in the vicinity of the squeak and then inject an epoxy adhesive into the void.
Floorboards that have cupped or crowned suggest moisture in the floor. Don’t attempt a repair until you eliminate the source of the moisture. After warped flooring has been allowed to dry thoroughly, the boards will usually regain their original shape and may need no repair. If you do inject epoxy to re-adhere wood flooring, fill the pilot holes with putty and then refinish the floor or touch up the area with a coat of varnish. You also can use an epoxy injection to reattach loose underlayment beneath resilient flooring.
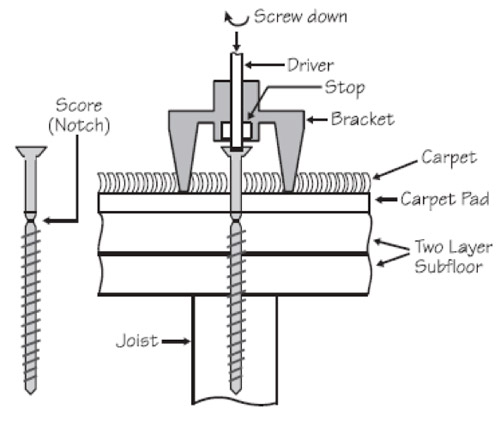
Loose subfloors under a pile carpet are easy to fix with deck screws. Just locate the joists under the floor and run screws through the carpet into the joists with a screw gun. The fibers of the carpet should hide the screw heads. (Tip: drilling a pilot hole for the deck screw first will make a smaller hole in your carpet). For commercial, low-pile, and other carpets where the head of the screw would be visible, use a longer screw and stop before the head penetrates the carpet, leaving about an inch of shank showing. Use pliers to rock the screw back and forth and snap off the head flush with the floor.

Image courtesy of Tom Feiza, Mr. Fix-It
Squeak elimination kits facilitate this procedure and often include an alignment device, scored screws designed to break off beneath the surface of the finished flooring, and a rocker to shear off the screws. If you have access to the joists underneath the subfloor, you can use repair kits specifically designed to fix subfloors that have buckled by bracketing them to the joists.
Silencing Squeaky Walls
Sometimes it’s the wall that squeaks and not the floor. This occurs primarily in newer homes with long-span joist systems that flex or bend slightly underfoot. If the floor framing gives but the wall does not, then the nails attaching the two are apt to rub noisily with each deflection. A wall perpendicular to the floor joists has drywall on both sides and sits firmly in place; it’s stiff and does not deflect. When the floor joists move, they pull away, causing friction on the nails holding the wall to the joists, which groan and squeak.
I like to prevent wall squeaks by using both construction adhesive and screws when attaching walls to I-joist or other long-span floors. If this occurs in your house, remove the baseboard on one or both sides of the squeaking wall, drive some cedar shims between the wall sill plate and subfloor where the joists are, and squeeze some floor sheathing adhesive into the gap. Cut the shims off with a wood chisel so they don’t interfere with reinstalling the baseboard.
Banishing Bounciness in Floors

Old floor framing can present many challenges to the remodeler, from annoying squeaks to undersized and improperly supported joists. Fixing floor problems will go a long way toward making a house feel sturdy, comfortable, and somehow almost new.
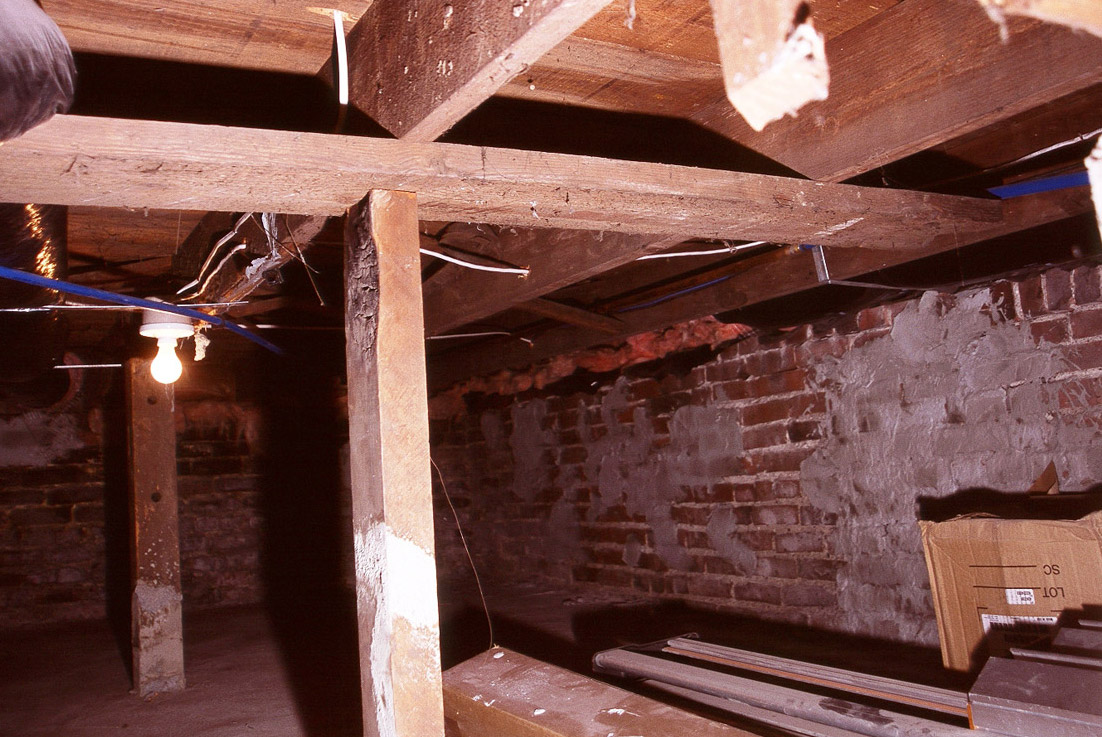
Bounciness in a floor results from framing that is poorly supported or not sufficiently stiff. Framing members often are compromised by drilling or cutting for wires and pipes; as well, moisture and wood-eating insects may have caused them to deteriorate. Fixing these problems is relatively easy when they affect the first floor, and the underside of the floor is exposed and accessible from the basement. On the upper stories, a repair might entail removing portions of the ceiling or adding a dropped beam.
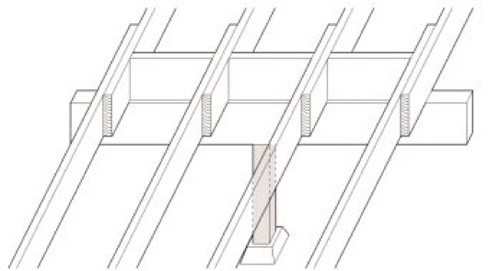
As a remedy for the first floor, you could install a beam and then add pier footings and posts, but you probably don’t have to do anything more than add a strongback. Nail a continuous 2 x 4 strap under the joists, traversing them at about mid-span. Next, nail a 2 x 6 to the 2 x 4 strap using 16-penny nails about every 16”. The floor will become noticeably stiffer and quieter. You can also install this fix under a finished ceiling and then box out the strongback to make it look like a solid beam.

To stiffen a floor, hang a beam off the joists. This method works especially well on old floors framed with uneven lumber, where the shims can bridge differences in joist depth.
For a floor with uneven joists, consider a more creative (albeit slightly more expensive) solution. Hang double 2 x 6s from the joists at about mid-span so that they are suspended with a double 2 x 12 joist hanger. Tap shims between the joist and the new double beam as needed so that the floor is supported evenly.
If the joists are large enough for the span but still bouncy, inspect the connections between the joists and beams. For floor joists that are notched or simply nailed into a girder, install joist hangers for more support. If you can’t use a full-depth hanger because of obstructions, don’t hesitate to use the next smaller size, such as a 2 x 4 joist hanger on a 2 x 6 joist.

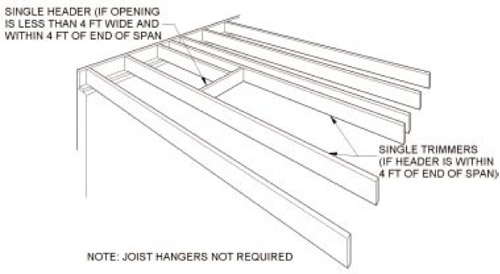
If a floor joist has been severely cut, it may be impossible to splice on a replacement member. End-nailing header joists across the cut end of the interrupted joist to the adjacent trimmer joist will transfer the load.
When a joist has rotted or plumbers have cut through it to install a fixture or run pipe, you can transfer its load to adjacent joists. Cut off the bad joist and nail a header across this cut end and into the neighboring joists, as you would when framing a stair opening. If the header has a span of 4’ or less, a single header will suffice.

Fernando Pages Ruiz
Homebuilder, developer and author Fernando Pagés Ruiz builds in the Midwest and Mountain States and consults internationally on how to build high-quality, affordable and energy-efficient homes. As a builder, his projects have numerous awards including the 2008 “Green Building Single Family House of the Year” and the 2007 “Workforce Housing Award” from the National Association of Home Builders. In 2006, the Department of Housing and Urban Development's PATH project chose him to build America's first PATH Concept Home, a home that is affordable to purchase and to maintain while meeting the criteria of LEED for Homes, ENERGY STAR, MASCO Environments for Living, and the NAHB's Green Building standards. A frequent contributor to Fine Homebuilding and EcoHome magazines, Pagés is also the author of two books published by the Taunton Press: Building an Affordable House: A high-value, low-cost approach to building (2005) and Affordable Remodel: How to get custom results on any budget (2007).
Contact Fernando on facebook or by way of his website buildingaffordable.com.

