Let There Be Light: Installing Lighting Fixtures
-
font size
decrease font size
 increase font size
In a recent survey conducted by the Foundation of the Fabricators and Manufacturers Association, 60% of the 1,000 people surveyed stated that they avoided installing light fixtures.� Homeowners surveyed also avoided unclogging a drain and replacing a window pane, among other things.� To see�all of the�projects homeowners avoided, read Survey Says: Homeowners Avoid Simple Repairs.� Over the next few months, the At Home channel will provide how-to articles covering all projects on the list.� Our main goal is to show how easy the repairs actually are and that homeowners can do the work themselves.
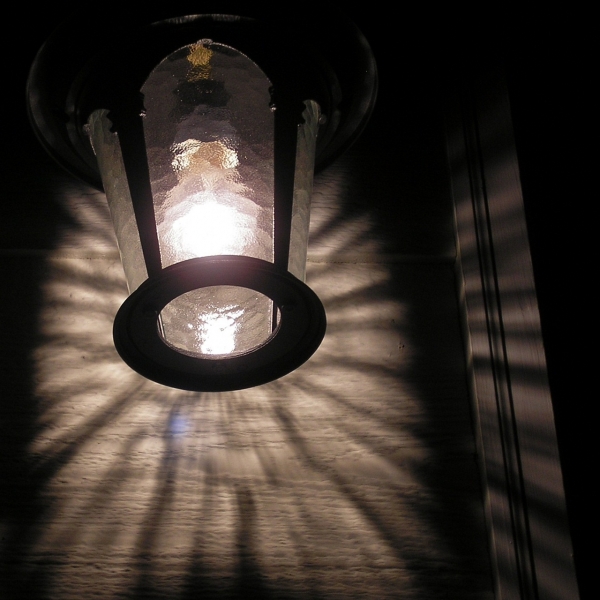
How-To Replace A Light Fixture
As a general rule of thumb, always review the manufacturer's instructions prior to installation.� All light fixtures are a little different.� The type of mounting bracket used and how the light fixture is attached to the mounting bracket can differ between manufacturers.� If installing a new light fixture without an existing electrical box, you will need to install a new electrical box and run power to it prior to following the steps below.�
- Turn power off. Locate your home�s breaker box and turn off the appropriate circuit breaker that powers the light fixture you are replacing.� If unaware as to which circuit breaker provides power, turn the existing light fixture on and turn off each circuit breaker until the light goes out.� If the existing light fixture is broken, you can use a voltage meter (see step 2) to determine if the wires are �live�.
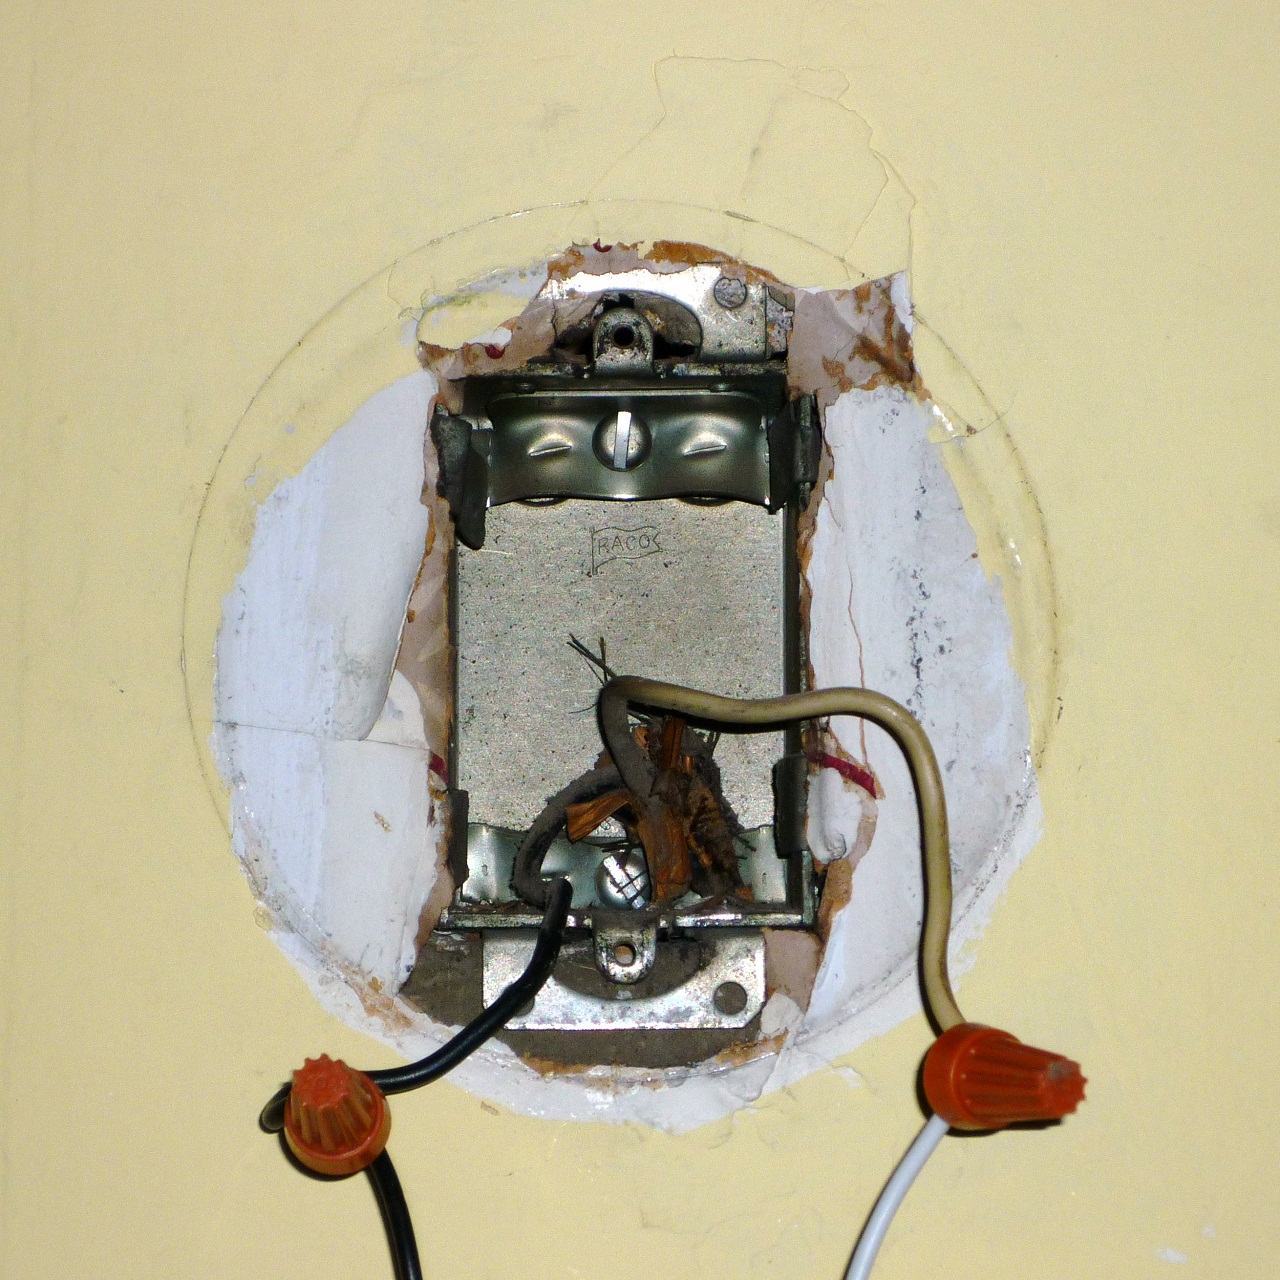 Remove existing light fixture.� Most light fixtures are attached with decorative screws or nuts.� Unscrew them and pull the existing light fixture away from the wall.� You should see a mounting bracket, a black or red wire, a white wire, and a green or exposed copper ground wire.� After removing the mounting bracket, disconnect the wires by removing the wire nuts and/or electrical tape.� Be sure not to touch the exposed wires (bare wire with no insulation).� At this point, if unable to determine which circuit breaker powers the electrical box, use a voltage meter.� Do not proceed until you are sure the power is off.
- Connect the wires of the new light fixture to the wires in the electrical box.� Most light fixtures require you to feed the wires of the light fixture�through the mounting bracket prior to connecting them to the wires in the electrical box.� The black wire of the new light fixture is connected to the black or red wire in the electrical box and the white wire is connected to the white wire.� Wrap the exposed portion of each same colored wire together and screw on the wire nut.� If there is not enough exposed wire for a good connection (1/2" is a good rule of thumb), you may need to use a wire stripper to remove excess wire insulation.� Exposed wire below the wire nut should be wrapped with electrical tape.
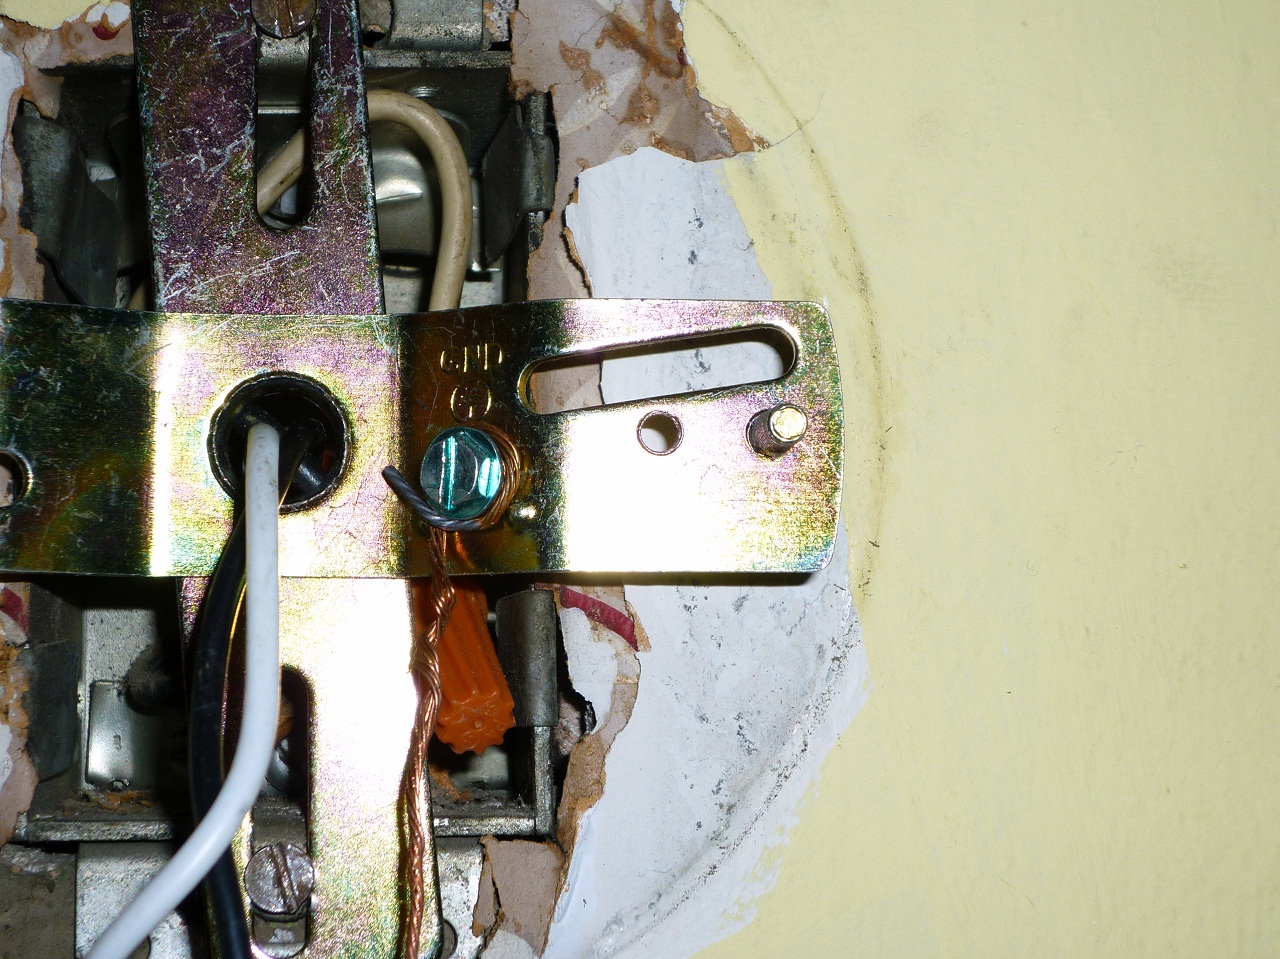 Connect the ground wire (green or exposed copper wire) to the ground screw or ground wire in the electrical box.� The ground screw is typically green and located on the mounting bracket.� Verify with the manufacturer�s instructions to ensure you are grounding the light fixture correctly.
- Tuck all wires into the electrical box.� After all wires are connected and the ground wire is secured, tuck the wires into the electrical box.
- Attach the mounting bracket to the electrical box.� The mounting bracket will be used to attach the new light fixture to the wall.� If a mounting bracket was not provided, your light fixture is probably attached directly to the electrical box.� Verify the mounting method with the manufacturer's instructions.
- Attach the light fixture to the mounting bracket.� Depending on the type of mounting bracket supplied, this step will vary.� Verify with�manufacturer's instructions.
- Attach globe.� If a globe was provided, attach it to the light fixture.� Be careful when tightening the screws that hold the globe in place.� Over-tightening the screws could cause the globe to crack.
- Screw in light bulb.
- Turn power on. Turn the circuit breaker back on and turn on the power to your new light fixture.
Tools Needed
- Screwdriver
- Wire Nuts
- Electrical Tape
- Wire Stripper/Cutter
See also: Set The Mood: Install A Dimmer Switch


Justin Lesch
Since becoming Managing Editor, Justin has led the development of Buildipedia�s site-wide content plan, fully integrating content across all audience channels and the Knowledgebase. Justin is responsible for the quality and accuracy of all published material, as well as the direction of the editorial department, including long-term strategy and vision. Before joining Buildipedia, Justin worked as an Architectural Project Designer, facilitating the design and construction process of multi-million dollar commercial projects. He also served as liaison to the international architectural staff and as a Construction Project Coordinator for higher education projects. Justin is a graduate of Bowling Green State University.