Guide to Cleaning, Staining, and Sealing a Cedar Deck
Video
The lazy days of fall have passed, which means itís time to winterize your home. Regular winterization protects your investment in your home, including your outdoor living spaces, yet many homeowners fail to properly winterize their cedar decks.
A cedar deck will last 20Ė30 years with little to no maintenance. However, to keep your outdoor living area looking its best, itís well worth your time to give your decking a bit of attention in the late fall and again in the spring. As a homeowner, you gain several benefits from cleaning, staining, and resealing your deck as part of your annual winterization process, including the following.
-
You will enjoy next summer with no deck maintenance worries.
-
A cleaner deck is a less slippery deck. By whisking away built-up crud in the fall, you decrease your chances of falling accidents, especially if you keep your cedar decking free of debris throughout the winter.
-
Cleaning, staining, and sealing your deck will prevent pest infestations over the winter.
-
Regular maintenance of your deck results in a higher selling price for your home; homebuyers prefer new-looking decks.
Now that you see the benefits of deck winterization, as well as the hazards of failing to maintain a deck, letís get down to brass tacks: Here's our guide to cleaning, staining, and sealing your cedar deck.
Cedar Deck Winterization: Cleaning, Staining, and Sealing
-
STEP 1. Power wash. Be careful to keep the power washer on a low setting Ė too much pressure can damage your cedar deck. If youíd like to further brighten your deck, you may apply a specially made deck cleaner at this point. For those who prefer not to use a pressure washer, cleaning with a soft-bristle brush and soapy water is a fair substitute.
-
STEP 2. Sand rough spots. Stains will come away with extra rounds of power washing and sanding. Make sure all paint and stain remnants have been removed before moving on to the next step.
-
STEP 3. Allow deck to dry. Give yourself a day or two off to allow the deck to dry completely. Any water that becomes trapped under the seal will prevent stain from fully penetrating the timber.
-
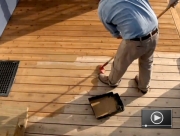
STEP 4. Stain and reseal. Save yourself a step or two by selecting a stain that includes both sealant and mildewcide. There are two major choices as far as stains are concerned: oil-based or water-based. Oil-based stains last longer, since they absorb deeper into wood. Water-based stains are generally considered superior from an environmental perspective, as they contain fewer toxins. However, keep in mind that youíll have to use more water-based stain to finish the job. Whatever stain or sealant you choose, follow the manufacturerís application instructions.
Cedar decking can last for decades as long as you refresh it periodically with a thorough cleaning, staining, and resealing.

Rick's Custom Fencing and Decking
This post is brought to you by Rickís Custom Fencing & Decking, which provides materials, design, service, and installation of wood fences and decks in Oregon and Washington.
Website: www.ricksfencing.com/


