Trimming an Interior Window
-
font size
decrease font size
 increase font size
Builders and remodelers looking to add extra value to a project may want to look at the interiors of their windows. That�s the advice of experts at Fypon, manufacturers of synthetic trim products.
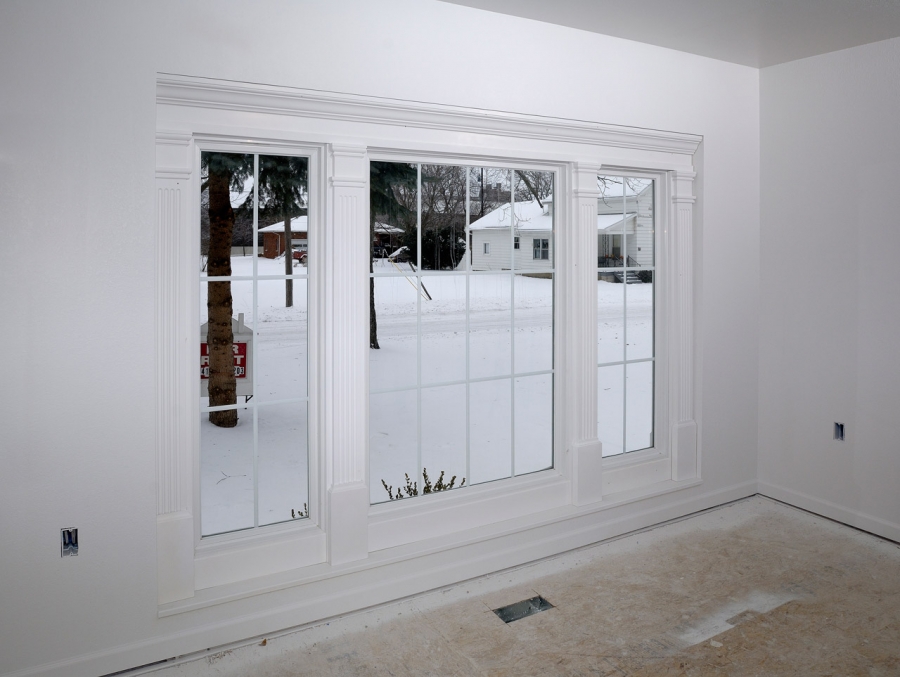 Image courtesy of Fypon
�Upgrading an interior feature window with millwork products creates a major focal aspect for a room,� says Kathy Ziprik for Fypon. �Using a combination of economical mouldings, pilasters, and trim to highlight an interior window is a fast project with lots of payback.�
As part of a remodeling project in Ohio, contractor Steve Roth used a combination of a Fypon window head mantel, fluted pilasters, and PVC board to enhance a picture window in a den. The 10'-wide floor-to-ceiling window covers most of the wall area in the room. Rather than simply trim the window with casing, which he believed would not do justice to the size of the feature window, Roth selected classical architectural features to accent the window.
�The use of molded millwork pieces really saved a great deal of installation time,� says Roth. �The highly detailed trim only needed to be cut to length and field installed. These synthetic products added fast value to the project and I was able to do the entire surround in less than two hours.�
To achieve the impressive interior surround, Roth took the following steps:
-
Step 1 � Measure the full width and length around the Simonton vinyl window, then order appropriate synthetic materials.
-
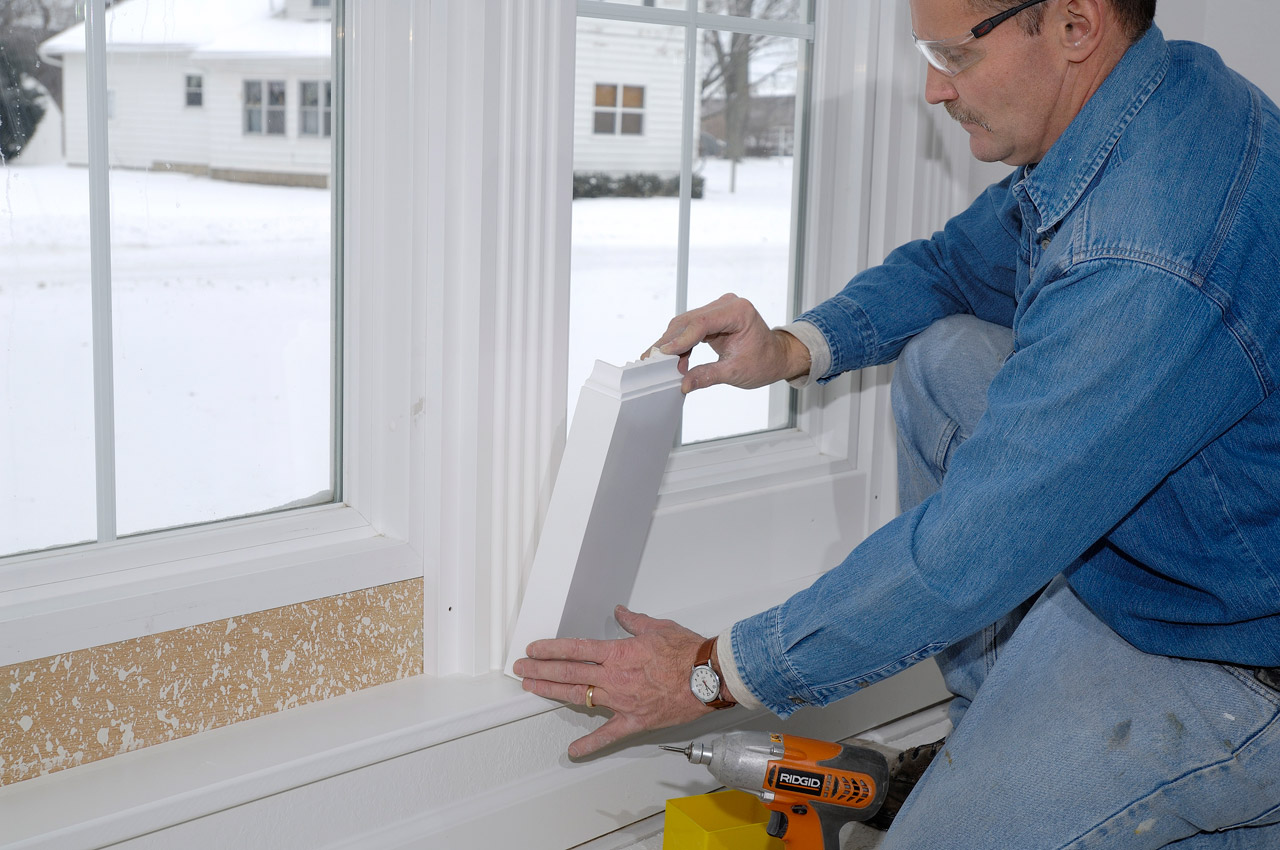
Step 2 � Start at the top of the window unit by adding a 10"-high window head mantel with bottom trim. Cut the moulding returns off both ends of the mantel and fit within the wall recessed area. For this project, the mantel flushes out with the wall surface. Secure the urethane window mantel with millwork adhesive and fasteners.
-
Step 3 � Move to the bottom of the window unit. Measure and install a PVC sill on the bottom ledge of the window to serve as a base. As an option, you can also create a sill panel out of a piece of 3/4" PVC board for the base. Selection of a moisture-resistant, low-maintenance product is key. Install the sill unit and secure with adhesive and fasteners.
-
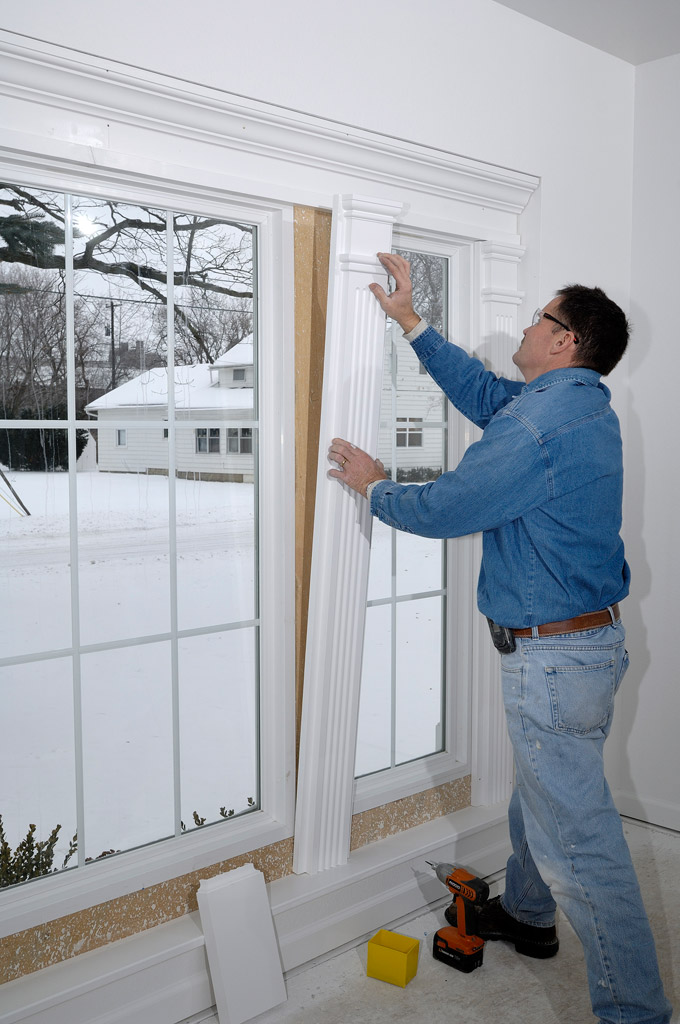
Step 4 � Measure the fluted pilasters so they fit snugly, starting at the top of where the bottom trim of the window mantel starts and ending at the sill. Cut from the base of the pilaster to fit to size.

-
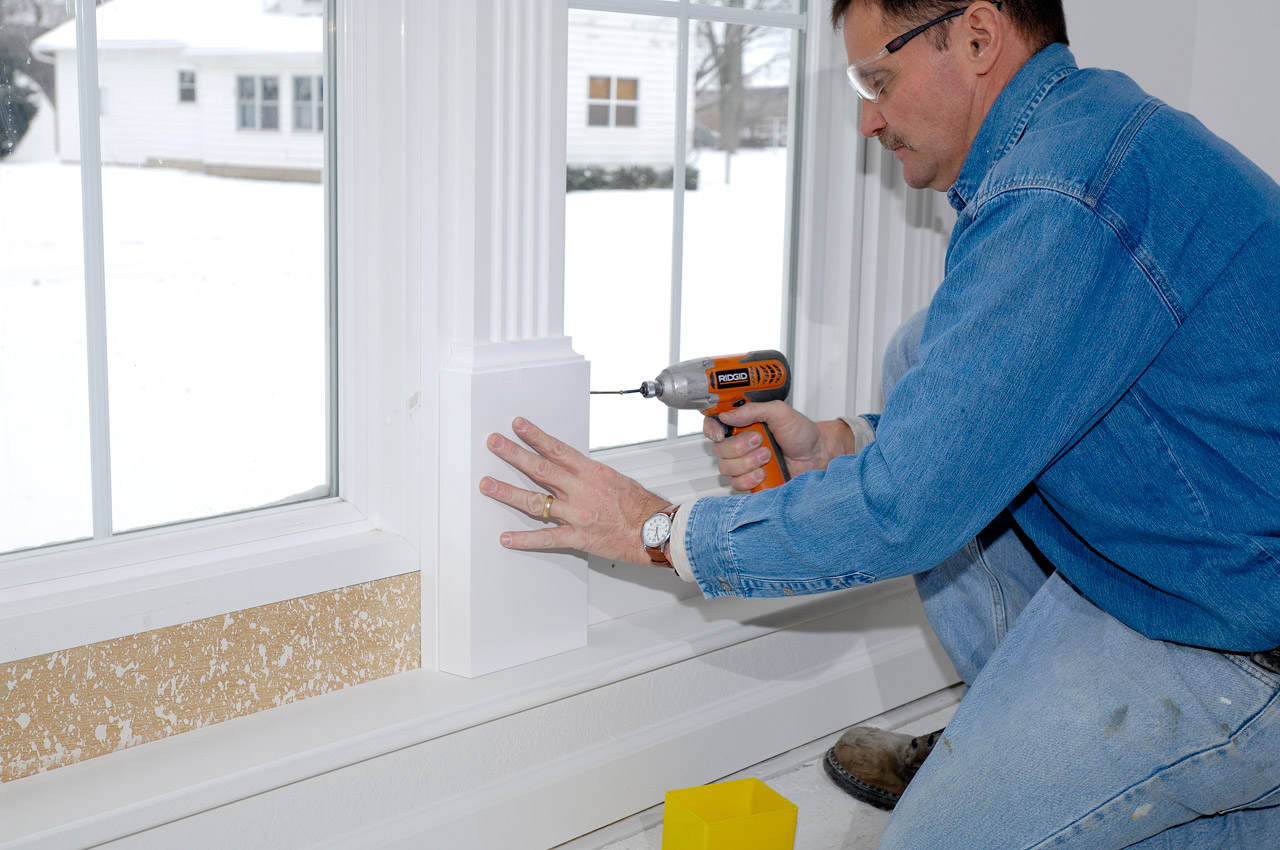
Step 5 � Install the fluted pilasters so they flank the windows and fill in spacing between the units. Secure in place with adhesive and fasteners. Then, slide the base cap in place over the bottom of the pilasters and secure.
-
Step 6 � Measure pieces of flat trim moulding or PVC board to fill in the areas below the windows and above the sill. Secure in place.
-
Step 7 � Use spackling to fill all fastened heads and latex caulk to cover the seams between the wall and trim. Finally, paint the interior trim pieces with latex semi-gloss paint.
�Every person that enters this room offers a fast comment on how striking the window surround is,� says Roth. �The Fypon products transformed the window wall area from ho-hum to wow with minimal work and created a strong return-on-investment for me.�


Fypon
Fypon offers thousands of decorative millwork elements in a variety of architectural styles to enhance the interior and exterior of America�s homes. Each piece is crafted from tough, weather-resistant, high-performance materials that are resistant to decay, insect infestation, and water damage for long-lasting beauty and low maintenance.