How to Replace a Light Fixture
-
font size
decrease font size
 increase font size
Video
Old light fixtures can make a room look dated. Funny thing is, installing new light fixtures is one of the easiest things to change and is a job any do-it-yourselfer can tackle. Join the At Home channel�s host, Jeff Wilson, as he demonstrates the job of removing an old fixture and replacing it with a new one to brighten up your room.
Necessary Tools and Materials
- Straight screwdriver
- Phillips screwdriver
- Needle-nose pliers
- Wire strippers
- Pliers
- Wire nuts
- AC tester
- New light fixture and lamps (bulbs)
How To Replace a Light Fixture
- Start by turning off the power to the fixture where we�ll be working. Remember, safety is always first. It�s important to be sure that no power is coming to the fixture.
- It can be helpful to have a partner here -- with the old fixture on, shut off the breakers until the light goes off. If you are unaware which circuit breaker provides power, turn the existing light fixture on and turn off each circuit breaker until the light goes out.
- If the existing light fixture is broken, you can use a voltage tester to determine if the wires are �live."
- A pen type voltage tester (or non-contact voltage tester) will indicate when current is present in many electrical devices. To test the wires to the light fixture, simply push the button and hold the tester near the wires. You�ll see the light and hear a beeping noise if there is current flowing through the wires.
- To remove the old fixture start by removing the finger nuts -- every fixture is a little different, but most use decorative nuts to hold the trim to the fixture, hiding the wiring underneath.
- Safety Check: With the trim removed, it�s a good idea to check again that the power is indeed off, using the voltage tester.
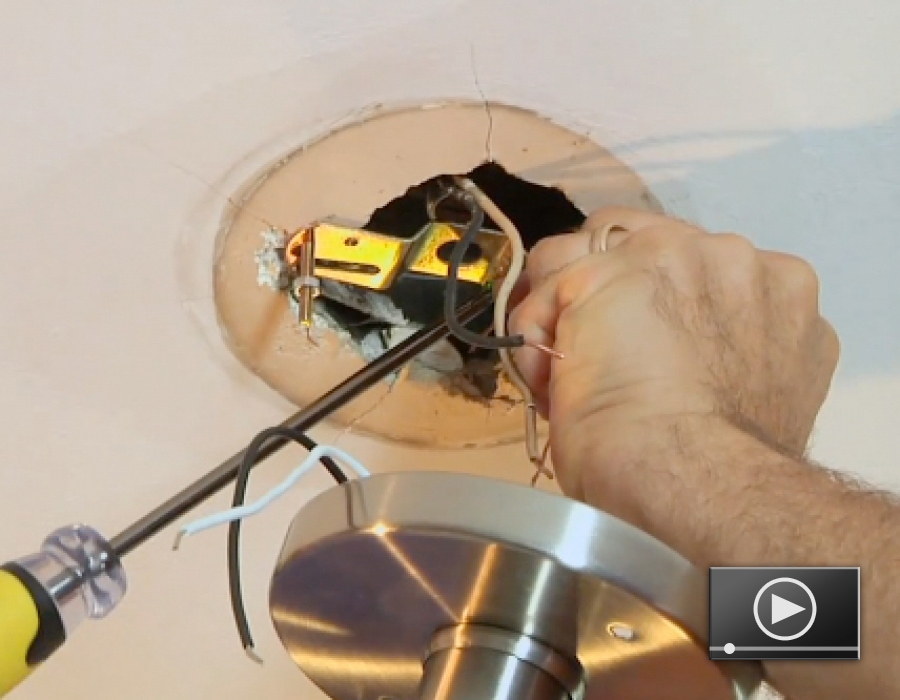
- Next, remove the mounting bracket for the old fixture and pull the wires out of the box. Remove the old wire nuts and separate the wires.
- Take note as to how the wires are attached and install the new fixture the same way.
- Begin installing the new fixture by attaching the new mounting bracket.
- As a general rule of thumb, always review the manufacturer's instructions prior to installation. All light fixtures are a little different. The type of mounting bracket used and how the light fixture is attached to the mounting bracket can differ between manufacturers.
- Using wire nuts, connect the fixture�s wires to their counterparts in the box.
- The bare wire is the ground wire and should be connected to the green screw on the mounting bracket. Installing the ground wire first is a good way to help hold the new fixture while you connect the other wires.
- The black wire of the new light fixture is connected to the black or red wire in the electrical box.
- The white wire of the new fixture is connected to the white wire in the box.
- If there is not enough exposed wire for a good connection (1/2" is a good rule of thumb), you may need to use a wire stripper to remove excess wire insulation. Exposed wire below the wire nut should be wrapped with electrical tape.
- Some light fixtures require you to feed the wires of the light fixture through the mounting bracket prior to connecting them to the wires in the electrical box � refer to the manufacturer�s instructions specific to your light fixture.
- Gently fold the wires and tuck them into the electric box.
- Attach the new fixture to the mounting bracket with the decorative nuts provided.
- Install the shade on the fixture base with the mounting screws.
- Install the new light bulb. Some fixtures will come with a bulb included; for others, refer to the manufacturer�s instructions to determine the specified type of bulb or lamp.
- Install the bottom cover in the shade.
- Turn the power back on to the circuit.

Ryan Carpico
Ryan is a Registered Architect who earned a Bachelor of Architecture from the University of Kentucky in 1998. His experience in a broad spectrum of architectural projects includes design and project management in multi-family residential, general commercial, and institutional projects. This architectural experience is balanced with a background in general contracting of residential and light commercial construction projects. Ryan�s knowledge and ability as both architect and builder enable him to address both the technical and practical sides of the comprehensive body of construction knowledge.
Website: carpicodesign.com/