Most Popular from All Topics

Demolition: Top 5 Salvageable Materials

Written by

In 2013, thousands of tons of materials were salvaged from demolition sites across the country. The environmental advantages of such salvage operations are obvious. Every ton of material that can be reused means one less ton is thrown into landfills. Considering that the United States creates 136 million tons of Construction and Demolition (C&D) waste annually, any efforts to reduce landfill volumes are laudable. However, the number one reason that salvage operations are now standard in demolition is because asset recovery can significantly reduce demolition project costs.

Property owners, therefore, have a natural motivation to recycle as much as possible. From fixtures to appliances to industrial machinery, every defunct building contains real salvage value for those willing to extract it. Today’s leading demolition firms specialize in salvaging procedures to maximize return for their customers. On a residential level, deconstruction by hand yields the most recyclable material, although it does require plenty of labor. Industrial demolition contractors tend to reclaim salvage value over several steps, starting with a sweep of fixtures and ending with processing of raw materials such as concrete.

Scrap Metal Salvage

Because building materials made with recycled elements are often less expensive than their virgin counterparts, there’s a healthy demand for salvaged building elements. It’s a win-win-win situation; developers enjoy lower project costs, contractors appreciate less expensive materials, and environmental activists love sending less trash to dumps. Understandably, demolition asset recovery is a sought-after service these days, and the five at the top of the list offer high resale value.

1. Asphalt Shingles
Shingles have to be tough to survive the scorching and bone-chilling temperatures a roof suffers. Once their roofing lifespan ends, shingles can be recycled into pavement projects such as patching potholes. Moreover, because asphalt shingles contain crude oil, they can also be repurposed as fuel for cement kilns and other operations.

2. Reclaimed Wood
Provenance, beauty, and strength—these are the characteristics that make reclaimed wood products so appealing to today’s designers and consumers. Many older buildings contain weathered wood products that can be milled and processed into stunning new products, such as paneling, flooring, and countertops. Reclaimed timber may also be used for structural lumber in new building projects.

Scrap Metal Salvage

3. Steel
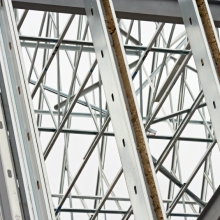
Steel is the one of the most frequently recycled materials on the planet, for the simple reason that it doesn’t lose structural strength after being recycled. For more than 150 years, recycled steel has been used in new buildings, bridges, cars, and more. Recycled steel is less expensive to produce than virgin steel. Plus, recycling steel causes far fewer carbon emissions than extracting new steel. In 2008, scrap metal recycling was an $86 billion industry that supported 85,000 good-paying American jobs. Steel salvaging and similar recycling efforts help to offset the country’s trade deficit while replacing former manufacturing jobs.

4. Drywall
Sandwich gypsum between two sheets of paper and you have drywall. Its high recycling value is due to drywall’s varied recycling potentials: Gypsum scraps can be used to patch walls, to form concrete, or to create new drywall. The gypsum in drywall is beloved by gardeners, who use it to nourish plants. Finally, the paper in drywall can be recycled as well. Salvaging drywall is an Earth-friendly operation, not only because it reduces landfill volumes, but also because drywall in landfills can leak sulfate into nearby watersheds.

5. Glass and Windows
Like steel, glass can be repeatedly recycled with no loss of quality. Environmentally conscious consumers and businesses are drawn to glass because it’s inherently green—for every ton of glass that’s recycled rather than extracted, a ton of natural resources are saved. Windows salvaged from demolition sites can be recycled for any number of applications, from sandblasting to paving parking lots.

Currently, 40% of the country’s landfill stream is composed of construction and demolition (C&D) debris. By salvaging as much as possible from buildings slated for destruction, demolition contractors can make a real difference for the planet. Because salvaging reduces demolition costs as well as landfill fees, building owners are naturally inclined to seek out demolition firms with salvaging expertise. The three basic steps of asset recovery—(1) identifying value, (2) redeploying what can be reused on site, and (3) selling materials that can’t be used on site—bring capital to stakeholders. Looking to the future, demolition salvage techniques can only improve, so we can expect more of today’s buildings to be reincorporated into tomorrow’s edifices.

Homeowner's Guide: Carpet vs. Wood Floors

Written by

Sometimes choosing between laying wood flooring or carpet is a practical choice, while at other times it is a question of aesthetics. You must evaluate the pros and cons of both wood and carpet – we’ve compiled a list of facts that will help you to decide whether you want carpet or wood floors.

Small Space Solutions: Storage Tips

Written by

Small living spaces offer real benefits: small homes reduce your cost of living in terms of rent or mortgage and are easier to clean and maintain. However, smaller living spaces come with a set of problems, and insufficient storage space is foremost among them. Even if you don’t have many belongings, you will still be hard-pressed for storage in a small home. If you want to live free of clutter, you should focus on storage solutions.

Top 10 Ways to Stay Warmer This Winter

Written by

Upgrade your home’s insulation and air-seal gaps and cracks sooner rather than later. This is one home improvement that will pay for itself relatively quickly and then continue to generate savings for as long as you live in your home.

Even if a full upgrade is not in your budget this year, you can tackle several low- or no-cost improvements right now. Here are 10 tips to keep your home comfortable this winter.

1. Use the passive solar heat that’s available to you.

If you have a sunroom or enclosed porch with a southern exposure, it can collect a great deal of heat. Use a small fan or natural convection to move air through a doorway from solar-warmed rooms to adjacent interior spaces. Just be sure to provide an opening for “return” air, such as a vent or an open window between the sunroom and the house, to ensure good air flow. Similarly, a south-facing window can also capture heat: open the shades or drapes when you want solar gain on sunny days and close them when you want to trap heat at night. Cost: $0

Rooftop solar array

2. Reduce air leaks at wall, ceiling, and floor joints.

In winter, a surprising amount of cold air can leak into your house around window and door openings, due largely to the fact that the framed (or rough) opening of a window or door is bigger than actual size of the window or door. Seal and insulate this space by removing casement moldings and filling the space with insulating foam sealant. The gap may be hidden by drywall or plaster, so you may have to make several holes to gain access to it. Use a low-pressure build foam sealant to avoid creating pressure on the window frame that could hinder its operation. Don’t use foam to fill the weight pocket of an old double-hung window unless you have already replaced the weights, pulleys, and cords with an alternative mechanism. Cost: $5 to $10 per window or door

3. Seal air leaks above the trim.

Baseboard and crown moldings that run along exterior walls are also sources of cold air infiltration. Apply a bead of “window and door” caulk along the trim/wallboard joint and smooth it with a damp finger. Have some paper towels handy to wipe off the excess caulk. Cost: $20 to $40

Caulking around a wall switch

4. Seal air leaks around wall and ceiling penetrations.

Vent fans, recessed lights, and electric receptacles and switches on exterior walls can be significant sources of uncomfortable drafts and energy loss. Fix the problem by applying caulk in the gap between the fixture or box and the drywall. Remove the cover plates and trim pieces before applying caulk. For electrical boxes, install a foam gasket under the cover plate before screwing it back in place. This video shows how to seal outlets. Cost: $30 to $50

5. Weather-strip windows and doors.

The tiny gaps between window sashes, jambs, headers, and sills and between the sash and the rails all add up. So do the ones around exterior doors. Depending on the size of the gaps, the accumulative “hole” could be the size of a basketball! Installing weather-stripping is easy and inexpensive. Don’t forget the door sweep at exterior doors. Cost: $80 to $120

6. Seal ducts near air handler with mastic.

Leaky, un-insulated ducts can reduce warm air flow where you need it. They can also waste huge amounts of energy. Use duct mastic to seal all duct joints and holes, especially those near the air handler. Cost: $20

Air ducts in attic

7. Seal and insulate rim joists.

A great deal of cold air leaks into your basement where the framing meets the masonry foundation. From there it contributes to cold floors and can easily infiltrate your living space via small cracks and gaps in the flooring. Cut rigid foam board insulation to fit snugly between joists at the rim or band joist. Use caulk or a foam sealant to seal around the edges of the rigid foam boards. Cost: $150 to $250

8. Keep registers and grilles clear.

Make sure that the supply and return registers and grilles in your forced-air HVAC system aren’t blocked or covered by rugs, furniture, or furnishings. Blockages disrupt the balance of supply and return air, making the HVAC system operate inefficiently. Blocked registers and grilles can also starve your furnace of air, causing the heat exchanger to overheat and crack. Cost: $0

9. Ensure a balanced duct system.

For a cozy, comfortable home, warm air must be able to circulate freely from the furnace to every room of the house and then back to the furnace. In a room lacking a return duct, especially one with a closed door, air pressure may build and resist the introduction of a new supply of warm air from the furnace. Leaving the door open or installing a simple jumper duct from the closed room to one with a return vent will help to solve the problem. Watch this video on installing jumper ducts to better understand why comfort depends on a balanced duct system. Cost: $0 to $80

10. Seal your fireplace flue.

A typical fireplace is a major source of cold air drafts during the winter. Cold air gets sucked down the chimney and warm air escapes, even with the damper closed. Stop this leakage (and save on heating costs) by installing a “chimney balloon” or “chimney pillow.” After inserting this tough plastic balloon into your flue, inflate it to seal the chimney. Remove it when you want to build a fire, and replace it after the flue has cooled completely. Cost: $70


Tile Flooring 101: Care and Maintenance

Written by

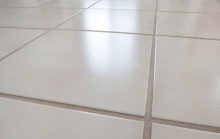
Tile floors are an extremely durable, long-term investment that should be regularly cared for to preserve both their appearance and value. In fact, a well cared for tile floor can last a lifetime. According to the Study of Life Expectancy of Home Components, which was prepared in 2007 by the National Association of Home Builders (NAHB), the average life expectancy of a ceramic tile floor is 75 to 100 years, while natural stone such as marble and granite can last more than 100 years.

5 Surprising (and Surprisingly Easy) DIY Security Ideas

Written by

Home security comes in many different shapes and forms. Many homeowners opt for traditional security companies that offer comprehensive home protection, backed by professional alarm monitoring. However, you can secure your home in a few less traditional ways, some of which you may have never considered before. If you are a DIY enthusiast looking to make your home a little safer, here’s how you can secure your home on your own.

Driven Piles vs. Jetted Piles - A Comparison

Written by

“Pile jetting” is a technique that is frequently used in conjunction with, or separate from, pile driving equipment for pile placement.  Pile jetting utilizes a carefully directed and pressurized flow of water to assist in pile placement.  The application of a concentrated jet of water at the pile tip disturbs a ring of sub-grade soils directly beneath it.  The jetting technique liquefies the soils at the pile tip during pile placement, reducing the friction and interlocking between adjacent sub-grade soil particles around the water jet.  This greatly decreases the bearing capacity of the soils below the pile tip, causing the pile to descend toward its final tip elevation with much less soil resistance, largely under its own weight.  In less frequent applications, compressed air jets are used instead of pressurized water jets with the same end result.

Residential Water Usage Guidelines

Written by

No household can function without a good, steady source of clean water. Many households needlessly waste significant amounts of water, leading to not only an impact on the environment but on our wallets as well.

Tile Flooring 101: Considerations

Written by

Tile flooring can be installed in a variety of locations. Prior to buying tile for your flooring project take the time to answer a few questions: Is the tile going to be located indoors or outdoors? What is the room going to be used for? Is the tile going to be installed in a wet area? How much foot traffic does the room experience on a daily basis? Identifying answers to these questions will define a floor tile that will have the specific characteristics to meet your needs.

Page 1 of 75