How to Install a Vinyl Fence
-
font size
decrease font size
 increase font size
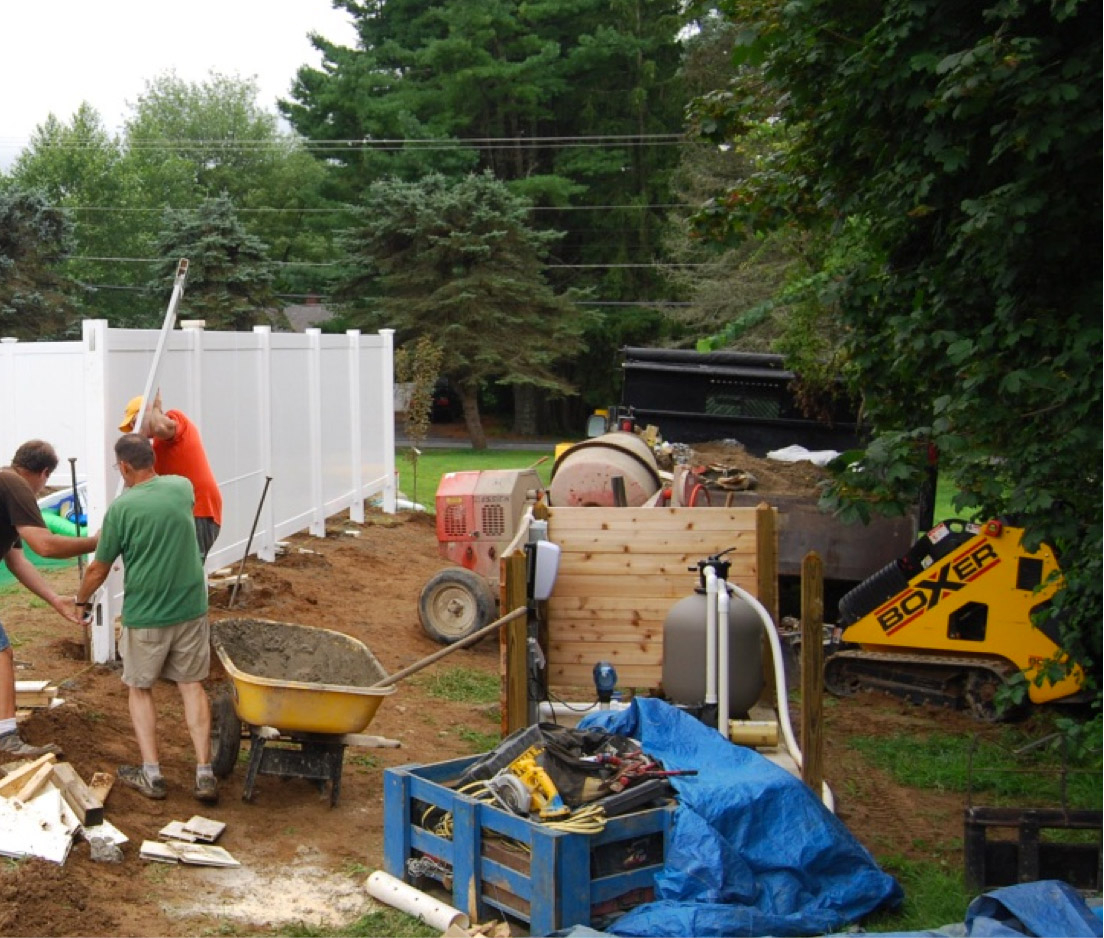
Thinking of installing a vinyl fence? Read this tutorial to see how fence installation pros handle this job.
 Image courtesy of Gerry Rogan
Professional grade vinyl fence is designed to be installed with "hollow" posts. Post centers for each manufacturer are different, but they are all measured the same way. As you will see, making accurate measurements when you're erecting a fence is extremely important.
Because a high-quality PVC privacy fence is generally comprised of routed fence posts and section rails that extend beyond the picket "field," measure the picket area and add the width of one fence post. This will give you the center-to-center measurement. Center measurements for vinyl picket fences are based on the individual manufacturer�s specifications.


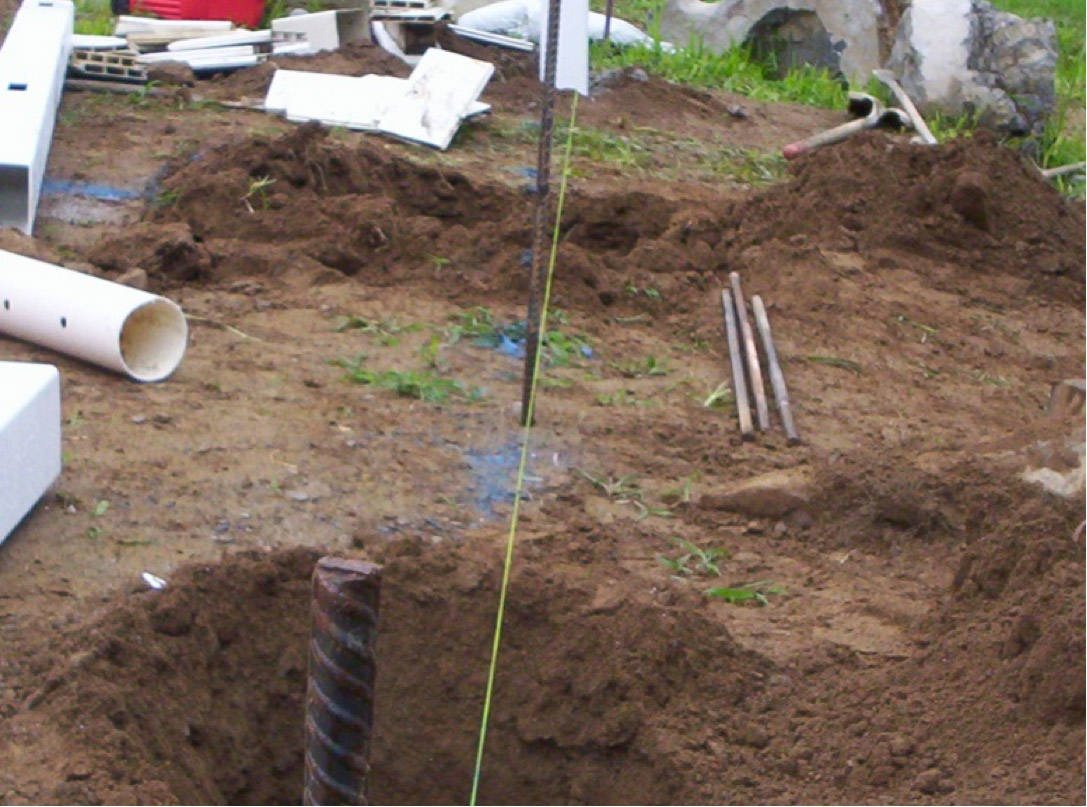
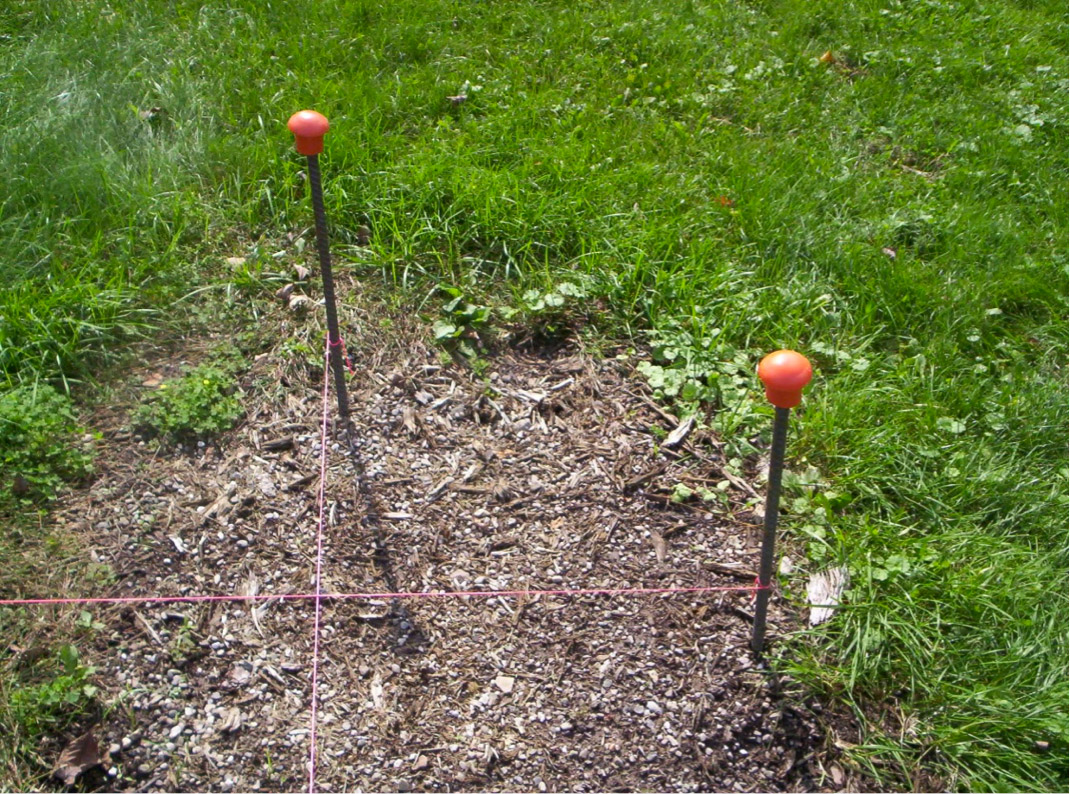
First determine whether your location requires you to get a building permit to erect a fence by contacting your municipality's planning and zoning department. After you complete all of the necessary paperwork, set up a string line in the desired location. Before digging, locate all underground utilities. A call to 811 is federally mandated but is also free, as is the mark-out of buried hazards owned by the relevant utility company. You should locate your posts where the entire footing of the installed fence will be on the property.

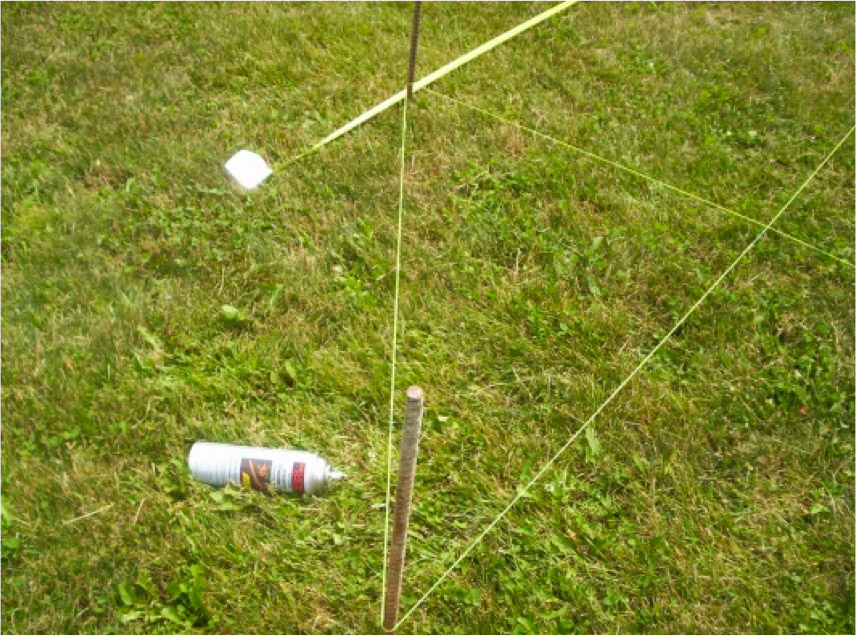
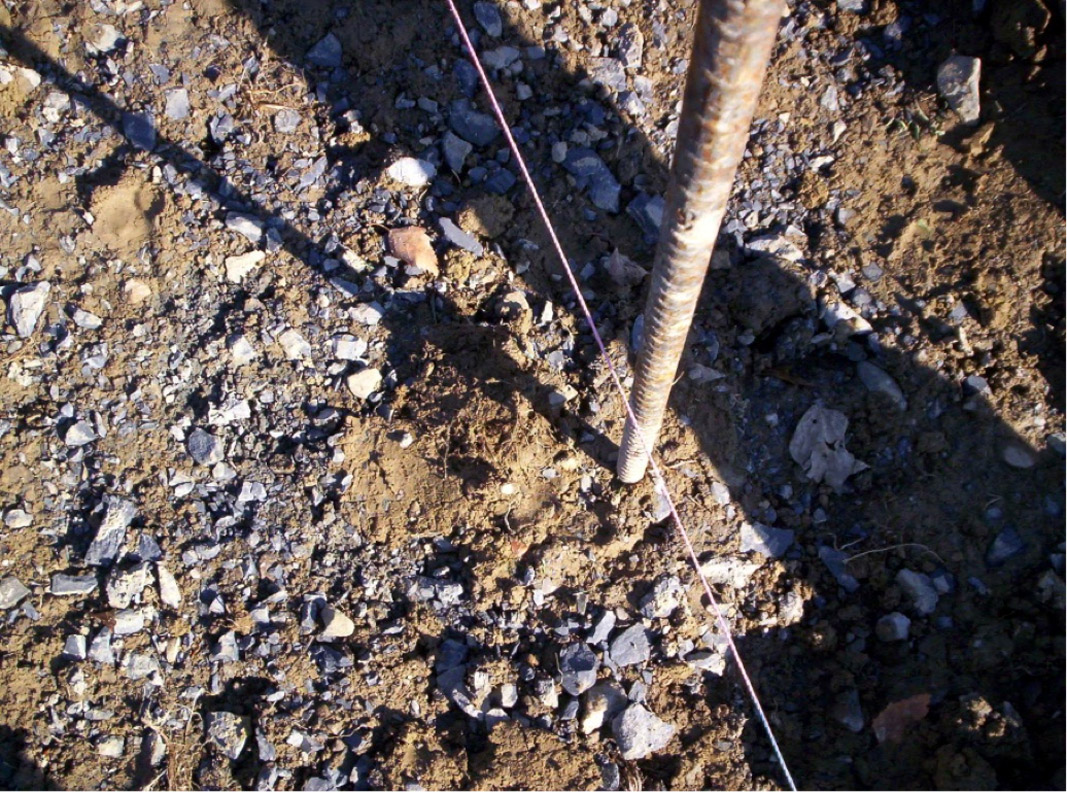
Rebar makes a better stake than a 2 x 2 � rebar allows the string to be made very tight when the correct knot is used. You should place your rebar stake a few feet beyond the corners and ends to allow the post holes to be dug without interfering with the rebar stake. This spacing is especially important if you will be digging with a machine of some sort.
Tip: If you plan to dig all of your holes first to save money on equipment rental charges, use nails to mark the centers of the holes for accuracy.
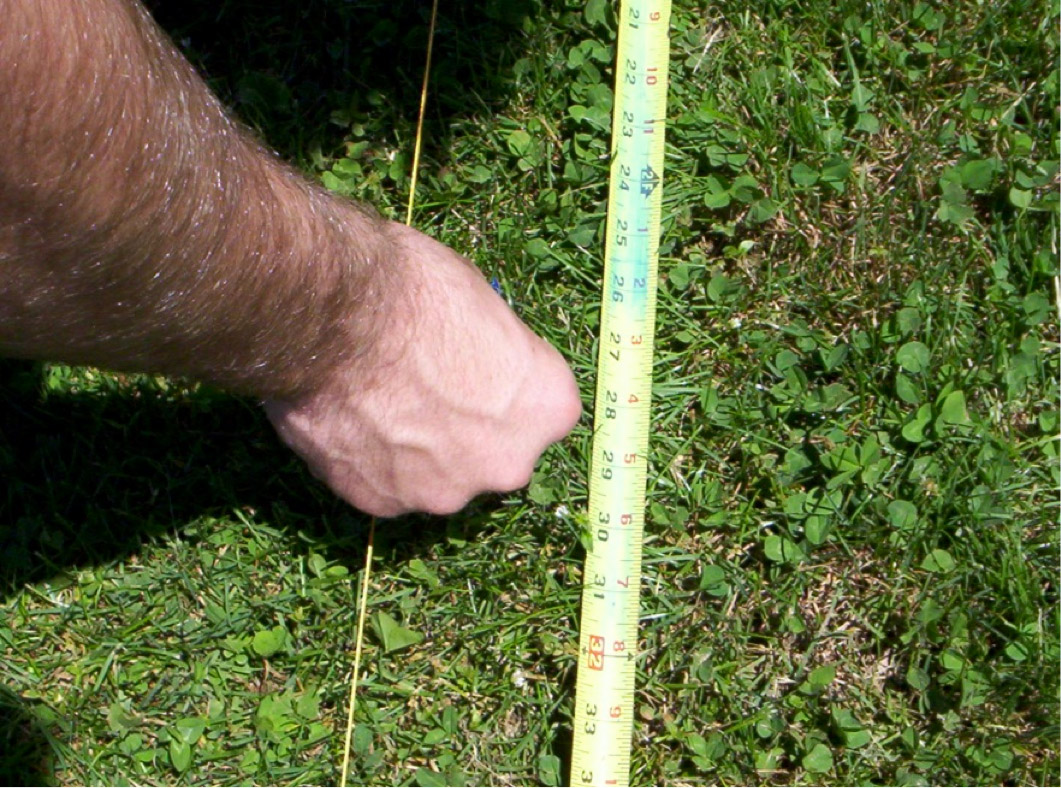
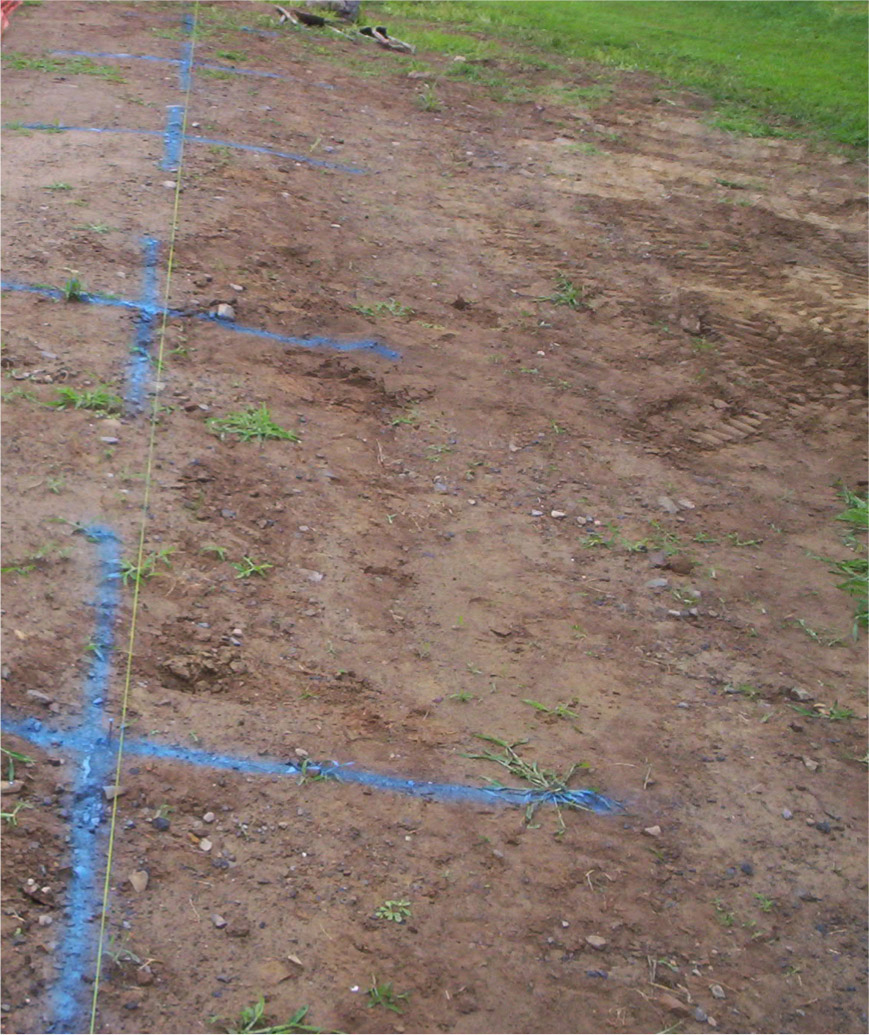
Press a nail into the ground and measure from there to the next "center." Measuring from nail to nail is the best assurance that we are marking accurately. Centers that are off by as little as 1/2" can lead your digging holes in the wrong spots, which can be especially frustrating on a long run of fence panels. Redigging a hole is never any fun, even when you're using a machine to dig.
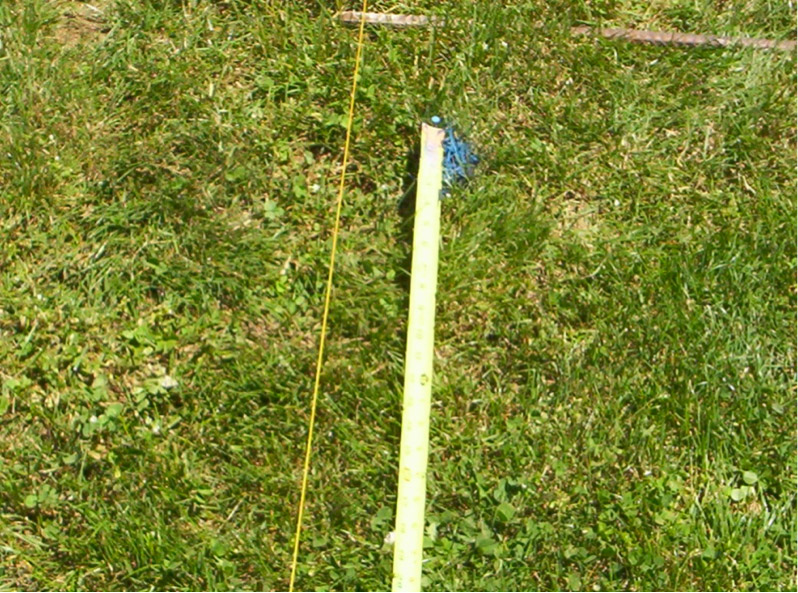
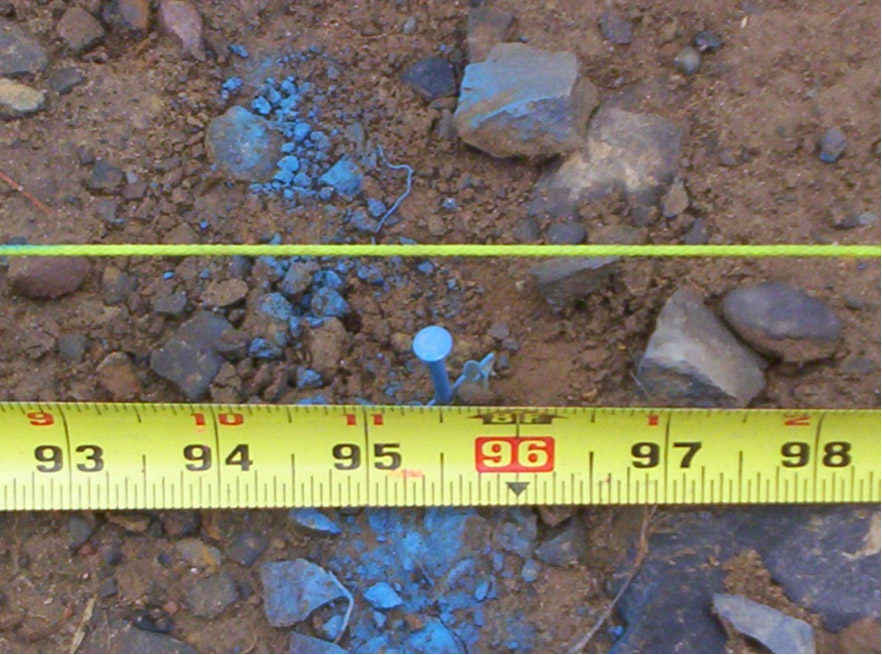
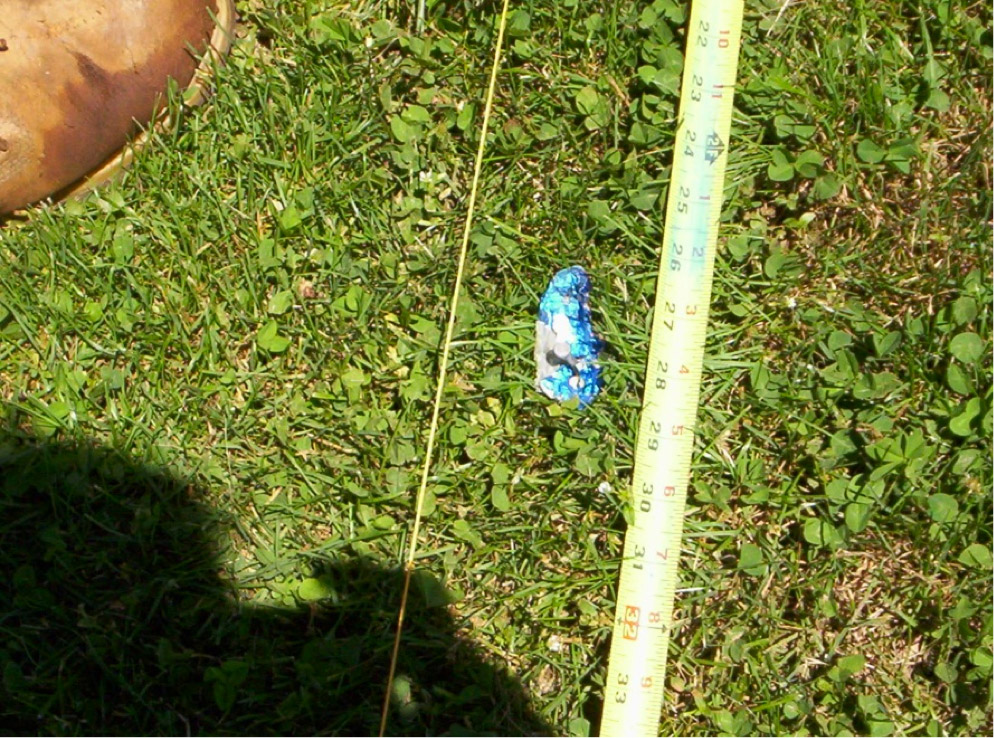
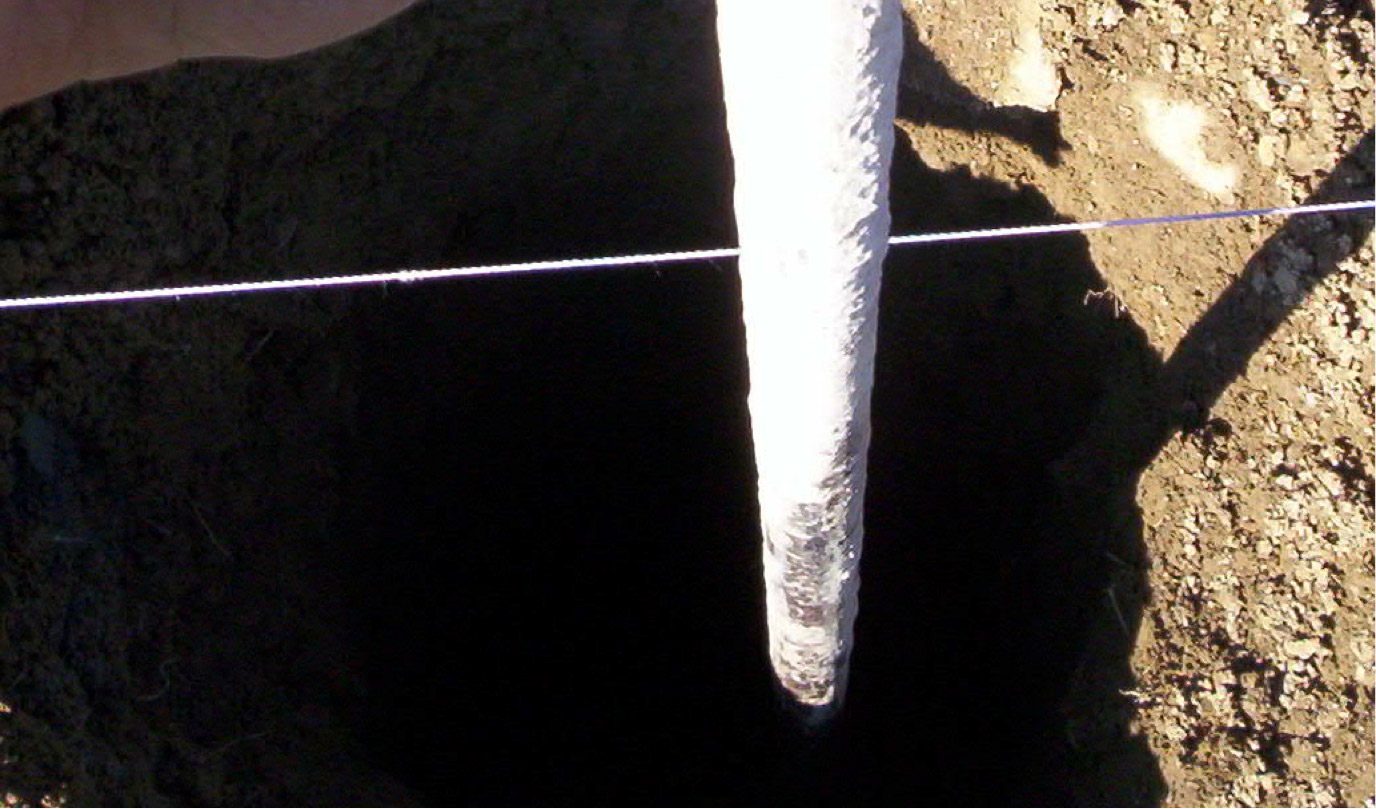
After you have located all the fence post holes by measuring from nail to nail, go back to where the first fence post will be set. Measure from its center and place a nail through a piece of bright plastic or foil (so it is easy to find) 2' from where the SIDE OF THE POST will be. The fence installed in this tutorial had fence post centers of 95 1/2". Because the fence posts in this installation are 5" square for the material, measurement back from the center would be 26 1/2". This mark will be important later.
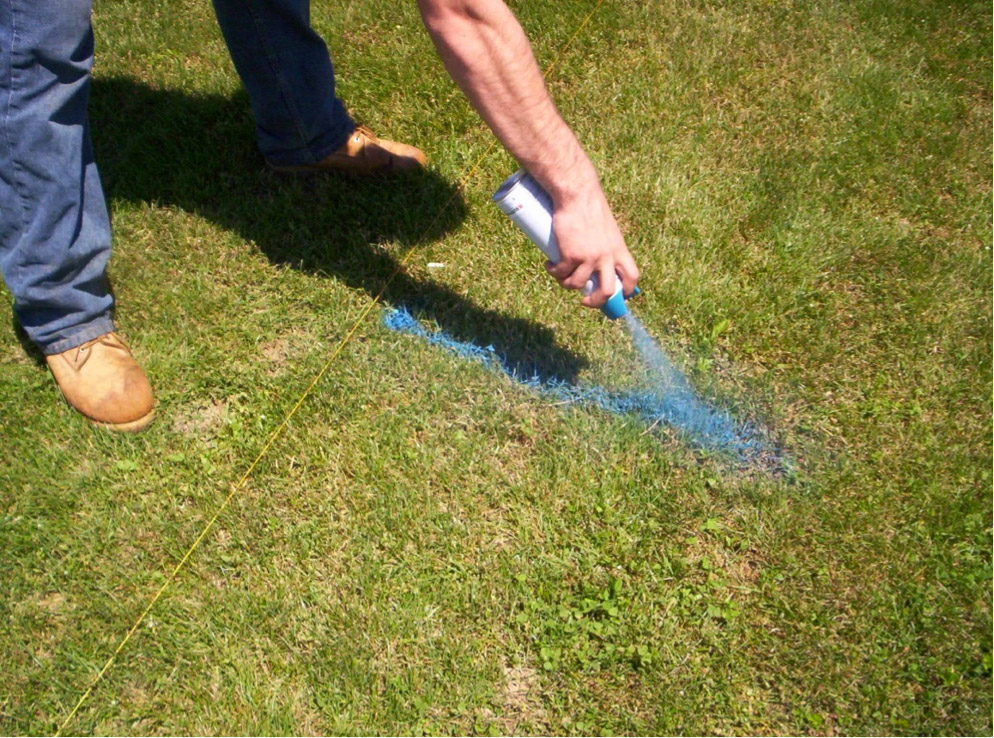
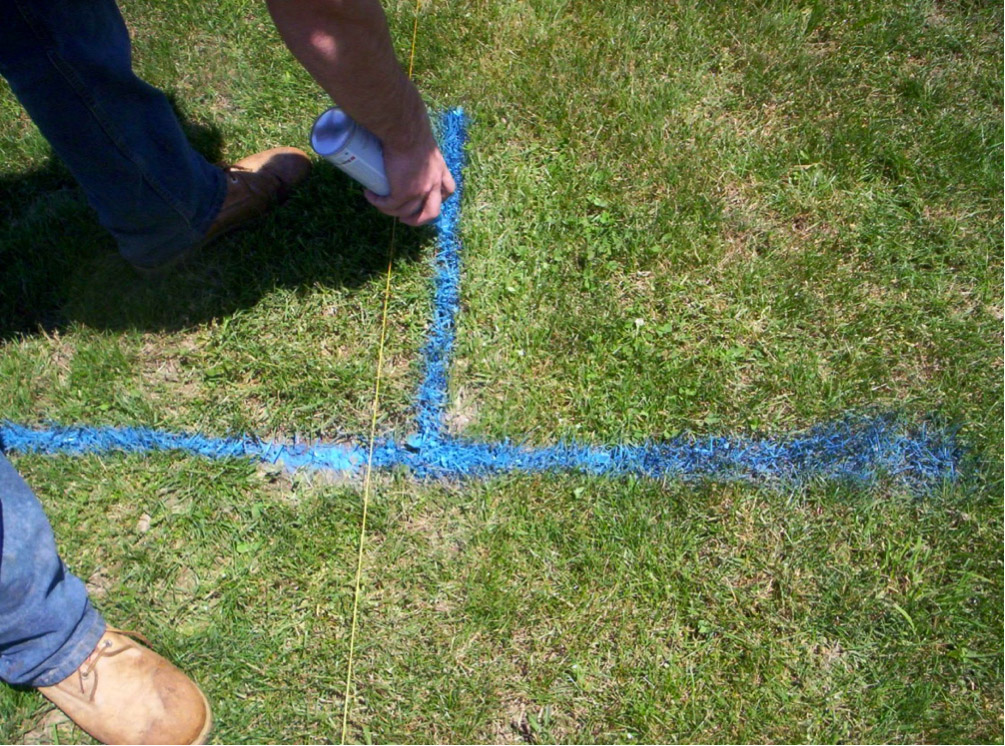
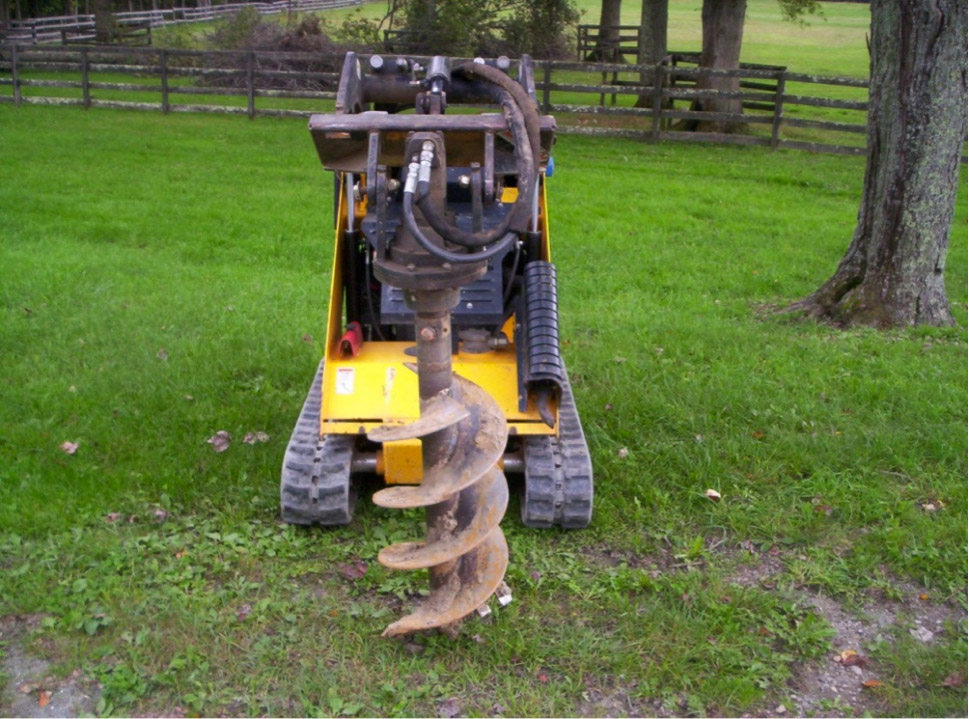
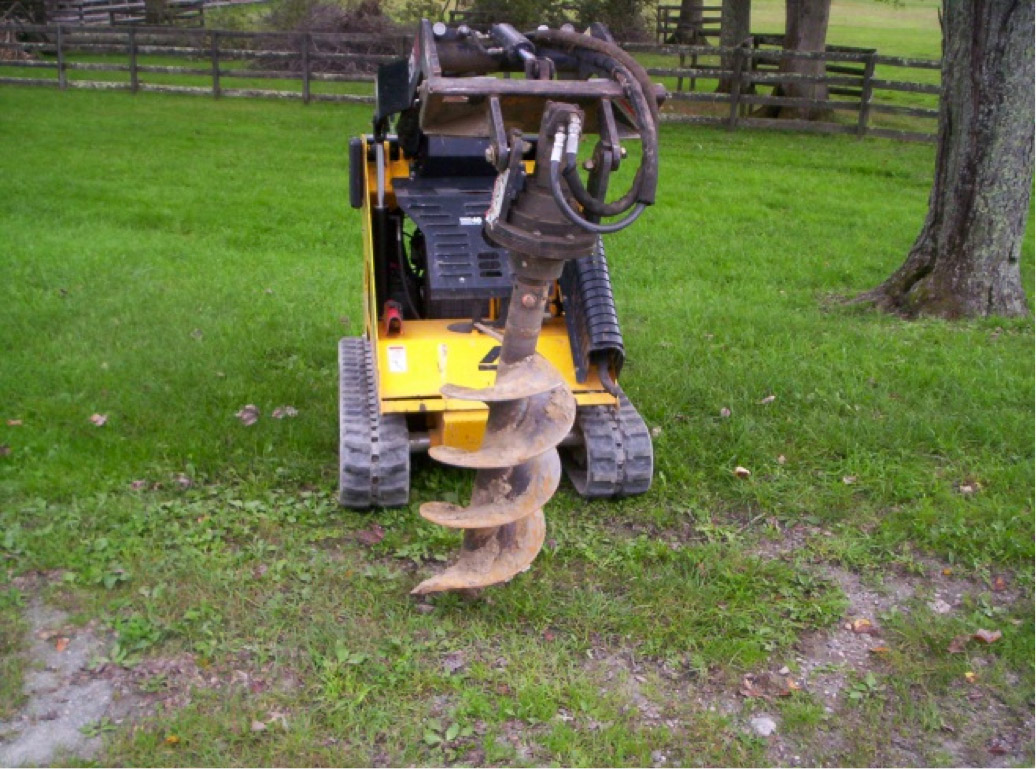
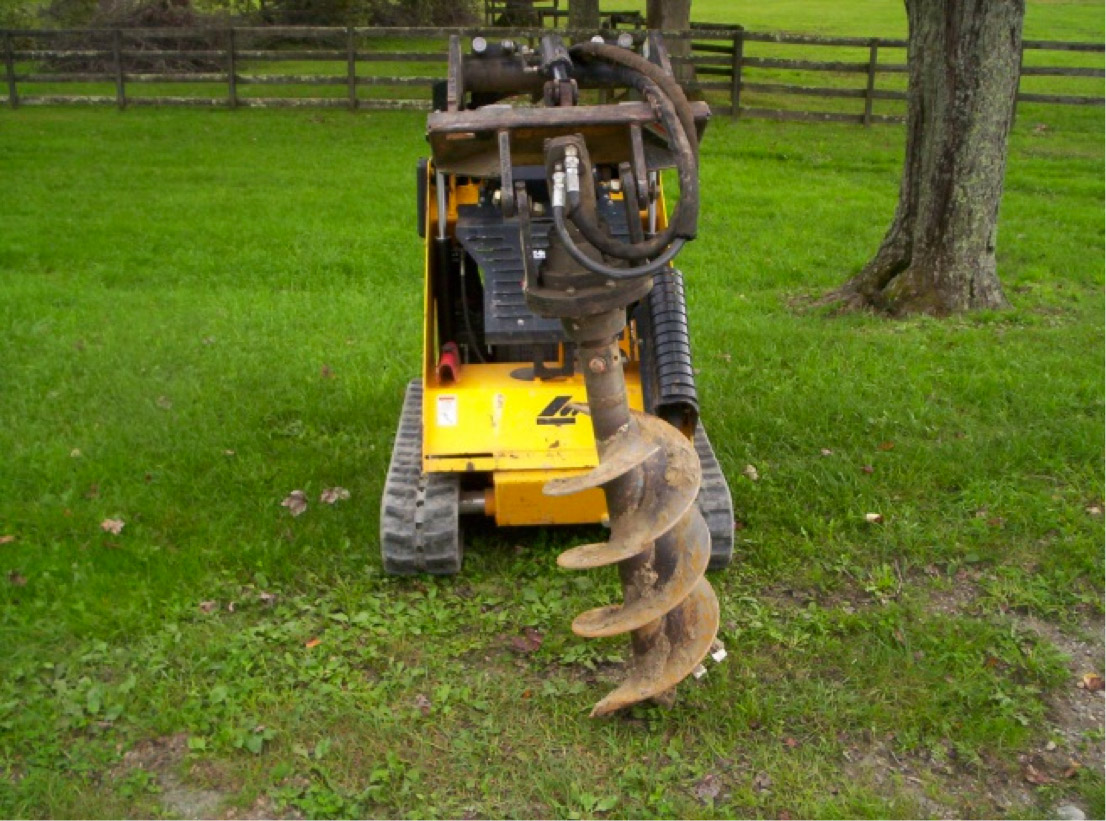
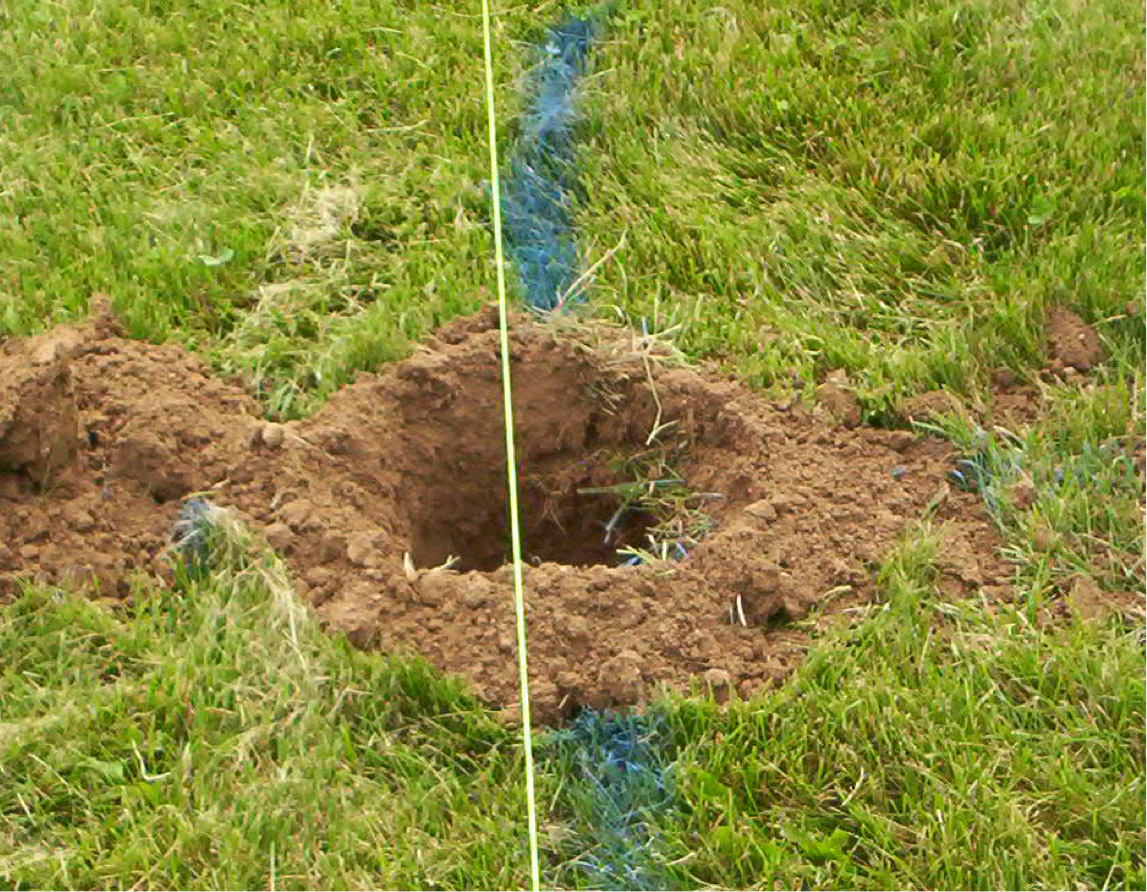
Each hole should then be marked with a large X approximately 2 1/2" off the string and as square to the line as possible. (You'll want to take down the string while actually digging. You will reattach it later.) A small mark will be obliterated as soon as the auger bit is dropped, so make the mark large enough that the outer portions won�t be covered with dirt from the hole as the auger progresses. The portion of the X that remains visible will help you to keep the post hole in the right spot if the auger bit hits a rock and wanders. Most mini skid steer machines do not have a true "vertical lift" � their loader arms move on an arc. For this reason, it is a good idea to have one person watch where the bit is in relation to the mark and advise the operator of when to creep (i.e., move) the machine to maintain as vertical a hole as possible.


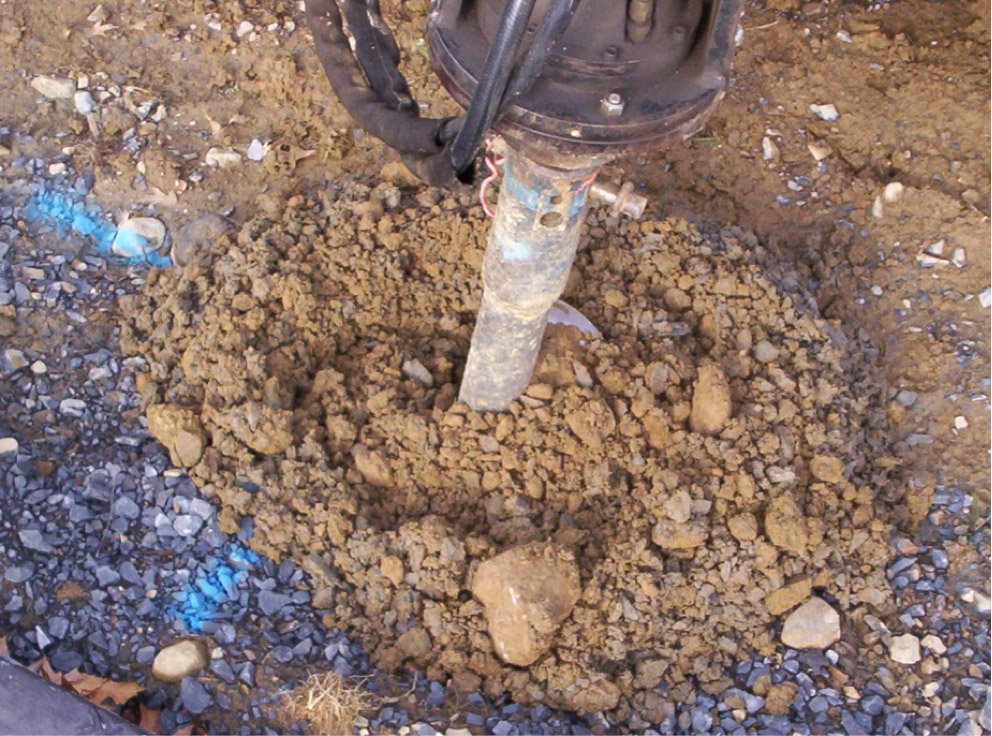
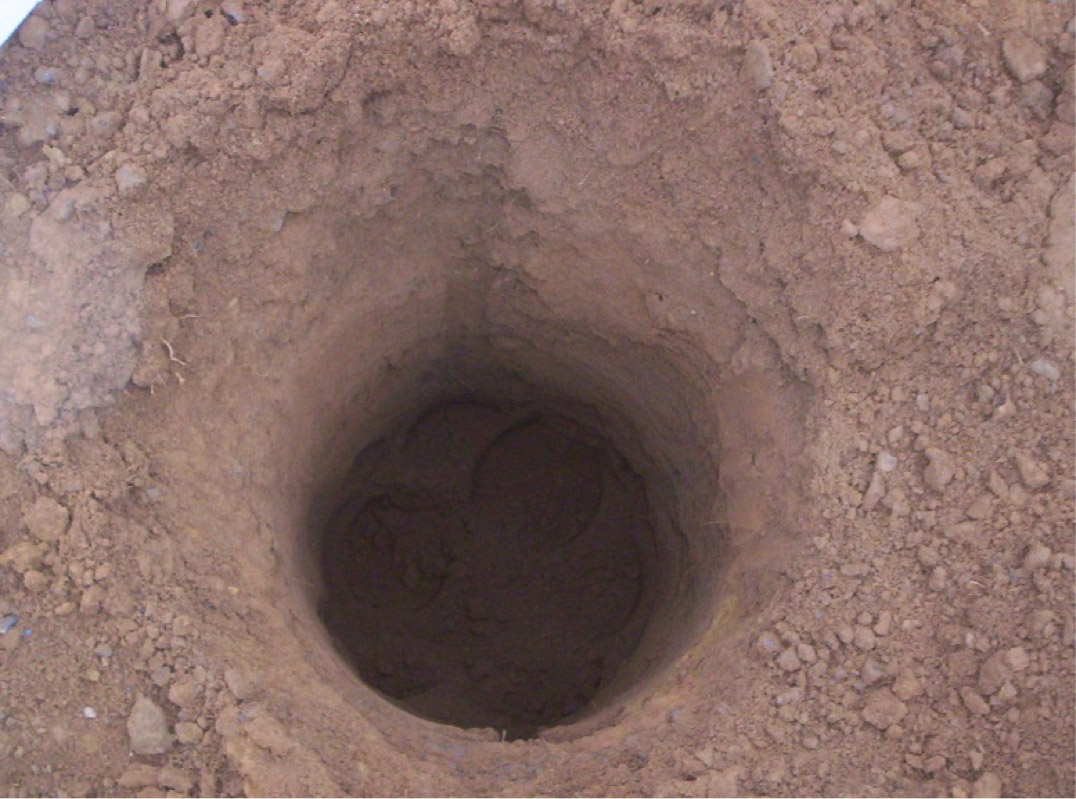
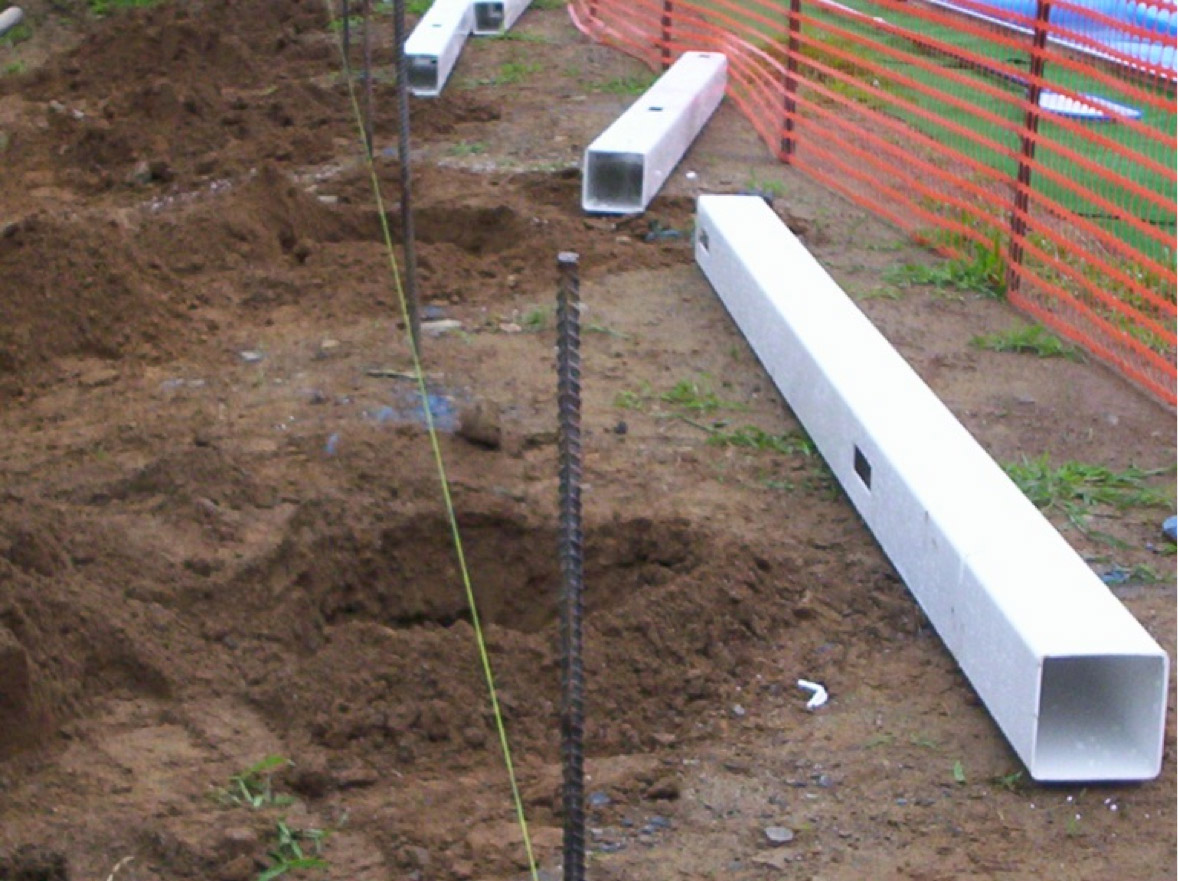
ASTM F1999 (standard practice for installation of rigid PVC fence systems) recommends a hole that is 3 times in diameter the width of the post. Because the vinyl fence in this tutorial used 5 x 5 posts, it required a 15" wide hole. If this seems excessive, bear in mind that a solid privacy fence will have a heavy wind load. In areas prone to high winds, a hurricane kit is suggested. The diameter of the hole should be kept in mind during the initial layout to prevent any part of the footing from being on the adjacent property. Local building codes should be researched for step-back, height, and permit requirements.
Tip: It is important to have a machine that allows for side-to-side, as well as front-to-back, movement of the auger powerhead. This allows the operator to manipulate the auger bit around rocks, etc. Remember, a large X mark will help to get the auger bit back in the correct spot when digging.
With a steady hand on the machine controls, the operator can remove the auger bit from the ground with the soil still on it. Emptying dirt directly into a wheelbarrow will save clean-up effort later. Only cart away the amount of soil that will be replaced by concrete.
When you have finished digging all the post holes, reattach the string to the stakes and check the location of the post holes in relation to it. The posts will be set along the string such that the center of each post hole will be about 2-1/2" away on the side of the string on which the fence will be set. The objective is to have an equal amount of concrete on all sides of the post without sacrificing a straight line.


A stake should be placed between every two post holes to hold the line straight as you finish installing your vinyl fence. Sometimes all it takes is a little brush against the string to throw it off. If the string is tied as taut as possible and stakes are located between every two post holes, a simple "snap" of the line will get it back into position. As you install each section of vinyl fence, you remove the stake.
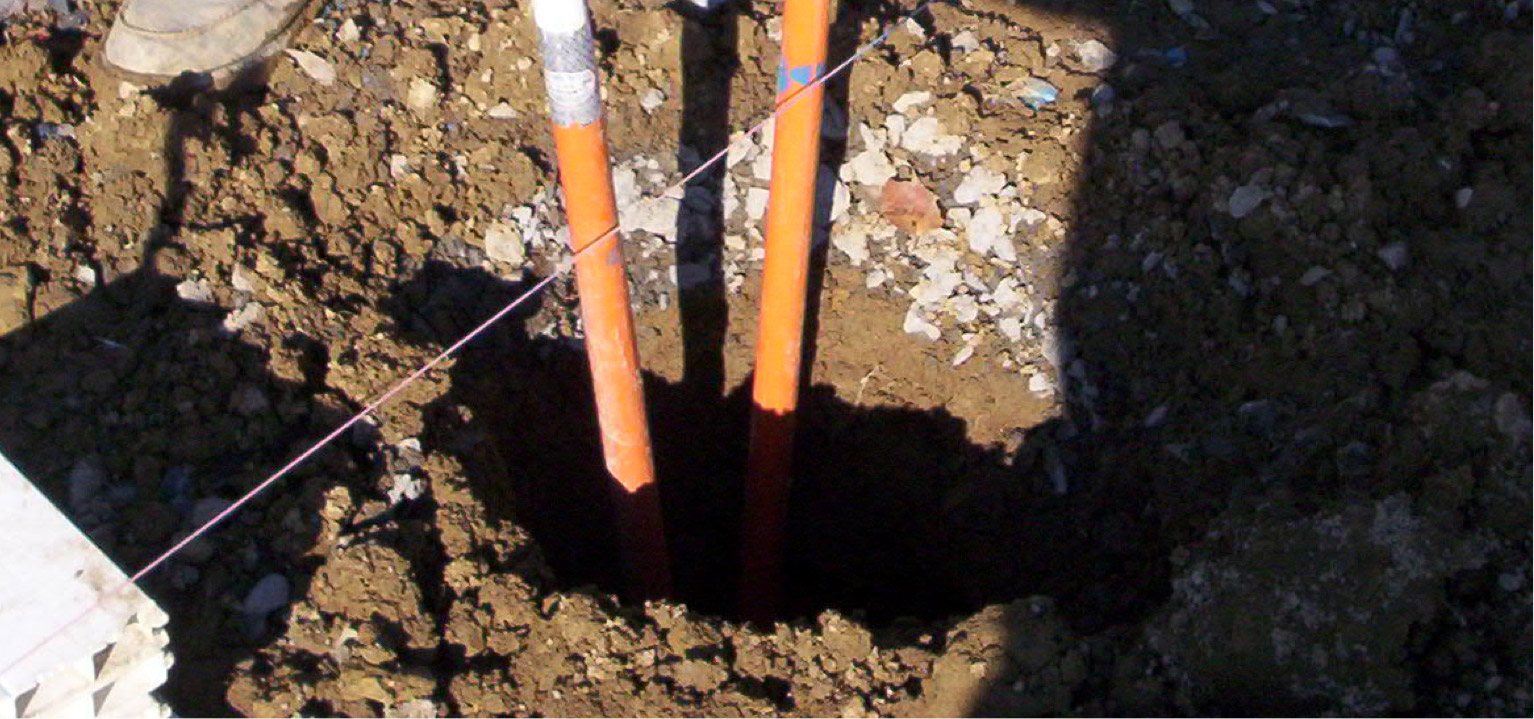
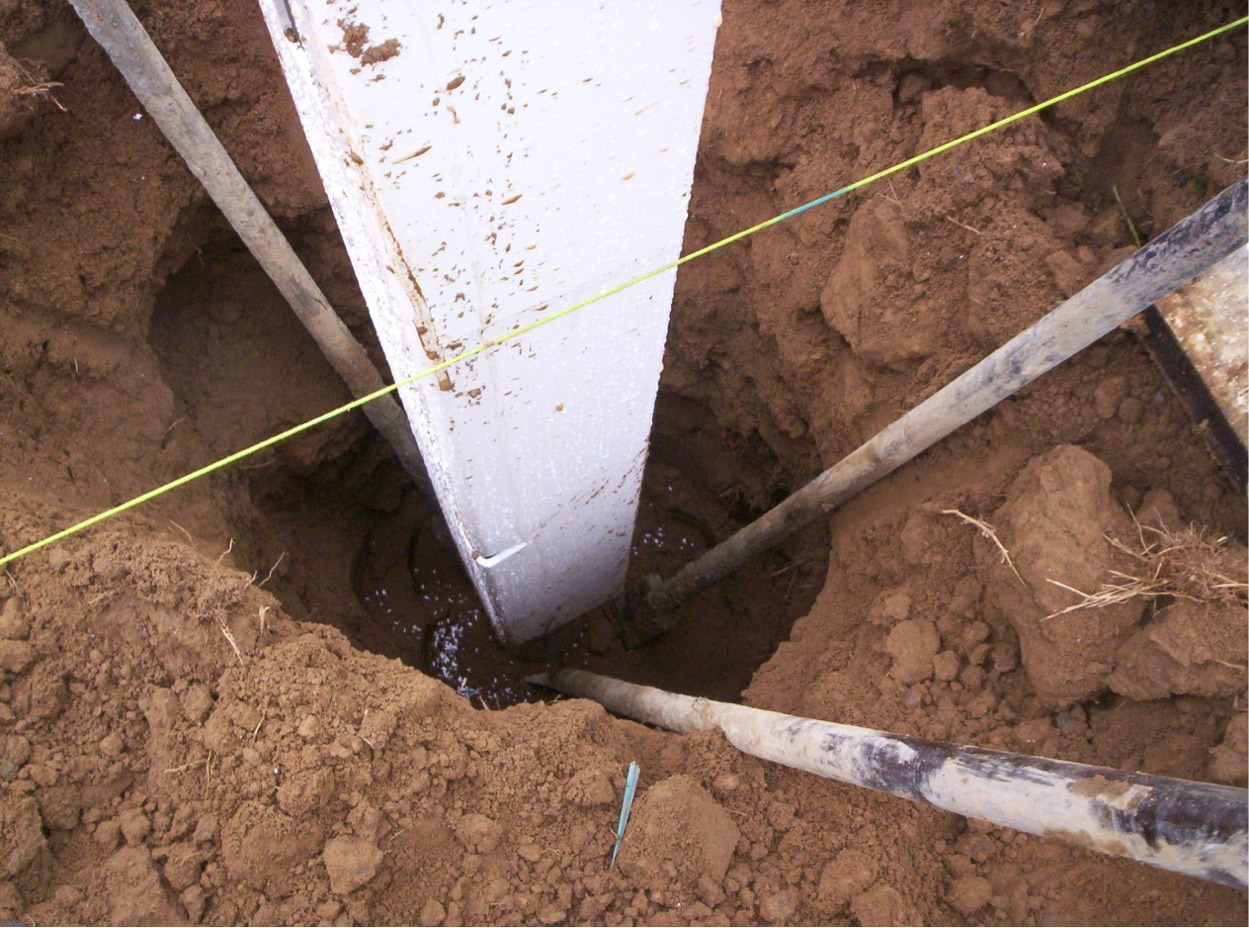
The most important part of the post hole is the bottom. Using the flat end of a digging bar or a 4 x 4, tamp the bottom of each post hole to provide a firm base for the fence post footing. One of the worst things that you can do is to place dirt back in the post hole. Loose soil at the base of the footing WILL settle and with it the entire fence post. In areas where the ground freezes, the post hole should penetrate the frost line. If the hole is dug too deep, drop a short piece of 4" drainage pipe into the post hole BEFORE the rail ends are inserted and the concrete is poured.
Tip: When you remove any loose soil at the bottom of your post holes, place all the loose soil on the same side of the fence. It makes clean-up easier.

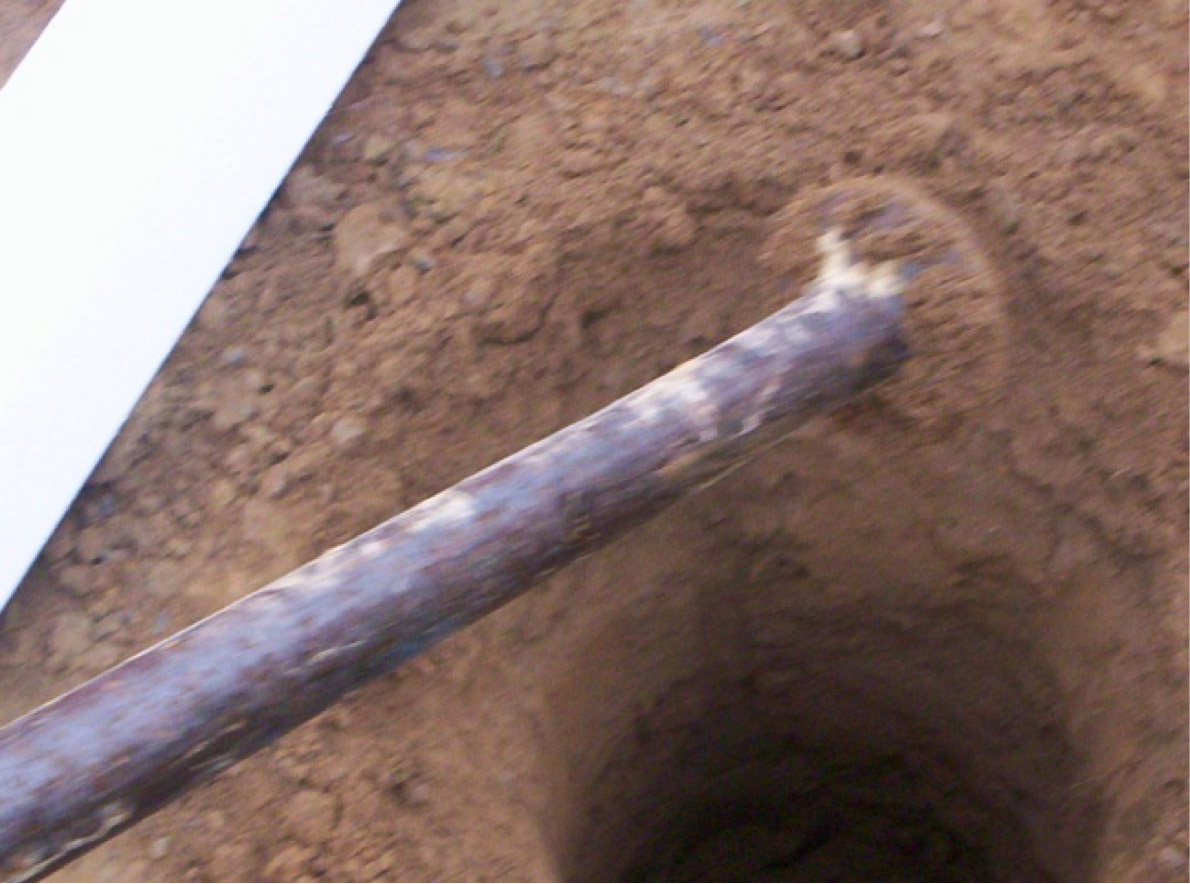
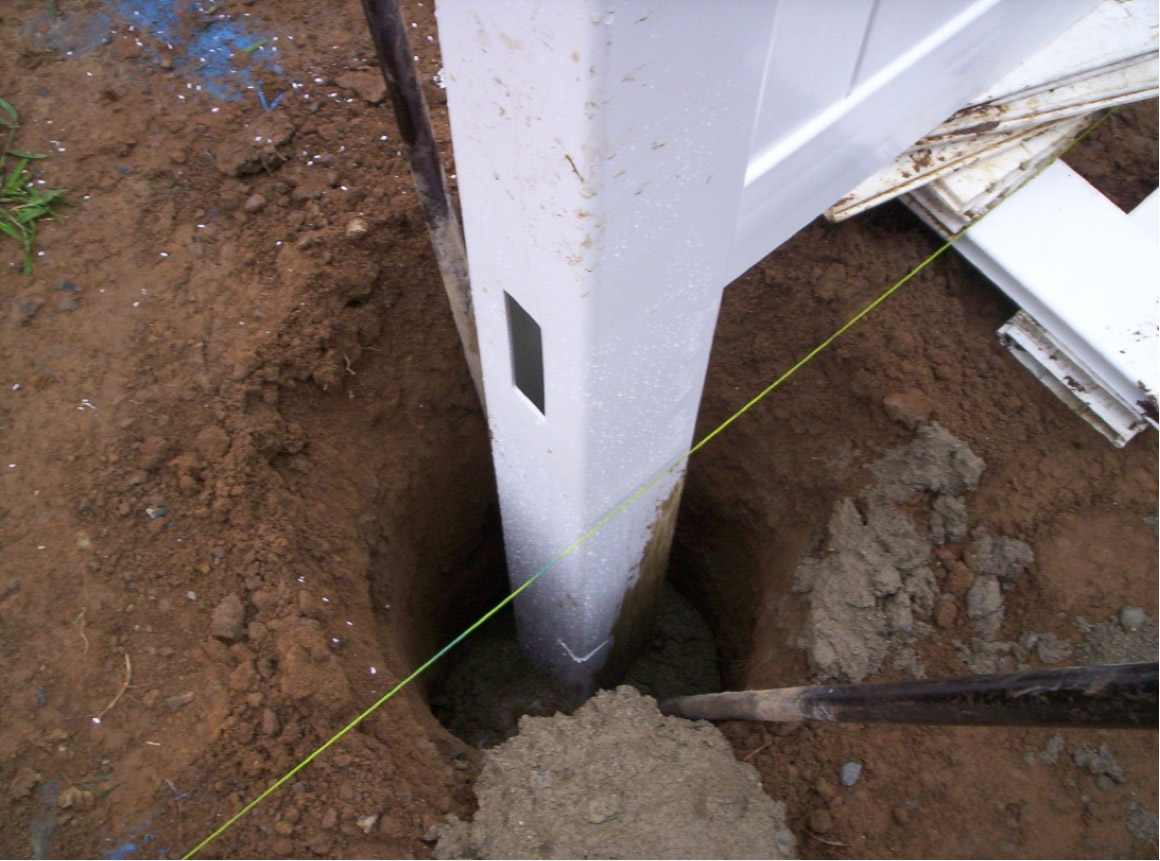
ASTM F1999 recommends that you prepare the fence post as well as the post hole. A small triangle nicked out of one of the corners of the post about 12" � 14" inches from the bottom will give the concrete a place to grab. Pouring concrete around the fence post leaves the bottom of the post open as opposed to filling the hole and "floating" the post into it. An open fence post bottom allows for drainage, which is a good idea. Condensation and rainwater can accumulate inside the post, and when this trapped water freezes it will expand and can push the post straight up and loosen it from the footing (another reason to properly prep the fence post). Where deep holes are required, use 4" drainage pipe to "extend" the length of the fence post. Drainage pipe is reasonably priced and readily available at the local hardware store or lumber yard.


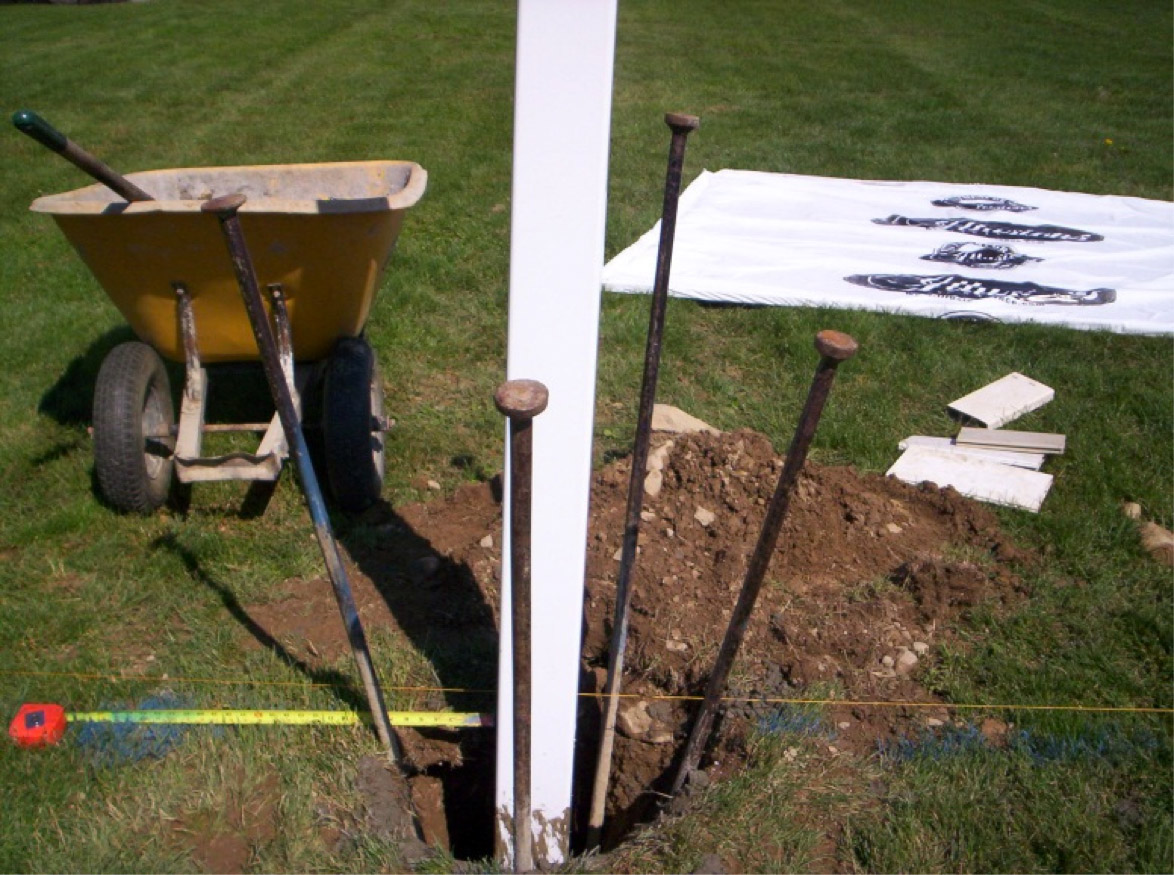
The nail that was placed in the ground 26 1/2" past the center of the first fence post as a reference point is now important. When the first fence post is to be set, measure from the nail with the brightly colored plastic 24" to the edge of the post, and all the post "centers" should be in the right location. You can use a digging bars to hold the fence post as the concrete is poured, and you can also adjust post plumb by using a digging bar. The first fence post may be left to give the chance for the concrete to set up, but the distance from the bottom of the hole to the grade should be set at the height at which the rest of the panels will be installed. Doubled up 2 x 4s or other pieces of wood sized to the desired spacing can be used to hold the panel height.
Tip: Leave several inches between the bottom rail and the grade for weed whacking.

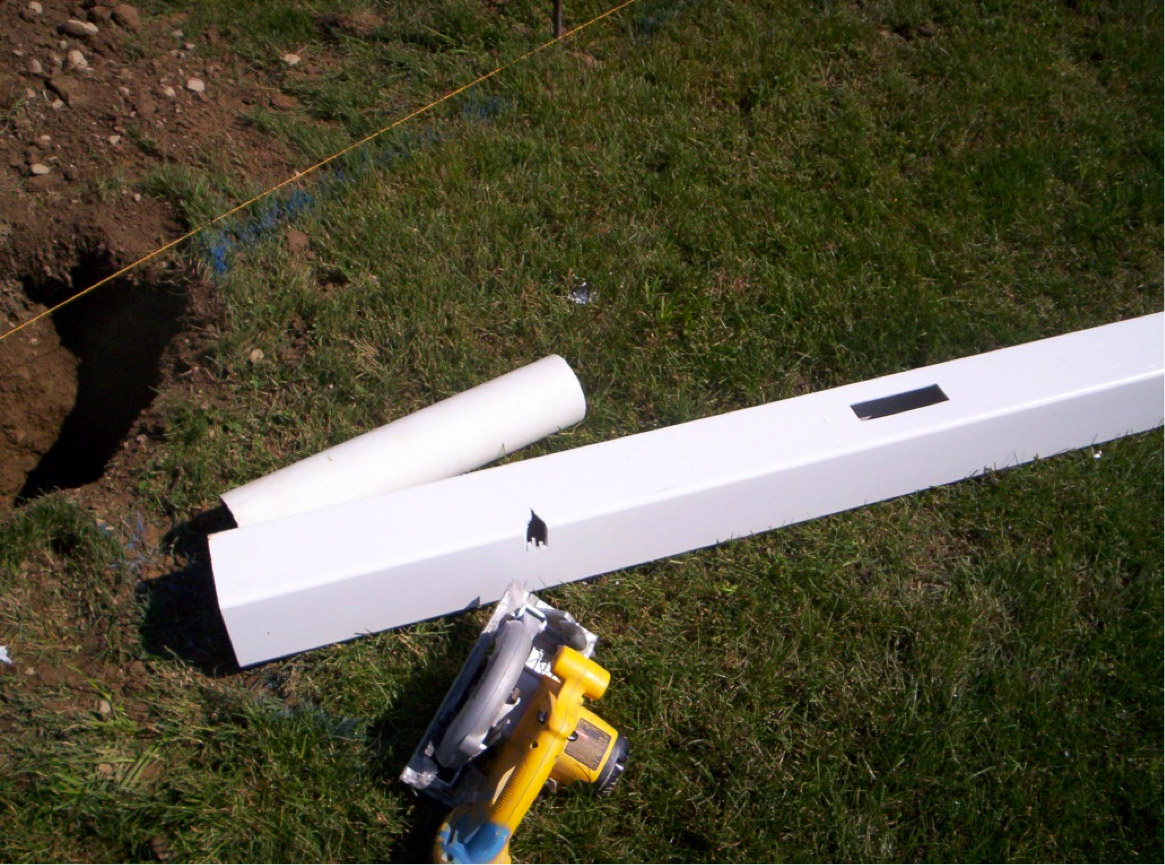
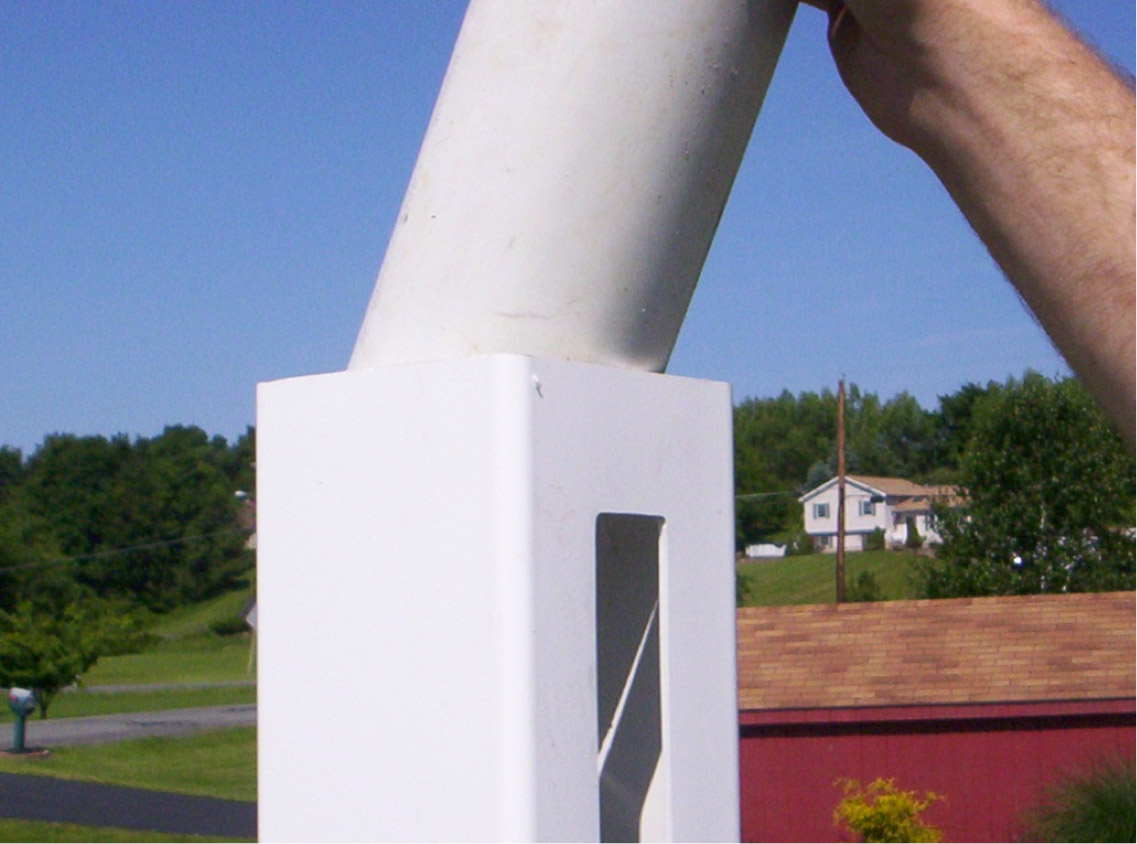
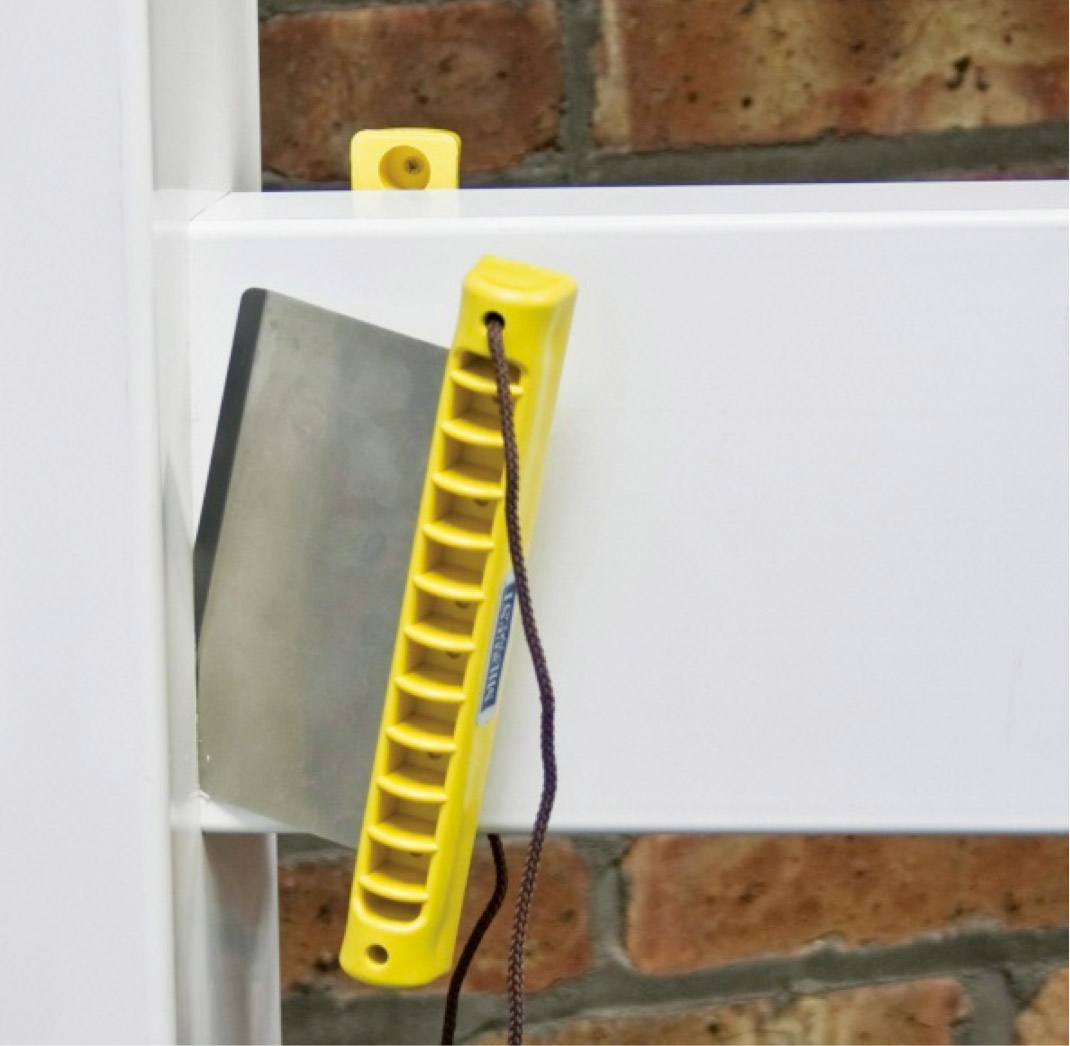
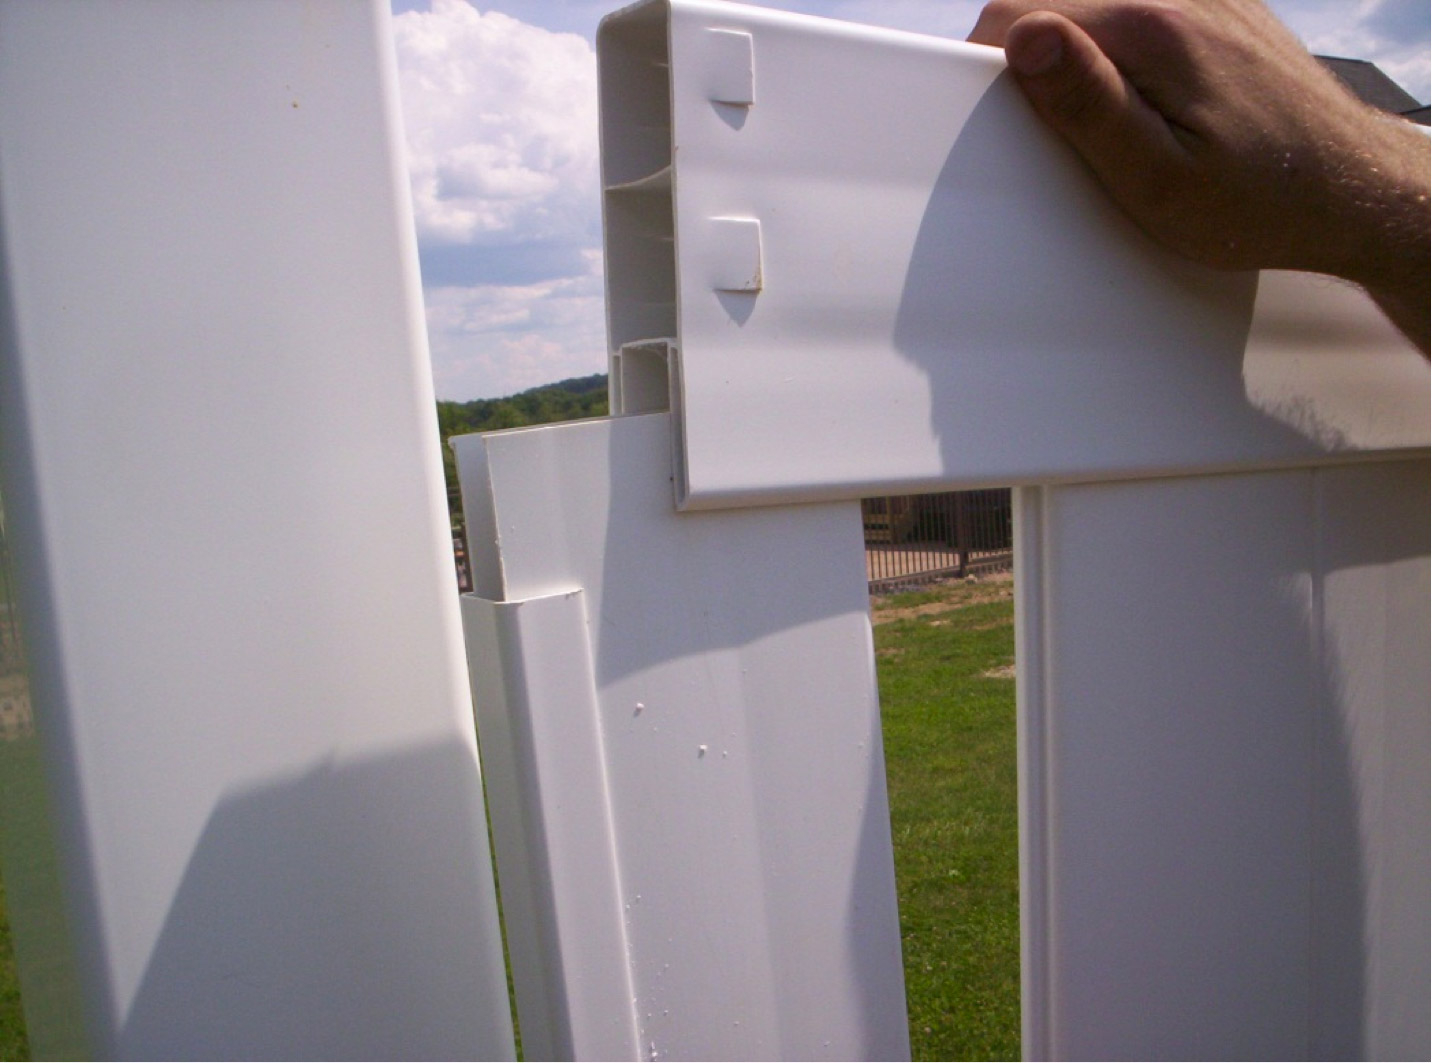
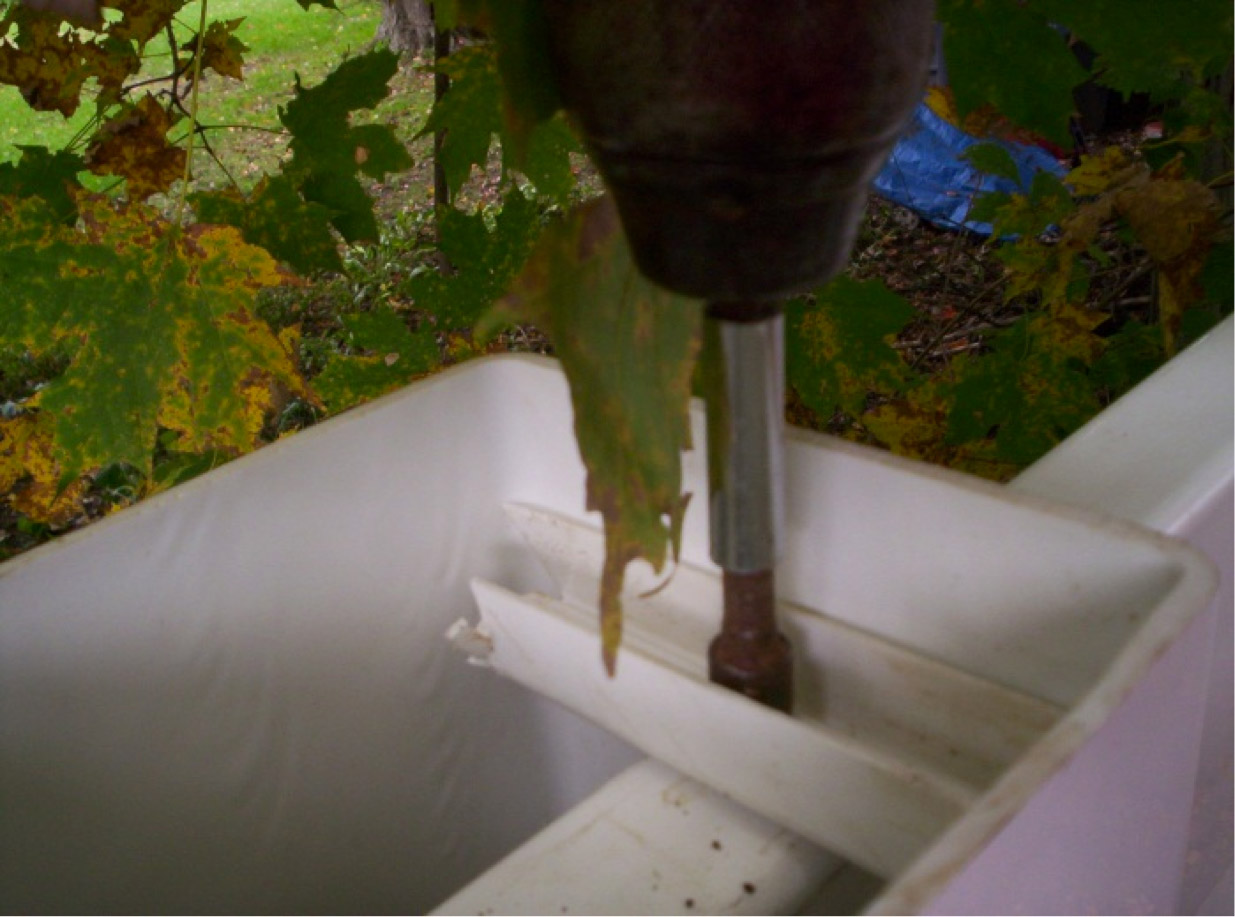
Rail ends come with notched tabs that will hold the rail in place after it is inserted into the post. If you need to cut sections, you must leave 1 1/2" of rail beyond the "field" (pickets) on each end to go into the post. Additionally, the tabs must be re-cut with a notch tool. Rail removal after installation can be difficult and most often requires the use of a special tool.
Top and bottom rails both have tabs, and most high-quality vinyl fence products have a galvanized stiffener in the bottom rail to prevent sagging.
You insert the rail end into the hole on the fence post, make sure that the panel bottom is supported to the desired height above grade, and pour the concrete to just below the triangle that you cut in the post.

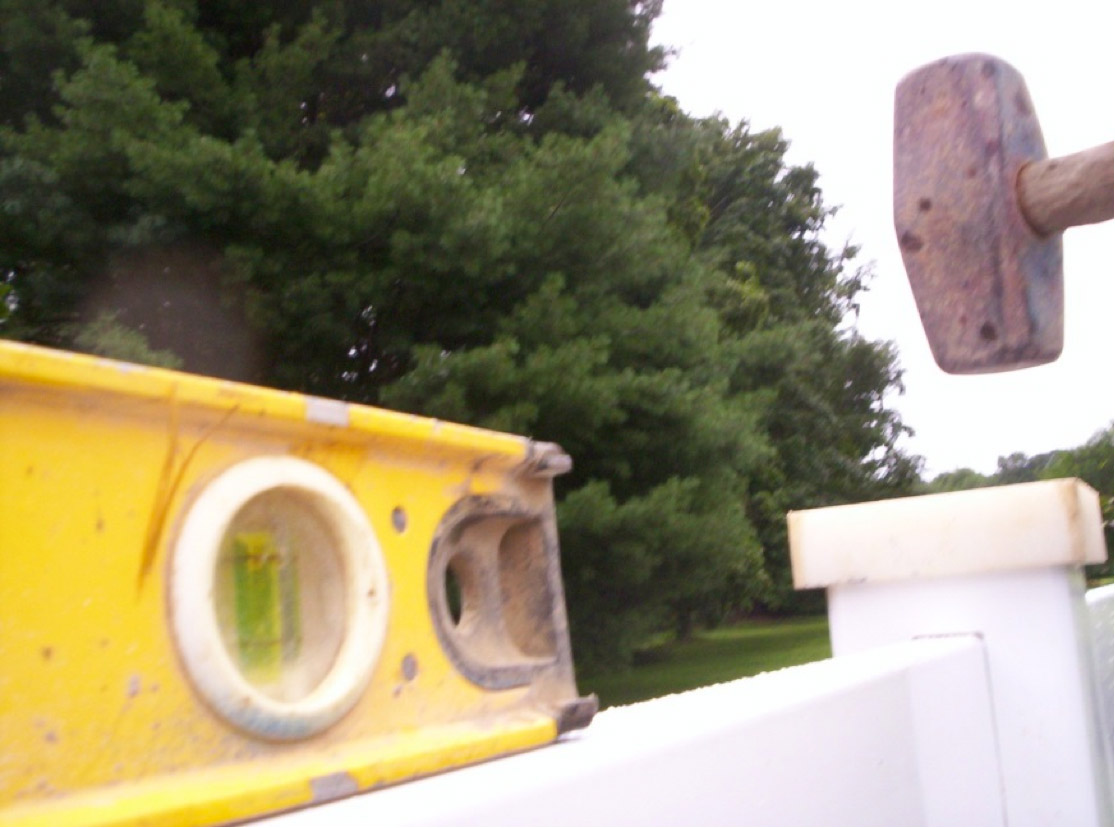
Plumb each post by using the digging bar when necessary and maintain approximately 1/16" of space from the string line. Move to the next section, trying to allow the concrete to set up a little, which will depend on weather conditions. If a slight adjustment to the height must be made, you can tap down the fence post. It is preferable to set the post too high and have to push it down than to set it too low and have to pull it up. Of course, placing the fence post and not having to touch it at all is best. When the fence post is at the desired height, you can pour more concrete to cover the triangle cutout. Concrete should be left about 8" � 10" inches below grade to allow grass to root and, in colder climates, to prevent heaving.
Tip: Remember that the ground freezes from the grade down. Leaving the top of the footing below grade will keep the soil from pushing up on the concrete as it freezes and expands.
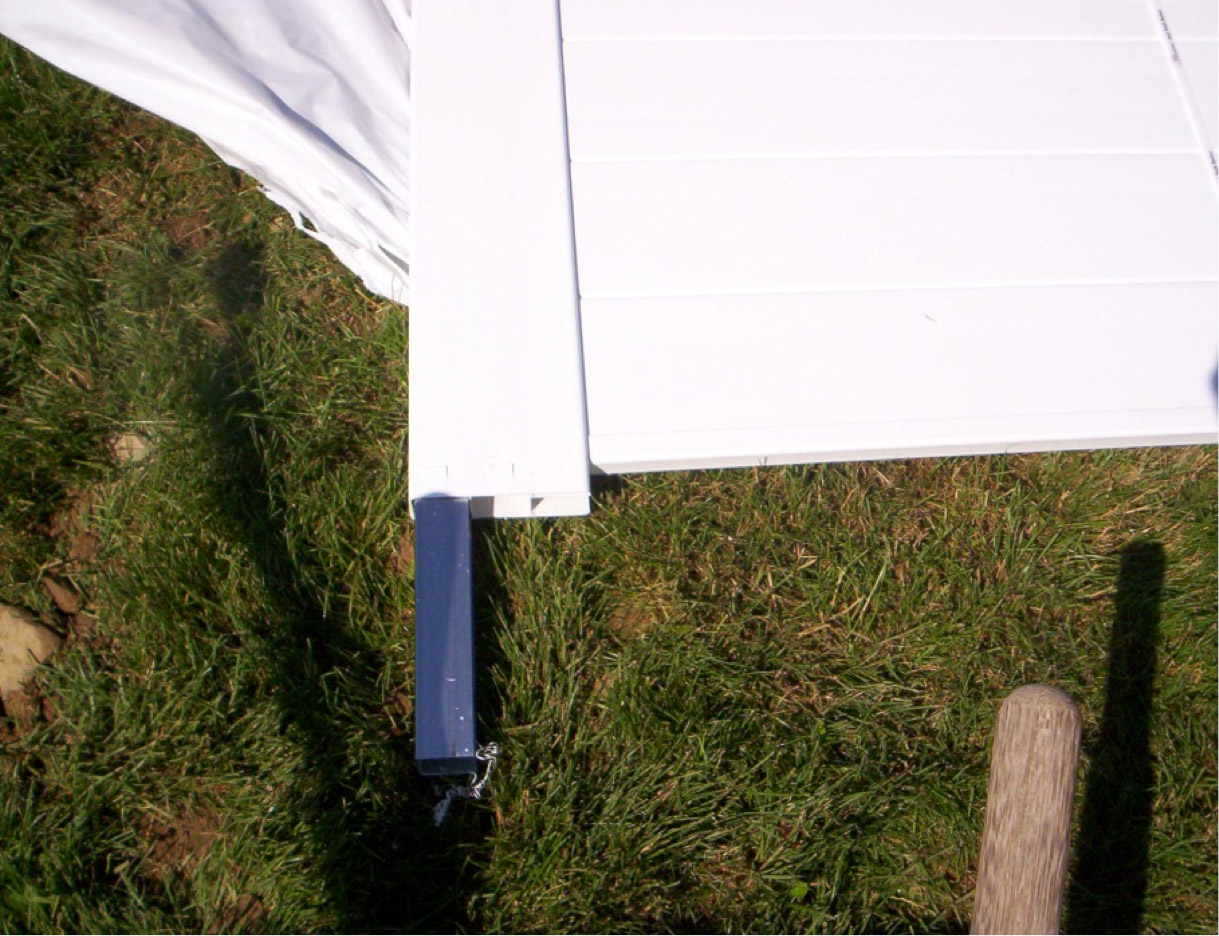
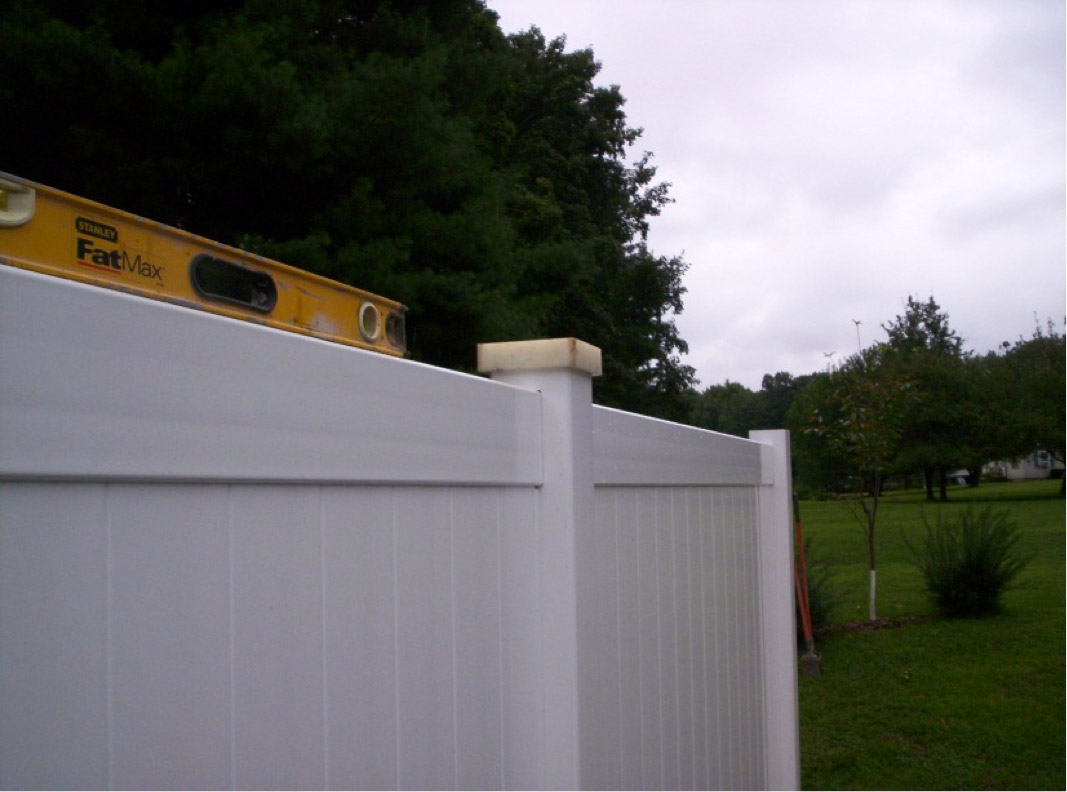
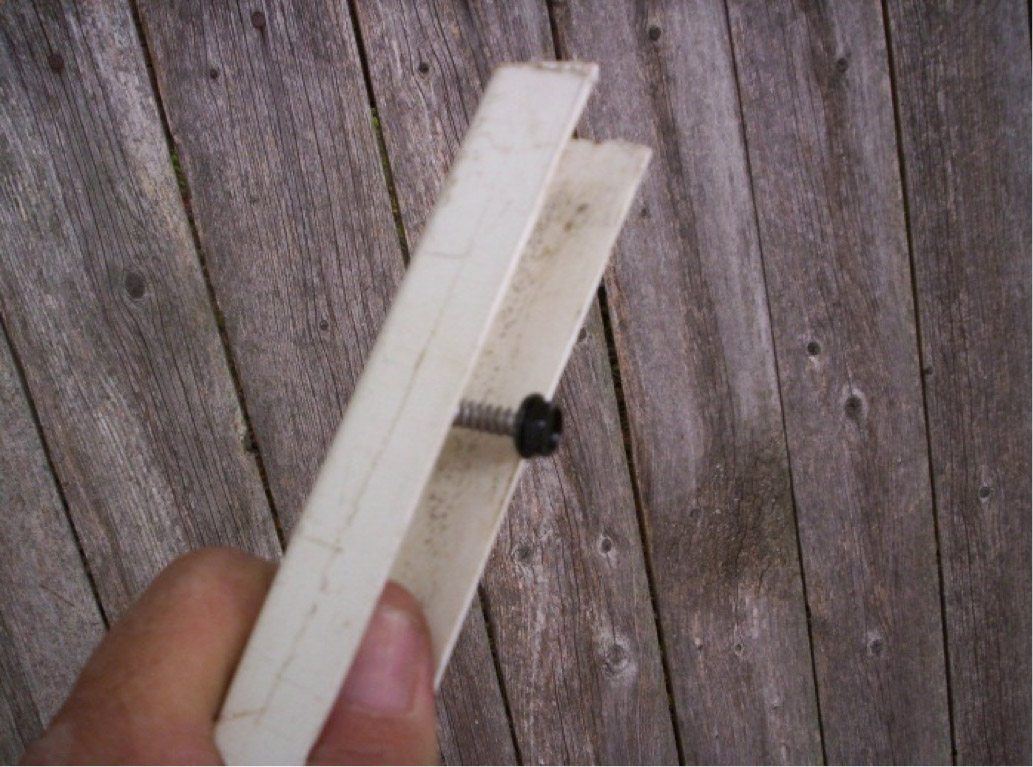
Repeat the process until the panel installation is complete. On the last panels of a straight run, position a piece of scrap PVC inside the post perpendicular to the top rail and secure it in place with a screw. Because the fence posts are hollow PVC, some sway may occur in windy conditions. This is normal and securing the rail ends as described is a precaution. Caps fit snugly on fence posts, and some installers only use glue in areas of high foot traffic (where passersby are tempted to use them as Frisbees). Whenever you glue the post caps caps, you should try to select one corner of the cap to dab with the glue and then use that same corner on every post you cap. This practice will facilitate access to the rail ends should the panel ever need to be removed.


A hand wash with car wash soap twice a year is suggested to keep the vinyl fence free of environmental dirt and grime, which can lead to mildew and premature degradation of the PVC.


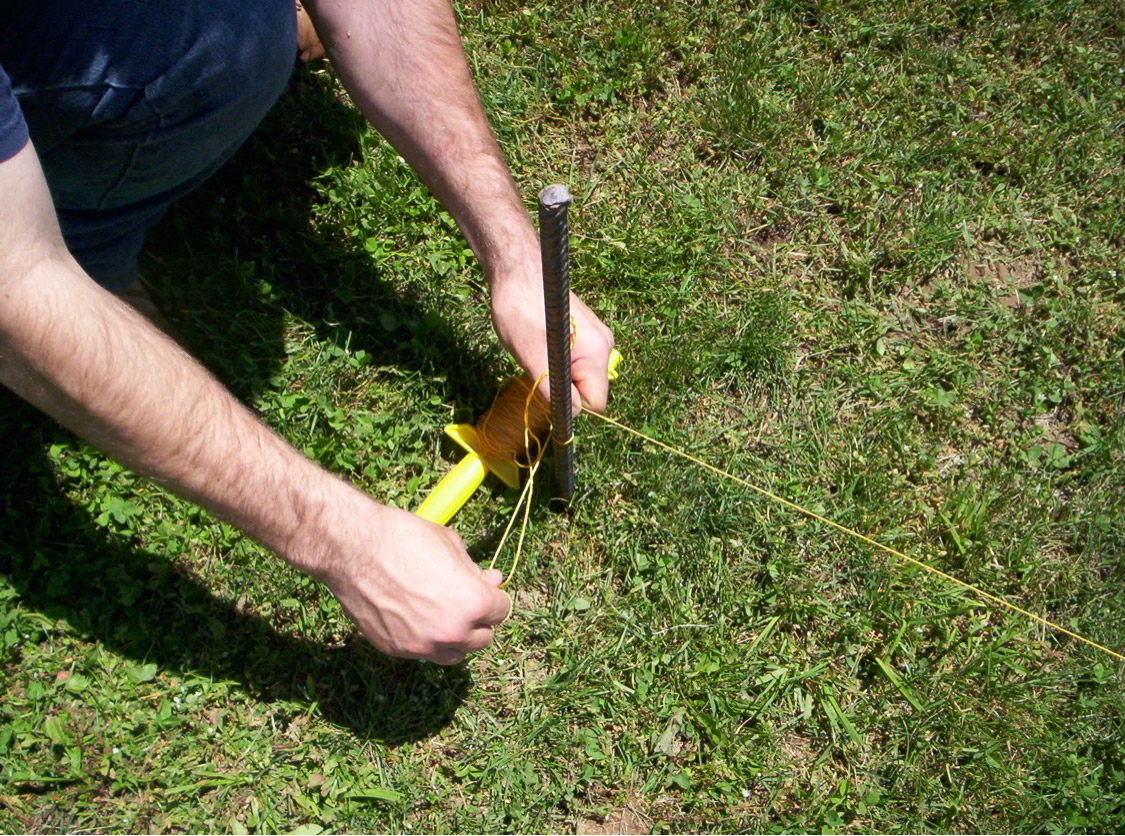
The very simple knot
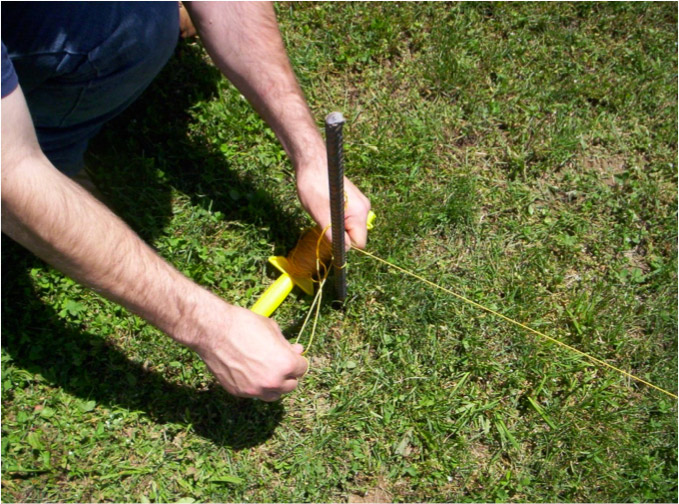
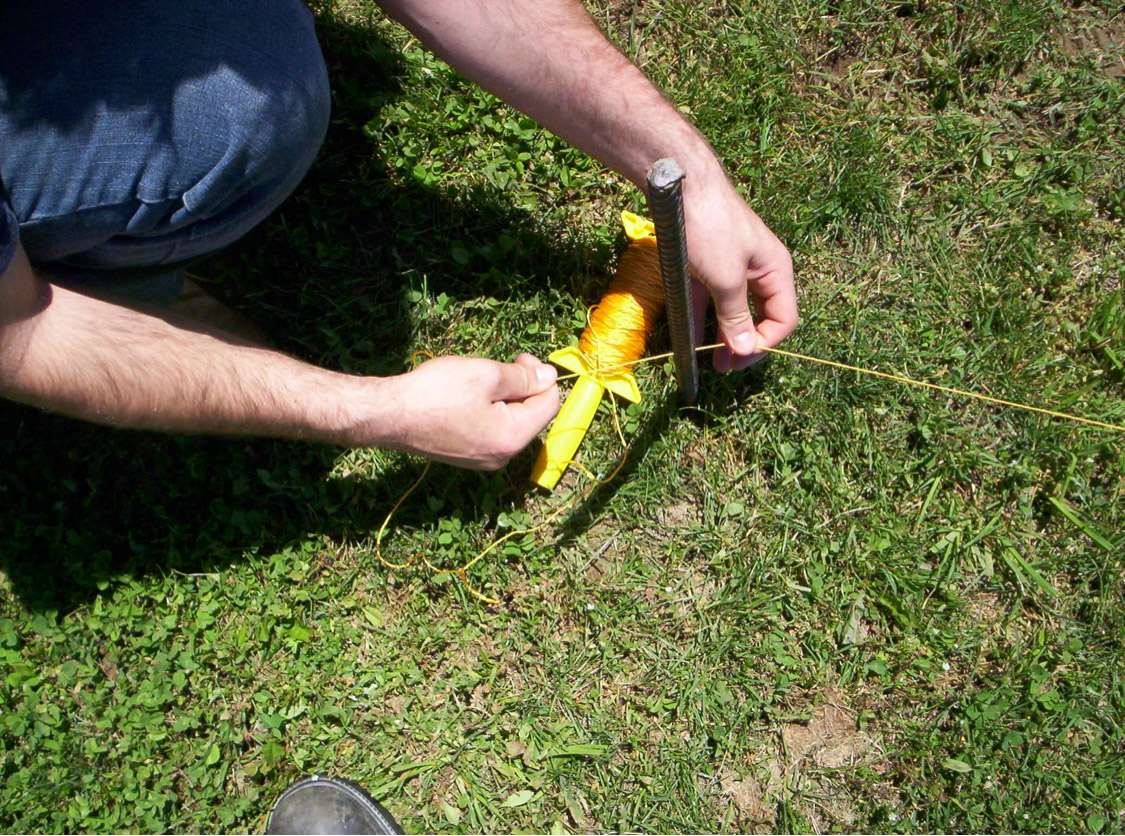
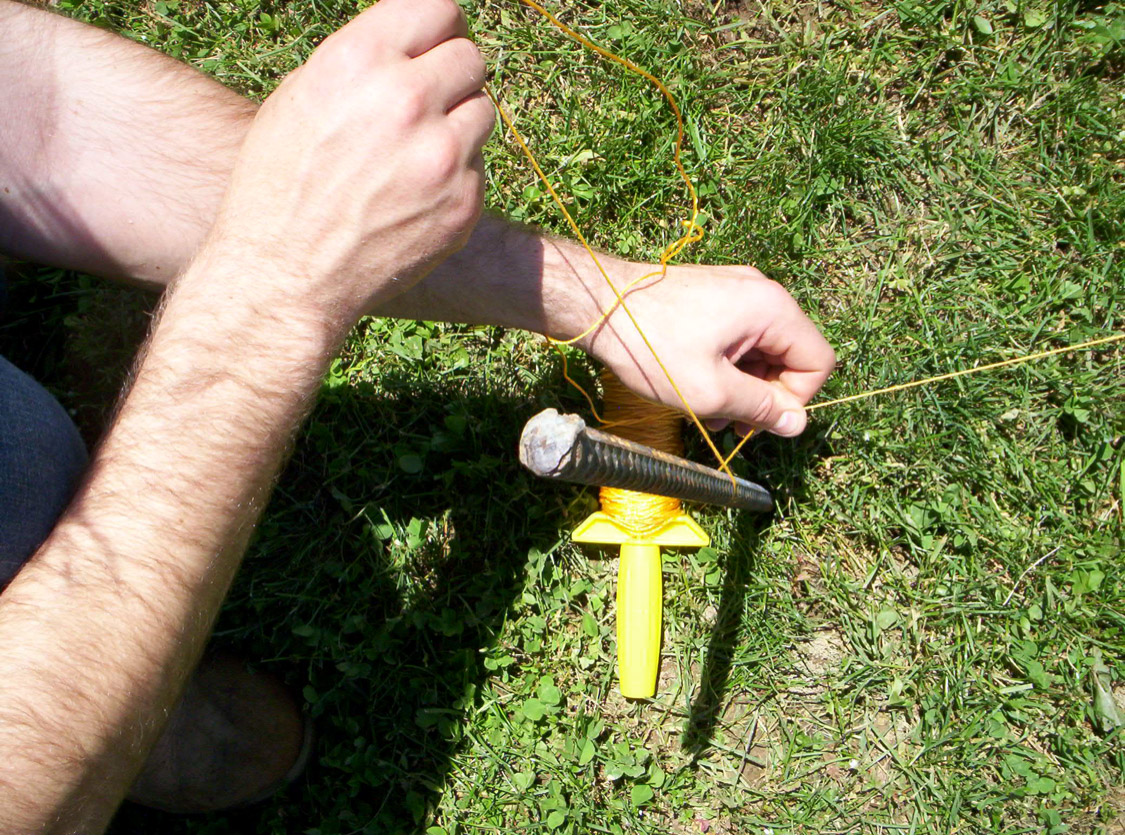
To tie a string (masonry line) as tight as a piano wire it is important to use sections of concrete reinforcement rod (rebar) because of the texture. Rebar can be purchased at a fairly reasonable price from a local masonry supply or lumber yard and cut into 18" � 24" lengths. Some steel suppliers have short pieces they�ll let go cheaply. The rebar should be driven into the ground sufficiently to be able to withstand the tension of the string.


You can tie one end of the masonry line to the first stake, but it is best to use the same knot at both ends. This will make it easier to tighten without having to walk the length of the string to do it. Keep the string taut as you walk to the second rebar stake and make one turn around the rebar with it as shown below.
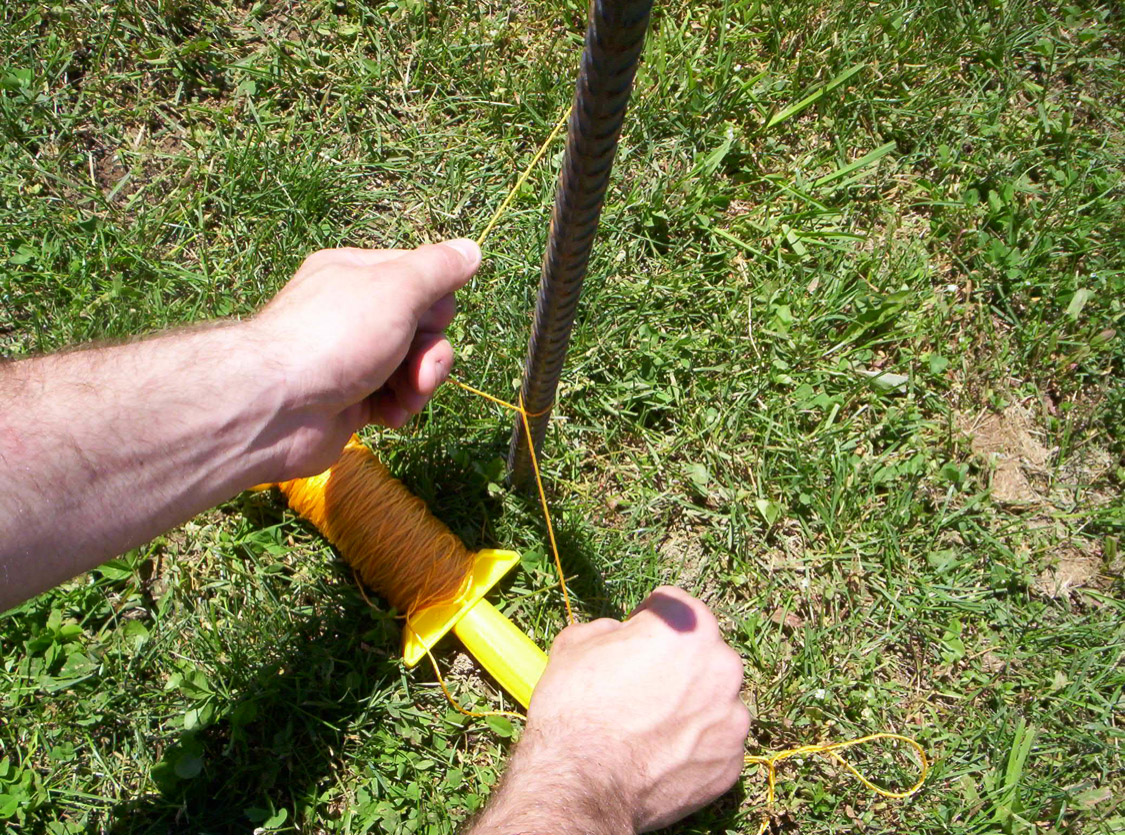
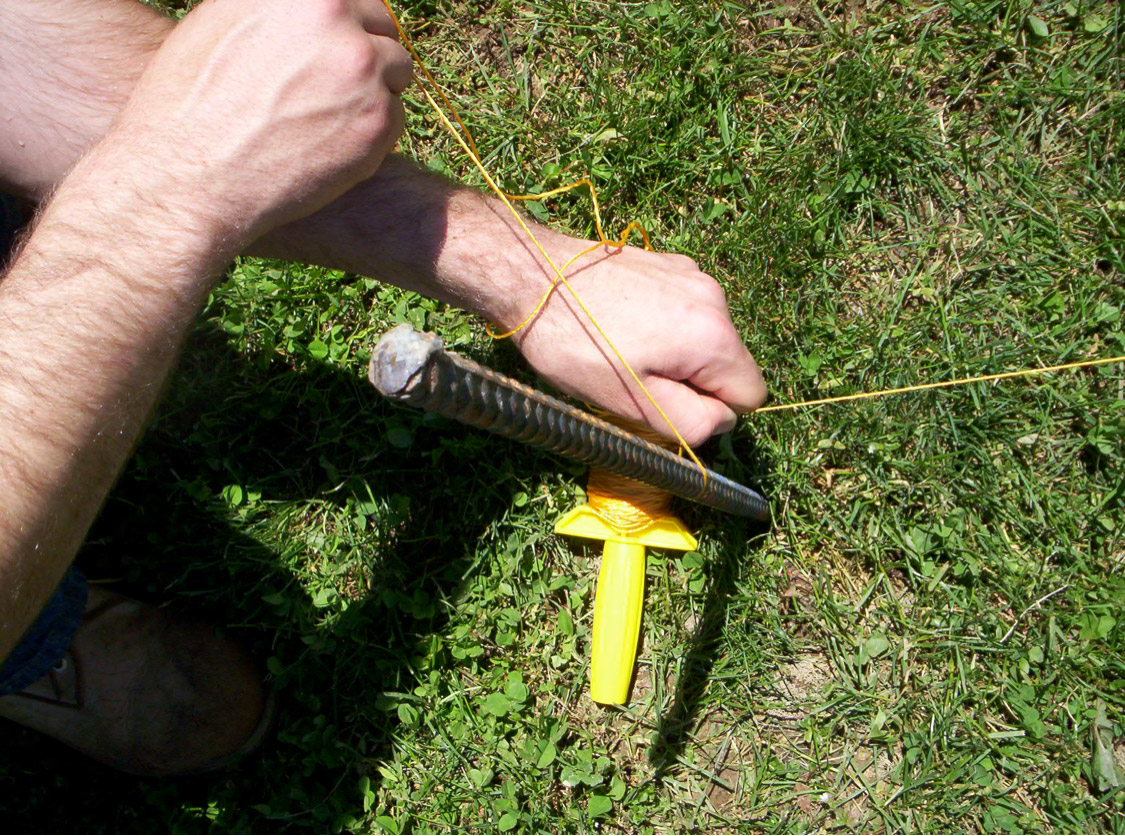
In the photo above, the installer�s left hand is holding the string tight as he uses his right to remove slack. Next, in the photos below, the installer brings the loose end of the string all the way around the rebar as tension is kept on the section between stakes. Once the string is around the rebar, the installer uses his left hand to hold the string away from the stake as the string is pulled as tight as possible, taking the slack away from stake pin with his right hand.


When the desired tension is achieved, the taut end of the string (in the installer�s left hand in the photo above) is crossed over the loose end of the string line (in the installer�s right hand in the photo above) and released. This forms an X, which sandwiches the loose part of the line between the taut part and the rebar, binding it in place. The rebar should be capped with safety caps to prevent injury.
DISCLAIMER OF LIABILITY
profencesupply makes no specific recommendations as to proper installation. The techniques described herein are those used by our installation technicians and may not be appropriate for all locations and ground conditions. profencesupply assumes no liability regarding the improper installation, misuse, or misapplication of any fence product purchased from us. It is the buyer's and/or installer�s responsibility to check for proper installation.


Gerry Rogan
Gerry Rogan is a retired N.Y.C. fire lieutenant, a member of the American Fence Association, and a 2005 graduate of the AFA Field Training School. Gerry has been involved in fence installation since 1985. He has studied Risk Management at the John Jay College of Criminal Justice and Labor Relations at the Cornell University School of Industrial and Labor Relations and has been certified in Building Construction by the National Fire Academy and in FEMA, Educational Methodology, Fire Behavior and Arson Awareness, Fire Cause and Origin Determination, Haz Mat First Responder Operations, Fire Instructor Level 1, and Fire Officer Level 1 by New York State.
Website: www.profencesupply.com