Planting 101: Understanding the Basics of Growing a Garden
-
font size
decrease font size
 increase font size
Only you and those around you know what color your thumb is. For those of you without a green thumb, plants have a few environmental needs to grow and stay alive: temperature, water, soil, and sunlight. When Mother Nature doesn't provide these, you need to. That all seems rather easy, right? Whether you are planting a new garden or adding to an existing one, a little knowledge, planning, and preparation will go a long way toward earning your green thumb and determining the future success of your garden.

�
Understanding Environmental Conditions
Planting a garden begins with a general understanding of your location's environmental conditions. The United States has ten planting zones, according to the USDA Plant Hardiness Zone Map, which defines zones based on the average annual minimum temperature. Determining your zone allows you to select the most appropriate plants for your location and will give your garden the optimal opportunity to thrive. The USDA PLANTS Database is an excellent resource for information, complete with facts, images, and guidelines. You should also consult with your local greenhouse for help in determining what plants are best for your area. Common types of plants you will choose from include trees, shrubs, flowers, herbs, grasses, vines, ferns, and mosses.
Planning
Necessary Tools
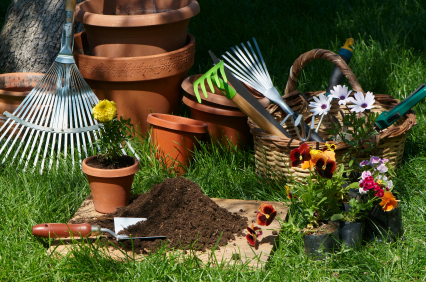
- Round shovel
- Hand shovel
- Hand cultivator
- Spade
- Mattock pick
- Grading rake
- Leaf rake
- Hoe
- Turning fork
- Axe (if applicable)
- Sledgehammer (if applicable)
- Digging bar (if applicable)
- Wheelbarrow (if applicable)
- Tiller (if applicable)
Before making any purchases, you should take a moment to plan your garden. During the planning phase you will define vital information that will help you determine which plants to purchase. Ask yourself the following three questions:
-
How much time you are willing to spend on the garden?
-
What is your budget?
-
What do you want your garden to look like?
After answering these questions you will be better prepared to select the appropriate plants for your situation. For instance, if you don't want to spend much time gardening, ornamental grasses would be a better option for you than, say, roses. Maybe you would like to create the look and feel of an English garden but don't have the budget to do so. You may want to choose a different direction or decide to work within your budget and, over the coming years, to allow your English garden to evolve. Keep in mind that gardens are ever changing as plants grow and die and your preferences change. With that in mind, it is a good idea to plant larger plants, such as trees and shrubs first, and then plant annuals, biennials, perennials, and groundcover.
Once you have determined the direction in which you want to take your garden, create a map of your property, define the planting areas, and gain an understanding of how sunlight interacts with these areas. Depending on how your home is oriented to the sun and the location of neighboring homes and trees, portions of your property will receive different amounts of sunlight. There will be areas on your property that receive full sun (6 or more hours a day), full shade (6 or more hours a day), partial sun (3 - 6 hours a day), and partial shade (3 - 6 hours a day).
Having an understanding of how sunlight interacts with your garden is essential before purchasing plants. Plant suppliers define sunlight requirements on the tag or label. Be sure you purchase and plant according to these requirements.
Soil Preparation
Preparation of the soil prior to planting is also essential for a successful garden. Depending on where you live, you may have one of three different types of soil:
- Sand: Large, light brown particles. Sand soils don't hold moisture or nutrients well.
- Silt: Smooth and black, silt soils are ideal because they are full of nutrients and offer good water drainage.
- Clay: Made up of small, dark brown particle, clay soil holds nutrients well but drains poorly.
If you have silt soil, you can relax and feel confident that your garden will grow. If you have sand or clay soil, you will need to spend some time improving it prior to planting. This can be accomplished with a tiller by mixing the existing soil with compost. Mixing the two will improve water drainage and increase nutrients. Depending on the type of garden bed you want to have (raised, berm, or border), you will be amending or adding topsoil.
How to Plant a Garden
Your garden is ready to be planted! Depending on in what zone you live, the best time to plant is in the spring, after the soil has warmed up, or during the early part of autumn, well before freezing temperatures. It is also possible to plant during the summer months; however, you want to be sure that the outdoor temperature is not extremely hot. Assuming you have purchased plants in containers from your local greenhouse, planting is a fairly easy process.
-
Start by digging a hole in the soil. The hole needs to be wider than the radius of the container with the depth the same as the height of the container.
-
Gently remove the plant from its container and loosen the root ball by using a hand cultivator.
-
Place the plant in the hole and fill the hole with amended soil or compost. Soil should be built up around the base of the plant. Using your hands, create a trough around the base of the plant.
-
Apply water to the trough, allowing it to soak in. Repeat several times. Keep in mind that larger plants, such as trees or shrubs, need more water.
-
Apply 2" to 4" of mulch around the base of the plant.
Your newly planted garden will require regular watering during the first few weeks. If you have planted during the hot summer months, you may want to water your garden daily. Most plants require 1" to 2" of water on a weekly basis; watch your local weather station's report on how much rainfall has occurred or purchase a rain gauge to determine how much rain has fallen. Should you experience a drought, be mindful that the plants in your garden need to be watered. Using a hose, sprinkler, or irrigation system, it is best to water your garden during the early morning hours, allowing plants to get a deep soaking prior to the heat of the day, when water will evaporate.

Jeff Calcamuggio
Jeff is an Editor-at-Large for Buildipedia.com who writes and edits Featured At Home and Knowledgebase content. Prior to joining Buildipedia, Jeff's work experience included carpentry, construction documentation, specification writing, construction administration, project management, and real estate property inspection. Jeff is a member of the Construction Specifications Institute (CSI) and an educator at Columbus State Community College and enjoys challenging DIY home improvement projects.
�